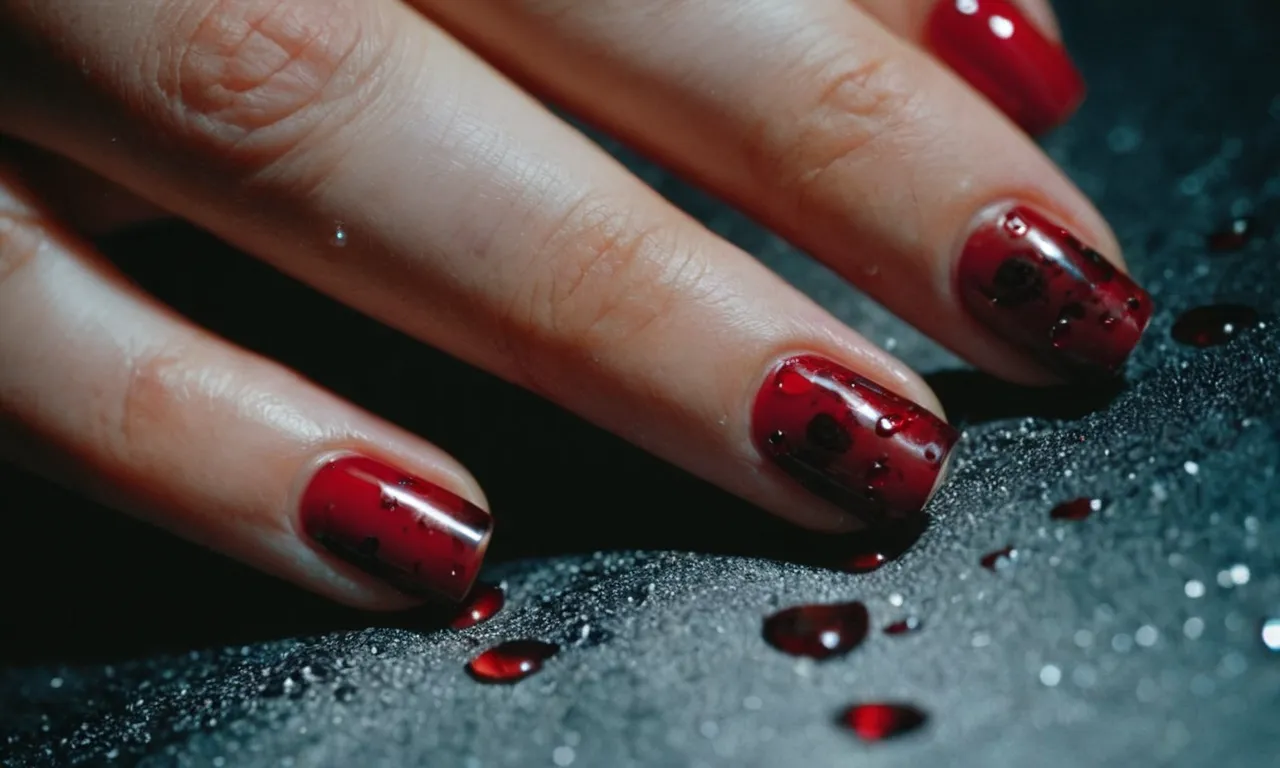
What To Do When You Break An Acrylic Nail And It Bleeds
Oh no! You were just trying to open a can of soda when your acrylic nail broke and now your real nail is bleeding underneath. Acrylic nails can be tricky when they break or crack. Thankfully, there are some quick solutions to stop the bleeding and repair your nail until you can see your nail technician.
If you’re short on time, here’s a quick answer to your question: Gently clean the area with soap and water, apply pressure with a tissue to stop bleeding, apply antibiotic ointment, cover with a bandaid, and avoid using the finger until you can get to the salon.
Read on below for more details on how to properly care for a broken and bleeding acrylic nail.
Stop the Bleeding
Clean the Area
When an acrylic nail breaks, it can tear the natural nail bed, causing pain and bleeding. The first step is to thoroughly clean the injured area to prevent infection. Run the finger under warm soapy water and gently wash away any dirt or debris. Pat dry with a clean towel.
Using a cotton ball, apply some rubbing alcohol or hydrogen peroxide to disinfect the nail bed. This may sting briefly as it cleanses the wound. Be sure to remove any jagged edges from the broken acrylic nail so they don’t catch and worsen the injury.
Apply Pressure
After cleaning, apply steady pressure on the nail bed for 5-10 minutes to stop minor bleeding. This gives damaged blood vessels time to close up. Wrap the finger tip tightly in a bandage or piece of clean gauze, applying enough pressure to stem blood flow.
Elevating the hand above heart level also aids in slowing bleeding. Ice wrapped in a thin towel may provide additional soothing and promote clotting. Take 400-800mg of ibuprofen for swelling and throbbing. See a doctor promptly if bleeding persists longer than 10-15 minutes despite pressure.
Use a Styptic Pencil or Gel
Special styptic pencils or gels containing astringents can quickly constrict blood vessels to halt bleeding from small cuts. After cleaning the nail bed, simply wet the tip of a styptic and dab it onto the wounded area. It may lightly burn initially but works within seconds.
Popular brands like Sally Hansen Instant Cuticle Remover contain antihemorrhagic ingredients that promote rapid clotting. Chemical cauterants like aluminum chloride or ferric subsulfate tell vessels to close off. Vitamin K-based ointments like Liquid Bandage also seal up lacerations.
If bleeding continues despite a few styptic applications, seek medical assistance to prevent complications like infection or abnormal nail growth.
Stopping a stubborn bleed from a cracked acrylic requires acting swiftly using the right techniques. Thorough cleaning prevents germs from entering while direct pressure restricts ongoing blood loss. Clot-promoting agents like styptic pencils or vitamin gels supply additional reinforcement.
Pay attention to symptoms worsening or showing infection like increasing redness, warmth, foul odor or pus to know when professional care is warranted. With appropriate home treatment, most broken nail beds heal within a week or so.
Getting the area to fully close up is key to avoiding long-term deformity or discoloration.
According to the American Academy of Dermatology, up to 50% of people receiving acrylic or gel manicures experience some type of nail injury from cracks, lifts and fractures (https://www.aad.org/public/diseases/a-z/acrylic-nails-risks).
Follow their expert polish removal and nail care advice to minimize damage. But even with proper technique, breaks can happen. Knowing how to stop bleeding quickly reduces discomfort until the nail can fully mend.
Protect the Nail
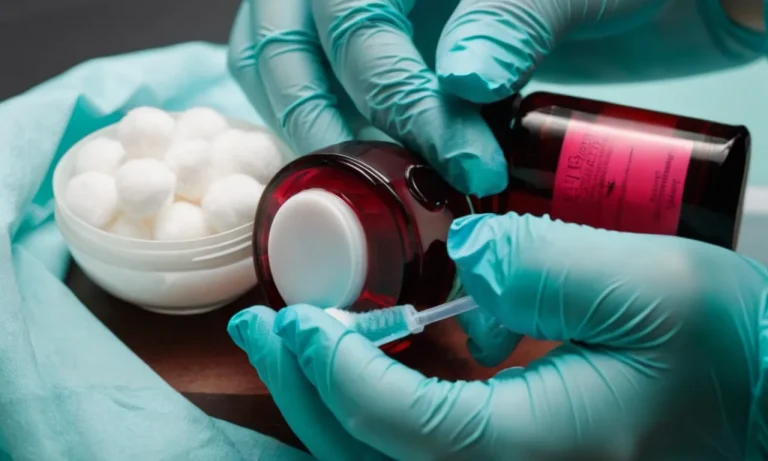
Apply Antibiotic Ointment
When an acrylic nail breaks, the underlying natural nail can become damaged or scratched, leaving it vulnerable to infection. Applying an antibiotic ointment is crucial for protecting the exposed nail bed and preventing bacteria from entering through any cracks or wounds.
Some top antibiotic ointments to use are:
- Neosporin – Contains neomycin, bacitracin, and polymyxin B to fight off infection-causing bacteria.
- Bacitracin – Prevents growth of bacteria and reduces risk of infection.
- Polysporin – Has polymyxin B along with bacitracin to ward off germs.
After cleaning the nail, apply a thin layer of the ointment directly onto the nail and surrounding skin using a cotton swab or clean fingers. Reapply 2-3 times a day and after hand washing to keep the area protected.
Using an antibiotic ointment is vital for avoiding painful inflammation or nasty infections when an acrylic nail breaks.
Cover with a Bandage
Bandaging the broken acrylic nail is equally important for shielding it from further damage. Choose an adhesive bandage or finger cot that fits snugly over the tip of the finger without rubbing on the tender nail.
Before bandaging, make sure the nail and skin are completely dry so the bandage sticks. Apply the bandage carefully and ensure it fully covers and protects the exposed nail. Waterproof bandages work great for keeping moisture away from the nail during hand washing.
Keep the bandage on for several days, changing it whenever it gets dirty or wet. This protects the fragile nail while it heals and prevents snagging on clothes or catching on things, which could worsen the break or cause pain.
Properly bandaging the nail also keeps ointment in place and reduces risk of infection.
Some helpful bandaging tips include:
- Pad around the nail with gauze for extra cushioning.
- Use medical tape to secure the bandage if needed.
- Opt for a finger splint if the break is severe.
Bandaging an injured acrylic nail is crucial for pain management and optimal healing. Keep it covered until the nail has fully reattached for best results.
Avoid Further Damage
Limit Use of the Finger
When you break an acrylic nail, it’s important to limit use of that finger as much as possible. Any additional stress on the nail can cause further cracking or damage. Here are some tips:
- Avoid using that finger for tasks like typing, writing, or picking things up. Try to rely more on your other fingers.
- When holding objects, position them so that finger doesn’t need to grip or apply pressure.
- Consider taping the broken nail to an adjacent finger to limit accidental bumps or snags.
- Wear a bandaid or fingertip cover on that nail if needed for extra protection.
Limiting use of the finger as much as possible in the first 24-48 hours can really help prevent additional breaking or trauma to the nail bed. Be patient with tasks that require fine motor skills during this time.
Avoid Water Exposure
It’s important to keep the broken acrylic nail dry while it’s in a fragile state. Water exposure can weaken the nail further and introduce bacteria, leading to potential infection or more damage. Here are some precautions to take:
- Wear waterproof gloves when washing hands or doing household chores.
- Avoid swimming or long baths. Keep showers brief.
- Wrap the finger in plastic wrap or a waterproof bandage when showering.
- Avoid washing dishes by hand if possible.
Try to keep the nail dry for at least 24-48 hours if possible. This gives the nail time to begin healing before introducing moisture. Be careful when washing or moisturizing your hands during this time.
Do Not Cut off the Nail
It can be tempting to clip off a cracked or broken acrylic nail, but this causes more harm than good. Cutting the nail leaves you open to infection and can damage the nail bed. Unless the nail is fully detached already, leave it in place.
Here are some reasons to avoid cutting the nail:
- Creates sharp edges that can catch and tear.
- Removes the nail’s protection from bacteria.
- Can pull off layers of the natural nail.
- Disturbs nail bed and causes bleeding.
- Introduces pathways for germs to enter.
Instead, file down any sharp edges gently with an emery board. Apply an antiseptic and cover with a bandage until you can see a nail technician. Letting a professional remove the remainder of the acrylic nail reduces chances of hurting the natural nail underneath.
Schedule a Salon Appointment
When you break an acrylic nail and it starts to bleed, it’s important to schedule a salon appointment right away to have it professionally repaired. Here are some tips on what to do when booking your repair appointment:
Call Right Away
Don’t wait to call your salon – contact them as soon as possible after your nail breaks. Many popular nail salons book up quickly, so you’ll want to call to check availability and get on the schedule. Tell the receptionist you broke a nail and need a repair appointment.
Most salons can fit you in within a day or two.
Bring Any Broken Pieces
When an acrylic nail breaks, often a piece of the acrylic will break off. Make sure to bring this piece with you to your appointment. Your nail technician can use it to match the shape and color when repairing the nail.
Having the broken piece makes it much easier for the technician to do a seamless repair.
Be Prepared to Pay for a New Set
In most cases, when you break one acrylic nail, the nail salon will recommend replacing the entire set. This is because the broken nail will look obviously repaired compared to the rest, so for aesthetic reasons your technician will suggest a full new set.
Expect to pay the price of a full fill or set when you come in for a broken nail repair. Most salons have a policy of charging for a full set when one or more nails break.
Dealing with a painful broken acrylic nail that’s bleeding is annoying. But taking the right steps to book a salon repair appointment quickly can get your nails looking beautiful again. Call right away, bring the broken piece, and expect to pay for a full new set.
With an expert technician’s help, your nails will be fixed up in no time!
Prevent Future Breakage
Watch Nail Length
Keeping your acrylic nails at a reasonable length is key to avoiding breaks. Anything longer than 1⁄4 inch beyond your natural nail tip starts putting excessive stress on the enhancement that can lead to cracks and fractures.
Aim to keep your set trimmed to less than 1⁄2 inch total length for maximum strength and durability. If you want long nails, building the length with forms and acrylic product rather than leaving your natural nails to grow out can help minimize the risk of breaks.
Use Gel Overlays
A thin layer of gel overlay applied on top of enhancements adds flexibility and strength. Gel soaks into the layers of acrylic and fiberglass underneath, reinforcing the entire structure. This helps acrylic nails bend instead of snapping when subjected to trauma.
Simply use a gel base coat followed by a gel top coat to create a protective shield that resists chipping and cracking. Reapply every two weeks along with your fill to maintain the benefits. Gel overlays are so effective at preventing breaks that many nail techs now use them as standard procedure on every acrylic set.
Moisturize Cuticles
Preventing your cuticles from becoming dry and cracked also keeps your enhancements protected. When you push back and trim cuticles aggressively, it can create tiny tears and openings for bacteria near the nail bed.
Not only can this lead to infection, but it compromises the seal between your natural nail and the acrylic overlay. Keeping cuticles hydrated with oil or cream ensures the skin stays flexible and intact. Gently push them back only as needed before fills.
Never cut or nip living tissue, as this causes more harm than good. Proper cuticle care promotes healthy nail growth and stops cracks from forming in vulnerable areas.
Conclusion
Broken and bleeding acrylic nails can certainly be an annoying and painful experience. Stopping the bleeding quickly and protecting the exposed nail bed is key to avoiding infection. Within a day or two, you should be able to see your nail technician for a repair or new set.
In the meantime, be gentle with the nail and avoid aggravating the area further. With proper care following these tips, your nail will be back to beautiful acrylics once again.