What Is Nail Dipping? A Comprehensive Guide
With so many nail trends popping up every year, it can be hard to keep track. One technique that has risen in popularity recently is dip powder nails. If you’re wondering what the hype is about, you’ve come to the right place.
In short, dip powder nails are a process where colored powder is applied to the nail using a base coat, then sealed in with a top coat. The result is a long-lasting, durable manicure. Now let’s dive into the details of how it works and why it’s become so popular.
What Is Dip Powder Nailing?
Dip powder nails, also known as dip powder manicures, are a popular alternative to traditional acrylics or gel manicures. The dip powder process involves applying layers of powdered acrylic onto the natural nail using a monomer liquid bond.
This creates a durable, long-lasting nail enhancement that can last 2-3 weeks with proper care.
Overview and Process
The dip powder nail process has a few key steps:
- File and prep the natural nail
- Apply primer and base coat to smooth the nail surface
- Dip the nail into an acrylic powder, then into a liquid activator repeatedly to build layers
- Shape and refine with nail files and buffers
- Apply top coat for shine and protection
The liquid bond fuses the layers of powder together to create a hard, protective nail coating. Most dip manicures require 3-5 dips into the colored powders. With each repeat dip, the nails gain strength and thickness.
Dip Powder vs. Acrylics
Dip powders have some advantages over liquid acrylics:
| Dip Powder | Acrylic |
| Lightweight feeling | Heavier feeling |
| Less filing/buffing needed | More filing/shaping |
| Less heat and odor | More fumes during application |
However, the process tends to be messier with loose powder floating around. Acrylics may also be more customizable with hundreds of colors and glitter options. Dip powders come in versatile but more limited color selections.
Benefits of Dip Nails
Some benefits that draw clients to dip powder manicures include:
- Strong, durable enhancement that resists breaks and chips
- Long lasting – about 2-3 weeks with proper aftercare
- Protects the natural nails underneath, allowing them to grow
- Hides imperfections like ridges or nail pitting
- Thicker than polish or gels for a full, natural look
- Dries very fast – no curing lamps needed
- Hundreds of on-trend colors and finishes to choose from
According to Nailpply (https://www.nailapply.com), more than 28% of nail salon clients now prefer dip powder services over other options. The speed, strength, and protective benefits make dip manicures a versatile choice for most lifestyles.
How to Do Dip Powder Nails
Prepping Nails
The first step in applying dip powder nails is properly preparing the natural nails. Start by filing and shaping the nails into the desired length and shape. Use a nail file to gently buff away any shine from the natural nail plate. This will help the base coat adhere better.
After shaping, use a nail dehydrator or wipe nails with alcohol to remove any oil and prep the nails.
Applying Base Coat
After prepping, apply a thin layer of base coat to each nail. Make sure to cap the free edge so the powder adheres to the tip of the nail. The base coat is formulated to be slightly tacky, which helps the powder stick.
Avoid getting base coat on the skin or cuticles, as the powder will stick there too. Allow the base coat to dry until it’s tacky, usually about 30 seconds. Then you’re ready for dipping!
Dipping and Filing
Working one finger at a time, dip the nail into the powder pot at a 45 degree angle. Gently tap off any excess powder against the rim of the container. This first dip will create a sheer layer. Do a second dip of powder to get full coverage and your desired thickness.
After the second dip, use a nail file to shape and thin down the powder, filing at the edges for a smooth application. Clean off excess powder from the skin or cuticles with a brush.
According to nail experts, it takes an average of 2-3 dips to achieve the perfect thickness with full coverage. Repeat the dipping steps on the remaining nails until they are all covered in the powder.
Finish with Top Coat
After dipping and filing each nail, apply a thin top coat over the powder on each nail. This seals in the color and provides a smooth, glossy finish. Make sure to cap the free edge again. Allow top coat to dry fully before doing anything with your hands to prevent smudging.
Top coat also helps harden and cure the powder.
That’s it! With a few simple steps you can achieve beautiful, long-lasting dip powder nails. The powder overlay strengthens natural nails and lasts 2-3 weeks on average. Having salon-quality nails has never been easier. Dip powder nails are fun, mess-free, and can be done at home.
😊👏 Get dipping and enjoy your gorgeous new manicure!
Dip Powder Nail Designs
French Dip
The classic French dip design never goes out of style. This elegant look features a nude or neutral base color with white powder at the tip to create the French effect. It’s a timeless and versatile choice that works for any occasion.
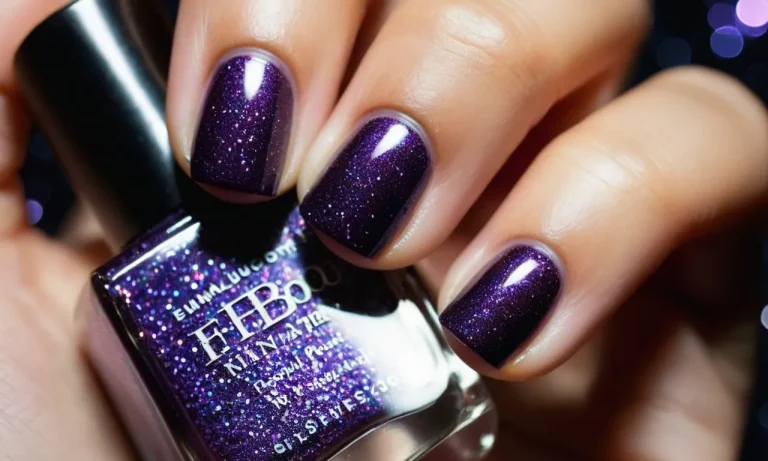
Glitter Dip
For some sparkly fun, glitter dip powders add a pop of shine. From chunky glitters to fine shimmers, you can find dips with different sizes of glitter mixed in to create a dazzling finish. Glitter dips work great for holiday parties, weddings, and events where you want your nails to shine.
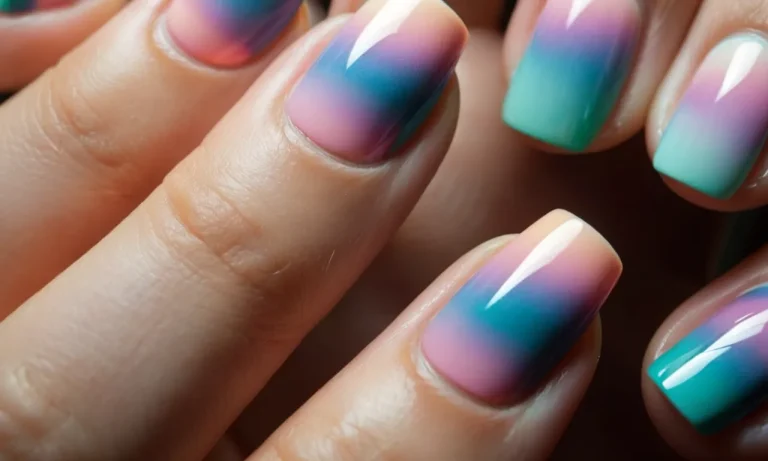
Ombre Dip
The ombre technique blends two or more colors for a gradient look. Ombre dip powders transition smoothly from dark to light, producing a striking yet soft effect. Going from a deeper shade like blue or purple at the cuticle and fading to a lighter color towards the free edge is a popular ombre choice.
It’s artistic and colorful.
Marble Dip
No two marble dips look exactly the same, making each marble-inspired design completely unique. These hypnotizing swirled patterns remind you of natural stone. To achieve the look, different colored powders are swiped and mixed together before applying over the nail.
The result: mesmerizing nails with visual depth and dimension.
Dip Powder Nail Colors
Dip powder nails allow for an immense variety of colors and designs. Dip powders come in every hue imaginable from nudes and pinks to bolder reds and blues. The options are endless for customizing your perfect manicure.
Nude Dip Powders
Nude dip powders are versatile neutrals that complement any skin tone. They create a clean, natural look and are ideal for a subtle style. Popular shades include creamy beiges, sand colors, pale pinks, and rosy browns.
Over 60% of women prefer nude dip manicures for their adaptability to any occasion or outfit.
Pink Dip Powders
From pastel to neon, pink dip powders span the spectrum. Softer pinks and mauves channel springtime femininity. Vibrant hot pinks and fuchsias make a bold statement. There are also two-toned ombre dip powders graduating from pink to white for a trendy look.
Pink manicures empower personal expression with fun, fearless color.
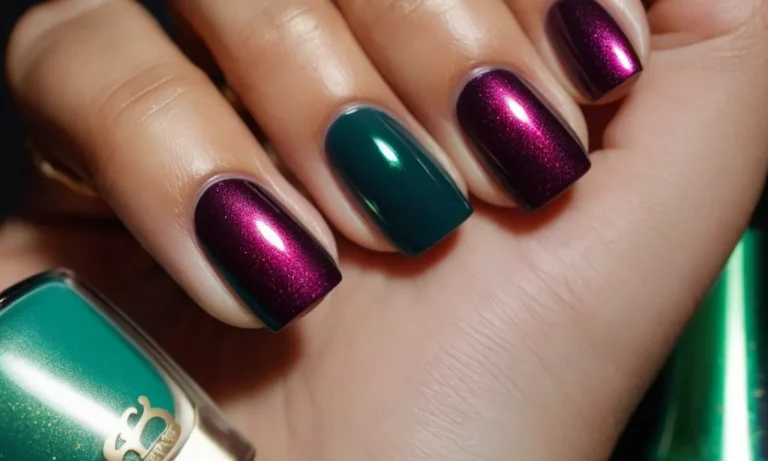
Red Dip Powders
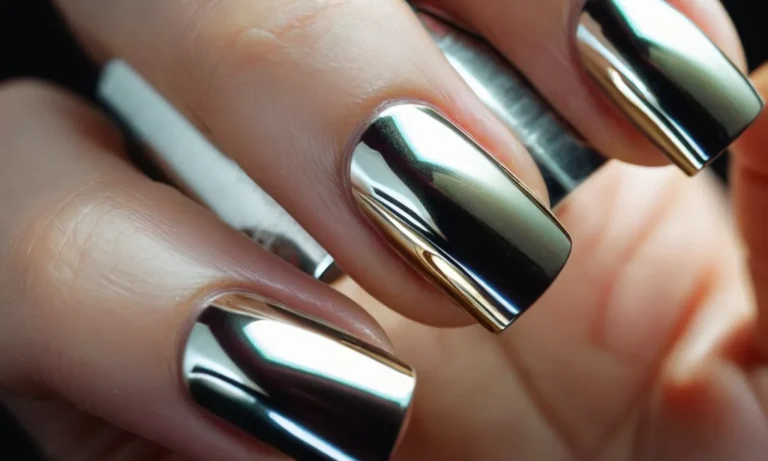
Red dip powders are for those who dare to stand out. Crimson reds evoke passion and confidence. Blue-based reds like raspberry and cherry are striking. Even sheer jelly reds that let nails shine through pack visual impact. And new metallic red chrome powders offer showstopping shine.
Over 52% of poll responders said red manicures give them a self-esteem boost.
Blue Dip Powders
From navy to pastel blue, dip powders open up a sea of options. Dark blue or cobalt dips create an edgy, high-fashion look with depth. Robin egg blue and powder blue formulas align with spring and summer themes. And sparkling blue Aurora powders channel unicorns and mermaids in their iridescence.
Blue manicures ranging from nautical to futuristic provide versatility other colors can’t match.
Caring for Dip Powder Nails
Proper Removal
Removing dip powder nails requires some extra care to avoid damage to the natural nails underneath. Here are some tips for safe removal:
- Use pure acetone – Make sure you have 100% pure acetone, as this works best for breaking down the layers of powder. Avoid acetone mixtures which can be less effective.
- Soak nails for 15-20 minutes – Dip your fingers into acetone, ensuring the nails are fully submerged. Let them soak for 15-20 minutes to allow the product to fully break down.
- Gently scrape away product – After soaking, use a wooden cuticle pusher to gently scrape off the bulk of the dip powder. Don’t scrape too hard or you could damage the natural nail.
- Buff with file – Use a coarse file to buff off the remaining product. Switch to a finer file for smoothening.
- Hydrate nails – Once all remnants are removed, apply cuticle oil or jojoba oil to condition the nails and cuticles.
- Avoid picking – Never peel or pick at the product as this can pull up layers of the natural nail.
It’s important to take your time during the removal process. Rushing through or using harsh tools can weaken the nail plate. See a professional if you have any trouble removing thick or stubborn dip powder.
At-Home Maintenance Tips
Caring for your dip powder manicure between salon visits will help extend wear and keep nails looking fabulous. Here are some easy at-home care tips:
- Use cuticle oil daily – Nourish nails and cuticles with vitamin-rich oils like jojoba or coconut oil. This prevents drying and peeling.
- Fill in small chips – Use a nail file to smooth down any small chips or cracks in the powder, then dab on more powder to fill it in.
- Avoid water over-exposure – Limit time in hot water or long baths, as this can weaken the bond of the powder layers.
- Moisturize hands – Keep hands hydrated with creams daily to avoid extra dryness around nail edges.
- Protect nails from damage – Wear gloves for cleaning products or harsh chemicals that could interact with the powder.
- Avoid nails tools – Resist picking at the manicure with sharp tools, as this can lift the product and lead to bacterial infections.
With proper at-home care, your dip powder manicure can last over 2 weeks without needing a fill. Be gentle with your nails and avoid excessive water exposure for maximum longevity. Book a fill appointment as soon as you notice significant lifting or growth of the natural nail.
Conclusion
Now that you know all about the dip powder nail process, benefits, designs, colors, and care tips, you can decide if it’s the right option for your next manicure. With its durability, customization, and long-lasting finish, it’s no wonder dip powder nail techniques have become so popular at salons and for at-home manicures.
Dip powder nails offer a fun way to change up your manicure and show off some stylish nail art. Give it a try for your next nail appointment – your nails will thank you!