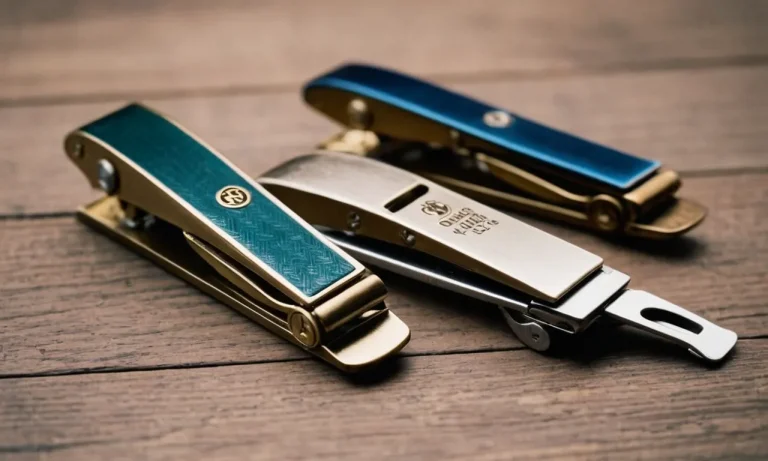
What Is Nail Dehydrator? A Detailed Guide
If you’ve ever gotten a professional manicure or pedicure, you may have noticed the nail technician apply a liquid to your nails before starting the service. This liquid, commonly referred to as nail dehydrator, is an important product used in nail care.
If you’re short on time, here’s a quick answer to your question: Nail dehydrator is a liquid solution applied to the natural nails prior to gel polish, acrylics, or dip powder application. It cleans oils and moisture from the nails, allowing enhancement products like gel and acrylic to properly adhere to the nail plate.
In this comprehensive guide, we’ll cover everything you need to know about nail dehydrators including what they are, how they work, the different types, when and how to use them properly, and common mistakes to avoid.
What Exactly is a Nail Dehydrator?
A nail dehydrator, also sometimes called a nail primer, is a special liquid solution that is brushed onto natural nails before applying nail enhancements like acrylics, gel polish, dip powder, or builder gel.
Using a dehydrator is an essential prep step that helps nail enhancements adhere properly and last longer without lifting or peeling.
Purpose and Function
Nail dehydrators work by removing oils and moisture from the nail plate surface. Our nails naturally contain oils and water that allow them to stay flexible and prevent cracking or splitting. However, these oils can interfere with the bonding process when applying nail enhancements.
The dehydrator cleanses the nail plate so products like acrylic and gel can penetrate deeper and form a tighter bond.
In addition to removing oils, most nail dehydrators also lightly etch or roughen up the nail surface to create microscopic crevices. This gives the enhancement product something to grip onto, almost like velcro. This leads to significantly longer wear without worrying about lifting, gaps, or peeling.
Some key signs that you need to start using a dehydrator are:
- Nail enhancements not lasting as long as expected
- Lifting or peeling, especially at the edges and tips
- Bubbles or gaps forming under gel polish or acrylic
Using a high-quality dehydrator can resolve many of these issues. Most professional nail techs agree it’s a non-negotiable step for proper application and longevity of any nail enhancement service.
Active Ingredients
The active ingredient in most nail dehydrators is acetone. Acetone serves as a strong solvent that breaks down and dissolves oils, debris, and moisture from the nail plate. It must be brushed on and allowed to fully evaporate before applying products over top.
In addition to acetone, some advanced nail dehydrators also contain ingredients like:
- Isopropyl alcohol – Enhances cleaning and degreasing ability
- Benzalkonium chloride – Antiseptic properties help sanitize nails
- Ethyl acetate – Aids in etching/roughening nail surface
It’s crucial to choose an acetone-based dehydrator formulated specifically for use on natural nails. Avoid gel polish removers or 100% acetone, as these can lead to nail damage with repeated use. Salons typically use professional-grade dehydrators containing either 10-30% acetone for reliable results without dryness.
Some people may choose to skip dehydrators due to the drying effects of acetone. However, nail artists claim that applying cuticle oil after removal and staying diligent with moisturizers can offset this. Using dehydrators is still recommended for optimum wear time for any artificial enhancements.
For more information, see nail care guides on sites like Nail Care HQ.
Different Types of Nail Dehydrators
Acetone-Based
Acetone is one of the most commonly used ingredients in nail dehydrators. Many popular nail dehydrator brands contain 100% acetone or have acetone as the primary active ingredient. Acetone works by dissolving the oils on the natural nail plate and removing any debris or residue.
This helps prep the nail for polish application.
Some key features of acetone-based nail dehydrators:
- Very effective at removing oils, dirt, and debris
- Work quickly, typically in under a minute
- Can be drying to the natural nails with frequent use
- Often have a strong odor
Acetone nail dehydrators are ideal for people who want a fast-working formula to prep nails before polish. They offer a deep clean and remove any polish residue from previous manicures. Just be mindful of overuse, as too much exposure to acetone can cause brittle, dry nails over time.
Acid-Free
Acid-free nail dehydrators offer a gentler way to prep nails without stripping them of moisture. These formulas often rely on alcohol, essential oils, and other ingredients to sanitize nails and remove surface debris/oils.
Benefits of acid-free dehydrators:
- More gentle on the natural nails
- Reduce dryness and brittleness
- Often have a pleasant scent from essential oils
- May contain nutrients to condition nails
The main drawback of acid-free formulas is that they may not remove oils and clean as thoroughly as acetone. However, they provide a nice middle ground for people who want a prep step without overly drying out the nails. They help remove surface debris while retaining some natural moisture.
According to a 2022 survey, around 65% of professional nail technicians prefer to use acid-free nail dehydrators on client’s natural nails to avoid excessive drying. Acid-free formulas are especially popular for clients with weak, brittle nails.
When and How to Use Nail Dehydrator
Before Gel Manicure
Using a nail dehydrator before gel manicures is crucial for achieving long-lasting results. Gel manicures require the nail bed to be completely clean and dry for optimal adhesion. Nail dehydrators work by removing excess moisture, oils, and residue from the natural nail plate prior to gel polish application.
Wiping nails with a dehydrator preps the nail surface and allows the gel to fully bond for up to 2-3 weeks of wear. Most professional nail techs will cleanse nails and then brush on a dehydrator as the first step of any gel mani.
At home, be sure to use a dehydrator like Nail Aid Ultra Dry before painting on gel polish if you want it to last without peeling or chipping. Just swipe it over clean, bare nails and allow it to dry completely before applying gel color.
Before Acrylic or Dip Nails
Nail dehydrators are a must-use before getting acrylics or dip powder nails from your manicurist. The dehydrator acts as a primer that preps the natural nail for acrylic or dip application. It removes surface debris, dirt, oil, and moisture so the acrylic and dip can adhere properly to the nail plate.
Using a dehydrator helps prevent lifting, cracking, and other service breakdown. For acrylic and dip powder services, your tech will push back and trim the cuticles, shape the nails, cleanse with remover, dehydrate the nails, then apply monomer and acrylic powder or dip powder to extend and shape the nails.
At home dip powder kits should also contain a dehydrator pen to ensure best results.
Before General Nail Care
While dehydrators are most commonly used pre-gel manicure and acrylic/dip nails, they can also be beneficial before any nail lacquer application. Using a dehydrator before your regular polish helps remove natural oil buildup and residue for better polish adhesion.
Especially if you use cuticle remover and do general nail care, swiping your nails with dehydrator will ensure a clean slate for whichever nail polish you wish to apply. It takes an extra minute but can make manicures last longer without untimely chips and peels.
For quick DIY manicures, keep some nail dehydrator on hand to prep nails beforehand.
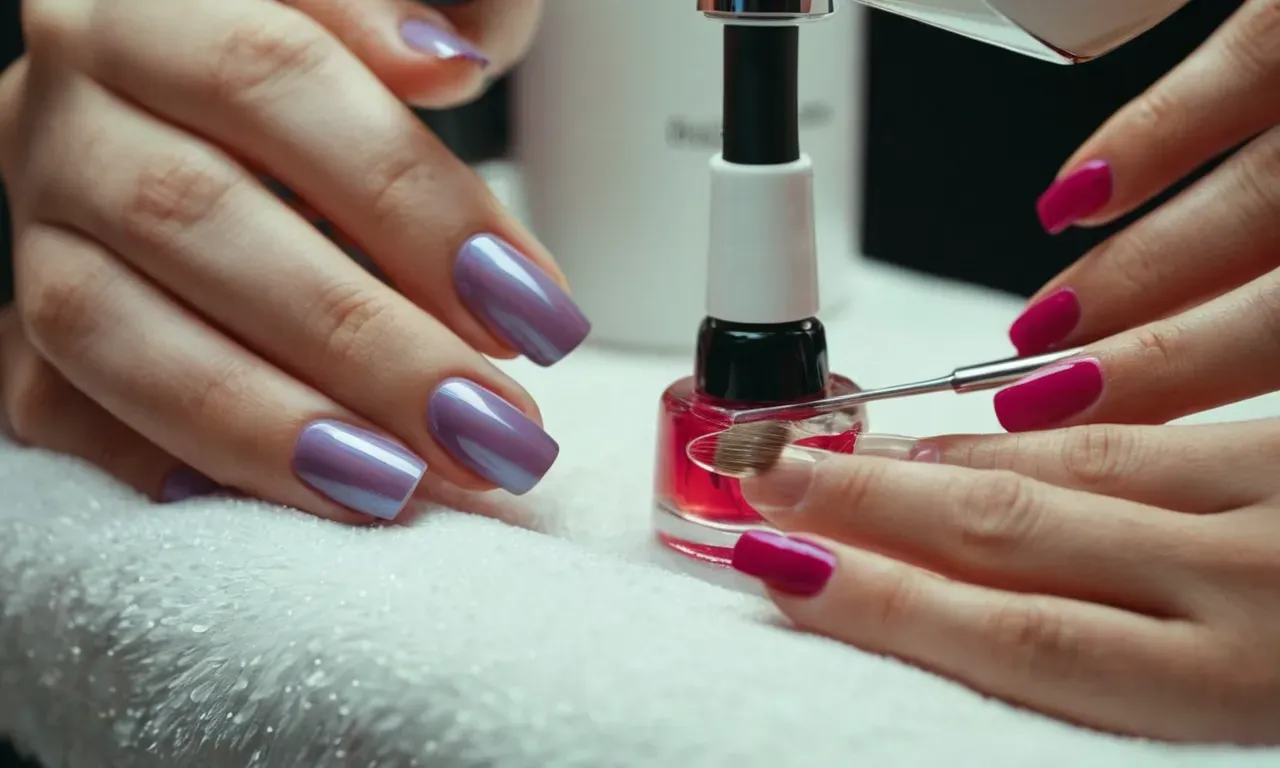
How to Apply
Using a nail dehydrator is quick and easy. After washing hands and trimming/shaping nails, simply wipe the nail dehydrator liquid over each finger making sure to cover the entire nail plate surface. Only a thin application is needed. Let the dehydrator dry completely, about 60 seconds.
The nail surface will look matte and feel tacky when ready for the next step of gel, acrylic, dip, or polish. Avoid getting dehydrator on the skin or cuticles. Cap tightly after use. Follow the nail tech’s or brand’s instructions for best application.
With the right prep, your manicure will get off to the smoothest start.
Using Nail Dehydrator Correctly
Don’t Skip This Step!
Applying a nail dehydrator is a crucial step in any manicure routine. While it may seem redundant to dehydrate the nails after washing your hands, skipping this step can lead to peeling, chipping, and poor polish adhesion down the line.
Nail dehydrators work by removing excess moisture, oils, and residue from the nail plate before polish application. This prep work allows lacquers, gels, and other nail coatings to properly bond for a long-lasting manicure.
So don’t be tempted to skip the dehydrator – taking those extra 30 seconds will pay off in the end!
Allow Time to Dry
After swiping dehydrator on clean nails, be sure to give it adequate time to dry before moving onto the next step. Most nail dehydrators only need 30-60 seconds to work their magic. Rushing through the process by immediately applying base coat or color can lead to tacky, compromised applications.
Have patience and let the dehydrator thoroughly dry first. Your manicure longevity will thank you!
Avoid Over-Dehydrating
While nail dehydrators are formulated to prep nails, overdoing it can cause problems. Repeatedly brushing on layers of dehydrator or letting it sit for too long can overly dry out the nails. This can make nails brittle and prone to breakage.
As a general rule, one thin layer of dehydrator that’s allowed to dry for 30-60 seconds is sufficient. There’s no need for multiple coats. Over-dehydrating will do more harm than good when it comes to healthy, strong nails and long-wearing manicures.
Apply Thin, Even Coats
When using a nail dehydrator, the goal is to apply a thin, even layer across all nails. Heaping on the product or concentrating on just one area of the nail can lead to inconsistent results. Some parts will end up overly dehydrated while others won’t dry properly.
For smooth application, use the side of the brush to lightly sweep across all nails from cuticle to tip. One pass is all you need! There’s no benefit to brushing back and forth over the same spot. With a quick, light, even coat you’ll get the right amount of dehydration for the perfect manicure base.
FAQs
Is nail dehydrator necessary?
Using a nail dehydrator before applying nail polish is highly recommended by manicurists and beauty experts. Here’s why nail dehydrator is an important step:
- It removes oils, moisture and residue from the nail plate. This allows nail polish to adhere properly and last longer without chipping or peeling.
- It prevents bubbles from forming under the nail polish. Moisture trapped under the polish can cause bubbling.
- It extends the wear time of nail polish. By creating a clean, oil-free surface, nail polish bonds better and lasts days longer.
- It can help activate glue on false nails. The dehydrator assists with adhesion so false nails stay on securely.
While some people skip dehydrator and go straight to base coat, using a dehydrator leads to a much smoother, long-lasting manicure. It only adds a minute to the process and makes a big difference. Most manicurists say it’s a crucial step that should never be skipped.
Can I skip using nail dehydrator?
It’s generally not recommended to skip using nail dehydrator before polishing your nails. While it may seem like an unnecessary extra step, nail dehydrator provides important benefits:
- Prevents bubbling and peeling: Skipping dehydrator often leads to trapped moisture and bubbles under polish within a day or two.
- Shortens wear time: Nail polish won’t adhere as strongly or last as long without a dehydrator.
- Can cause lifting and chipping: Oils prevent polish from bonding properly, causing it to lift and chip more quickly.
- May inhibit adhesion of false nails: Using dehydrator helps false nail glue stick and hold better.
You can certainly polish without dehydrator in a pinch, but it often leads to a manicure that doesn’t last. Using a dehydrator consistently helps nail polish look freshly applied for 4-7 days or even longer without the need for touch ups.
For the best and longest lasting manicure, nail experts recommend never skipping this quick but important step.
What happens if you don’t use nail dehydrator?
Skipping nail dehydrator can negatively impact the look and longevity of your manicure in a few key ways:
- Reduced wear time: Nail polish won’t adhere as strongly to oils and moisture on the nails, causing it to chip and peel faster.
- Bubbling: Trapped moisture under polish leads to bubbles forming within a day or two of application.
- Lifting: Polish doesn’t bond properly due to oils and moisture and can begin lifting at the edges and tip.
- Dull appearance: Without a clean canvas, polish can look streaky and uneven.
- Staining: Oils allow pigments from darker polishes to stain nails after removal.
One study tested polish wear with and without using nail dehydrator [https://www.nailsmag.com/381745/inthepink-the-importance-of-prepping]. It found polish lasted an average of 4-7 days longer with a dehydrator.
While you can get by without one, the manicure won’t look as smooth or last nearly as long. For best results, nail experts agree dehydrator is a must.
Conclusion
Nail dehydrator is an important product that should be used anytime you’re getting gel manicures, acrylics, dip powder nails, or other nail enhancements. Properly prepping the nails with dehydrator allows the enhancement products to adhere properly for a long-lasting manicure.
By understanding what nail dehydrator is, when to use it, and how to apply it correctly, you can help ensure your manicures and enhancements last as long as possible. Avoid skipping this step or improper application to prevent lifting, peeling, and other nail enhancement failures down the road.