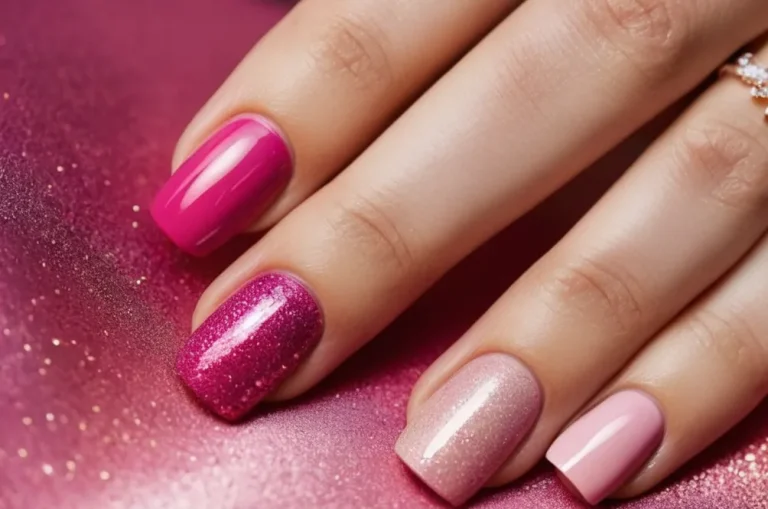
What Does A Nail Buffer Do? A Detailed Guide
Smooth, shiny nails are a sign of good health and grooming. If your nails are looking dull or have ridges and imperfections, using a nail buffer can transform them. But what exactly is a nail buffer and how does it work?
If you’re short on time, here’s a quick answer: A nail buffer is a handheld tool made of various grits of abrasive material that you rub over the nail to remove roughness and shine it up. Using a nail buffer helps smooth ridges, eliminate small stains and discoloration, and leave you with a polished, healthy-looking nail surface.
In this comprehensive guide, we’ll explore everything you need to know about nail buffers. You’ll learn what they’re made of, the different types and grits available, how to use a buffer properly, mistakes to avoid, and the results you can expect.
We’ll also cover alternatives to buffers and tips for maintaining your nail buffing results. Let’s get started!
What Is a Nail Buffer?
A nail buffer is a tool used to smooth and shine fingernails and toenails. It has a number of purposes when it comes to nail care and maintenance.
Basic Description and Purpose
Nail buffers are usually small, handheld blocks made of various materials and layers that serve to buff nails. They are gently rubbed against the nails in order to:
- Eliminate small ridges and imperfections
- Smooth uneven surfaces and flaws
- Soften and prevent hangnails
- Remove thin layers of dead skin cells from the nail plate
- Polish and shine the nails for a groomed look
Over time and repeated use, buffers gently wear down the nail’s surface to reveal a smoother layer underneath. Frequent buffering leads to a healthy glow that enhances the appearance of both fingernails and toenails.
Materials and Construction
Buffing blocks are typically constructed using various materials and grit sizes, including:
|
|
The different coarseness levels serve different buffing needs. Multiple layers might be combined on one block, providing options for gentle smoothing or more intensive buffing on thick or damaged nails.
Types of Buffers
There are a few common varieties of nail buffers:
- Basic single-sided rectangular blocks: These have one buffing surface and are very affordable and portable.
- Reversible/double-sided rectangular blocks: They have two grit sizes (one on each side), allowing for step-by-step buffing with the same tool.
- Three- or four-way nail buffers: Triangular or square blocks with three or four buffing layers of varying grits. These provide different textures to tackle multiple buffing needs.
- Electric nail buffers: Electrically-powered rotary tools that spin a buffing barrel for quick, motorized buffing.
The variety allows people to choose the buffer shape and texture that works best depending on their unique nail conditions and care preferences.
How to Use a Nail Buffer
Prepare Nails
Before using a nail buffer, it’s important to properly prepare your nails. Start by soaking your nails in warm water or applying cuticle oil for a few minutes to soften the cuticles. Gently push back the cuticles using a cuticle pusher.
Then, trim and file your nails into the desired shape using nail clippers and a nail file. Make sure to file in one direction and avoid sawing back and forth. File the tops of the nails from outside edges to center. Buffing works best on smooth nail edges, so take the time to get a neat shape.
Technique for Buffing
When your nails are shaped, it’s time to start buffing. First, wipe nails clean and dry thoroughly. Apply a small amount of nail oil to condition the nails. Then, go through each step using your multi-sided buffer:
- Side 1 – File gently over nails back and forth using medium grit to smooth surface
- Side 2 – Buff surface using fine grit to refine
- Side 3 – Use ultra-fine grit to polish nails to a shine
Be sure to buff in one direction, applying light to medium pressure. Buff from cuticle to tip evenly across the nail. Do not saw back and forth. The buffing motion should be fluid and rhythmic. After completing all nails, wipe away dust with a soft cloth.
Buffing Tips and Precautions
Here are some tips to get the most from your buffing session:
- Buff natural nails only – avoid artificial tips
- Don’t buff too aggressively or you may thin nails
- Buff once a week at most for maintenance
- Moisturize after buffing to condition nails
- Shape nails before heavy-duty buffing
- Disinfect buffer between uses
Take care not to overbuff or you may damage the nails. Signs of overbuffing include warmth, redness, and thinning nails. If nails feel hot or look red, take a break to allow nails to recover.
Finishing Touches
Once buffing is complete, nails should look naturally smooth and polished. Use a nail brush to wipe away any remaining dust. Apply a nourishing nail oil, cream, or cuticle treatment to condition nails and cuticles. Let nails soak it in for a few minutes.
Then, apply your choice of nail polish or buffed nails can be left bare for a natural finish. Proper nail buffing and care helps nails shine!
Nail Buffer Grits Explained
Extra Fine
Extra fine buffers, usually white in color, are the gentlest on nails. They have a grit size of about 180-240 and are ideal for light buffing and finishing touches. Extra fine buffers smooth the nail surface, remove light scratches, and leave nails with a natural glossy shine.
They prep nails beautifully for nail polish application. Using an extra fine buffer 1-2 times a week helps keep nails looking tidy between manicures.
Fine
Fine grit buffers, often pink, range from 150-180 grit. They provide light buffing action to gently shape nails and remove surface imperfections like peeling and ridges. Fine buffers even out ridges for a smoother nail surface.
If you shape your nails at home between salon visits, a fine buffer shapes and smooths nails nicely without taking off too much length. Fine grit buffers prep nails for polish, removing oils for better adhesion. Use them 1-2 times per week for nail maintenance.
Medium
Medium grit nail buffers are usually gray or white and fall in the range of 100-150 grit. Medium buffers smooth nails and remove blemishes safely with moderate buffing action. They shape and shorten nails, taking off a thin layer for an even surface.
Medium buffers work well to remove gel or acrylic residue after a soak-off. Using a medium grit buffer shapes nails and preps them for polish application. Limit use to 1-2 times per week to avoid thinning nails.
Coarse
Coarse buffers are generally dark gray or black with grit from 80-120. Coarse buffers aggressively shape, shorten, and thin nails due to their high abrasion. They quickly remove length and layers of keratin to change the nail shape or remove damaged parts.
While coarse buffers smooth uneven surfaces, overuse risks weakening nails. It’s best to limit use of coarse buffers to once a week at most. They work well for shortening nails or reshaping after an acrylic or gel manicure removal. Use a light touch and avoid over-buffing with coarse grit.
Results You Can Expect From Buffing
Smoother Surface
One of the main benefits of buffing your nails is that it helps create a smoother surface. The abrasive pads on a nail buffer gently smooth away small ridges, bumps and imperfections on the nail plate. This helps create a flawless finish that looks professionally manicured.
Buffing evens out the texture of the nail and makes colors apply more evenly too. Who doesn’t love a super smooth nail that looks like it was done at the salon?
Shinier Nails
In addition to smoothing, buffing also helps polish adhere better and makes nails shinier. The light abrasion removes any natural oils or lotions that may be on the surface of the nail plate. This allows polish, especially top coats, to fully bind to the nail and create a glassy, high-shine finish.
So if you want serious lacquer shine, be sure to buff properly beforehand. Those nails will be shimmering in no time!
Removal of Stains/Discoloration
Buffing can be a great solution for removing stains or yellowing on natural nails. Things like frequent nail polish use, certain medications, smoking, and the aging process can cause discoloration or darkening of the nails over time.
Gently buffing with a fine grit file can help lessen the appearance of staining and make nails look whiter. Be careful not to over buff though, as thinning the nail plate too much can weaken nails. But a little buff is great for rejuvenating the look of discolored or dull nails.
Improved Nail Strength
Using a nail buffer doesn’t just transform the appearance of nails, it can also help strengthen them too. Light buffing smooths over small flaws in the nail surface that can often lead to peeling and breakage when left untreated.
It essentially seals the edge of the nail plate and prevents it from chipping and splitting. The buffer’s friction also helps harden and compact the nail keratin, creating tighter nail plate bonds. This is especially helpful for those with peeling nails or split cuticles.
So grab that buffer and get ready for stronger, healthier looking tips!
Alternatives to Nail Buffers
Nail Files
Nail files are a great alternative to nail buffers for shaping and smoothing nails. Files come in different grits, from fine to coarse, allowing you to customize smoothing and shaping. Using long strokes in one direction, nail files gently smooth rough edges and shape nails.
They are more targeted than buffers, letting you work on individual nails. An added bonus – nail files don’t create as much heat and friction as buffers, reducing the risk of thinning your nails. They also easily remove jagged edges and peeling layers for a pro manicure.
Overall, nail files allow for precise shaping and smoothing without the risks buffers can pose.
Shine Buffers
If you’re looking to buff your nails for shine, but don’t want the risks associated with over-buffing, shine buffers are a safe alternative. Made from soft materials like microfiber or chamois, these buffers add gloss without abrading the nail surface.
Gentle circular motions create subtle friction to buff nails to a light sheen. Unlike traditional buffing blocks, shine buffers do not remove layers of keratin so there is less risk of thinning nails. They are a great way to make your manicure dazzle between polishes.
Shine buffers are safe for natural nails or nail enhancements. For beauty that shines, shine buffers are a smart buffer alternative.
Nail Polishes and Treatments
Using quality nail polishes and treatments can also help you skip nail buffers while still getting strong, shiny nails. A base coat fills ridges and evens tone, minimizing the need for buffing. Top coats containing oils, silicones and polymers help seal the manicure and add glossy shine.
Look for ingredients like jojoba, vitamin E, biotin and bamboo silica for nourishing protection. For added shine between polishes, opt for oils that hydrate and smooth like coconut, olive and jojoba oils.
Nail hardeners with calcium, proteins and silica also help build strong, smooth nails that don’t require buffing. With the right nail care products, you can achieve great-looking nails without aggressive buffing.
Tips for Maintaining Your Buffed Nails
Use Cuticle Oil
After buffing your nails, it’s important to moisturize the nail area to prevent dryness and peeling. Massaging cuticle oil into the nails and cuticles helps keep them hydrated and strong. Look for cuticle oils that contain moisturizing ingredients like vitamin E, aloe vera, and jojoba oil.
Applying cuticle oil once or twice daily will help your buffed nails stay smooth and healthy.
Apply Nail Hardener
Since buffing can weaken nails over time, using a nail hardener helps reinforce the nail structure. Nail hardeners work by creating an extra layer that coats and protects the nails. They often contain strengthening ingredients like calcium, keratin, or silk.
For the best results, apply a thin coat of nail hardener on the nails after buffing and let it fully dry. This helps prevent chipping and peeling while making the nails stronger and more resistant to damage. Reapply nail hardener every few days for maintained strength.
Get Regular Manicures
Professional manicures are a great way to maintain beautiful, buffed nails. Manicurists can shape and buff the nails properly, removing any rough edges or uneven surfaces. They can also apply moisturizing creams and oils to condition the nails and cuticles.
Getting biweekly or monthly manicures ensures your nails stay perfectly buffed and polished in between home maintenance. It also prevents issues like hangnails or overfiling. With regular manicures, your nails will look fabulous for longer.
Wear Gloves for Wet Work
Exposing your nails to water without protection can lead to cracking, peeling and damage. Wearing rubber gloves when washing dishes, cleaning or gardening keeps moisture from seeping into the nails and weakening them.
Look for thicker glove materials like latex or nitrile, which offer more protection. If you’ll have your hands in water for longer periods, cotton lined gloves provide extra insulation and softness inside.
Preventing excessive water exposure will help retain your buffed nails’ smooth texture and shine.
Conclusion
With the right buffing technique and product, you can reveal strong, smooth, shiny nails without harsh filing or damage. Take the time to properly shape and buff each nail, moving in one direction with the proper grits.
Avoid over-buffing, keep nails moisturized, and get manicures to maintain the results.
Nail buffers are a simple and effective way to improve the look of your nails at home. Knowing the different types, proper use, and upkeep will ensure you get salon-quality nails and hands. Buff away those ridges and imperfections to show off neat, polished nails with health and beauty.