What Are Nail Tips? A Detailed Guide
If you’ve ever gotten your nails done at a salon, you may have heard your manicurist ask if you want nail tips. But what exactly are nail tips? In short, nail tips are artificial extensions that get applied to the end of your natural nails to help extend their length or protect them from damage.
Keep reading this comprehensive guide to learn everything you need to know about nail tips, including what they’re made of, how they’re applied, the different types and styles, and the pros and cons of using them.
Nail tips have become an extremely popular service at nail salons in recent years. More and more women are opting to get long, stylish nails using tips instead of acrylics or other enhancement options. Tips provide a fast and easy way to extend your natural nails temporarily.
If you’re considering trying them for the first time, this detailed article will provide all the information you need to decide if nail tips are right for you.
What Are Nail Tips Exactly?
Nail tips, also known as artificial nail extensions, are thin pieces of lightweight plastic or paper that are applied to the free edge of natural nails to extend their length or reshape them. They create an instant “new nail” and act as a base for acrylic, gel or dip nail extensions.
Artificial Nail Extensions
Nail tips are pre-shaped artificial nail extensions that have been molded into the desired end shape. They are available in a huge variety of different sizes and shapes to suit every nail size and desired nail length.
When applied properly, they conform to the natural shape of your nail and extend its free edge.
Nail tips are most commonly used to add length to short, bitten down or damaged nails. They provide the foundation for further nail enhancement with acrylic, gel, dip powder or other sculpting products to build out and strengthen the nails.
But they can also be used on their own as an instant extension when painted with nail polish.
Made of Thin Plastic or Paper
Nail tips are made from lightweight, flexible plastic or paper that is thin yet durable. Most nail tips today are made using a plastic polymer, such as ABS (acrylonitrile butadiene styrene). Some are made from cellulose paper, which is soaked in solvent to make it hard and durable when it dries.
The thin material flexes slightly to mold to the natural nail’s shape for a seamless, natural looking extension. Plastic polymer tips are very strong and resistant to cracking or peeling. Paper tips are more affordable but may be more prone to peeling or discoloration over time.
Applied to the Free Edge of Nails
To apply nail tips, you size and customize them to suit your nail width and desired length. They should only extend off the free edge of your nails – the part that extends past the finger. The tips are bonded to the natural nail using nail glue or acrylic.
Proper sizing and application helps the nail tip conform and adhere smoothly to the natural nail. This creates a seamless extension that is shaped to your natural nail and provides a strong foundation for further nail enhancements.
Nail tips are an ideal choice for lengthening bitten or damaged nails quickly. With proper application and care, they allow you to sport beautiful, elongated nail extensions instantly!
Different Types of Nail Tips
Full Cover Tips
Full cover tips, as the name suggests, are nail tips that cover the entire natural nail. They are ideal for people with very short or damaged nails that need to be covered completely. Full cover tips come in various shapes like square, round, almond etc.
Once glued on, they provide a smooth surface on which to apply acrylic or gel nail extensions of desired lengths and shapes. The sturdy plastic material allows flexibility for safe application and filing into any preferred shape. With full cover tips you can go all out with length and designs!
Half Cover Tips
Half cover tips only cover half the length of the natural nails, leaving a space to showcase natural nails. They are a great option if you want to add strength and length while still keeping parts of your natural nails exposed.
Half cover tips have an inbuilt “smile line” – an elegant arched smile tip shape – which creates the appearance of a beautiful natural looking French manicure! The partial coverage also means less surface area for extensions, rendering them lighter.
For those looking to boost natural nails without going overboard with overlays, half cover tips hit the sweet spot!
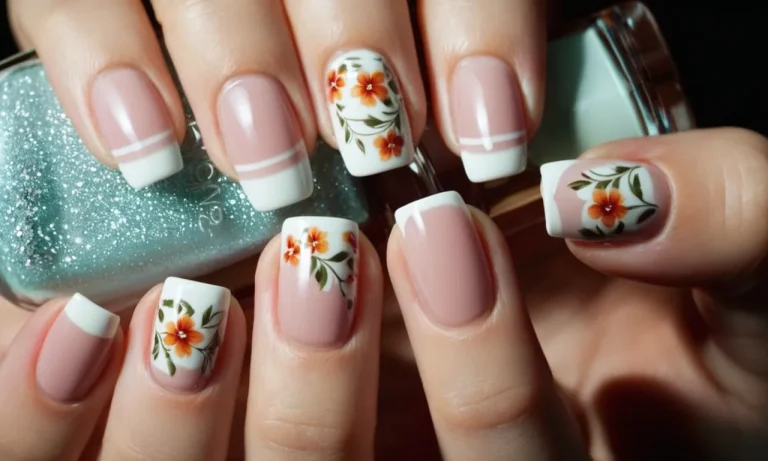
French Manicure Tips
French manicure tips are essentially clear or natural colored full cover tips with a white smile line near the tip. When applied properly and paired with a sheer pink base gel or acrylic overlay, they replicate the classic French manicure look seamlessly.
French manicure tips are extremely handy when you want to skip the skilled and tedious manual painting required for a French manicure. Just glue them on and coat them with the overlay color of your choice for a fresh French manicure instantly!
From square and squoval to stiletto and ballerina, French tips are available in varied shapes to complement any nails. For hassle-free perfect French nails, grab these handy tips!
Nail Tip Application Process
Filing and Shaping the Nails
The first step in applying nail tips is to file and shape the natural nails. Using a 100/180 grit nail file, gently shape the free edge of each nail to form a uniform curve. Avoid over-filing as it can damage and thin the nails.
The nails should have a smooth surface and even length for proper nail tip application.
Next, use a nail buffer to further smooth and shine the nails in preparation for nail tip glue. Buffing removes any small ridges and debris left from filing to ensure maximum adhesion. Take care not to over-buff, as it can weaken the nails.
Selecting the Proper Size Tips
Choosing the right size nail tips is crucial for a natural look and comfortable fit. Place various nail tip sizes over each nail to find the best match. The tip should fit from sidewall to sidewall without overhanging the edges of your nail.
An overly large or small tip will be difficult to blend with your natural nail.
Have an assortment of nail tip shapes on hand as well, as nail beds vary in curvature. Square, round, oval, and almond nail tips are common shapes. Select the shape that most closely mirrors your natural nails for the most seamless enhancement.
Gluing on the Tips
Once you determine the correct size and shape nail tips, properly adhere them to the natural nails with nail glue. Apply a thin layer of glue inside the tip and position it evenly over your nail. Hold for 30-60 seconds to allow it to fully bond. Avoid getting glue on your skin or cuticles.
If the alignment looks slightly off, gently slide to tip into proper position within the first few seconds while the glue is still pliable. Use nail clippers to trim the tip end to match your desired nail length.
Blending and Shaping
The final step is customizing the shape and blending the tips into your natural nails for a seamless enhancement. Use a 180/240 grit file to shape the tip sides straight or into a round, square, oval or almond shape based on your preference.
Next, gently file across the tip-nail junction to smooth and blend the layers together into one continuous surface. The finished shape should mirror your natural nail beds for the most natural look. Avoid over-filing or leaving ridges between the tip and natural nail.
Nail Tip Maintenance
Filling in Gaps
One of the most common issues with nail tips is gaps forming between the natural nail and the tip. This can happen if the tip becomes loose or if your natural nail grows out. Filling in these gaps is important to help the nail tip last longer.
To fill gaps, you’ll need a nail file and nail glue. Gently file the gap using a fine grit nail file to rough up the surface. This will help the glue adhere better. Apply a small amount of nail glue inside the gap and press the tip back into place, holding for 30 seconds as the glue sets.
The glue will fill in the space and re-bond the tip to your natural nail. Be sure to avoid getting glue on your cuticles or skin.
You may need to re-file the tip edge to blend it with your natural nail if there is a ridge after gluing. Buff the nails to smooth and shape. Filling gaps as soon as you notice them will help prevent further lifting or damage to the nail tip.
Replacing Loose Tips
Nail tips can sometimes become loose or pop off completely. This is common as your natural nails grow out and the tips are under pressure. If a nail tip becomes very loose or falls off, you’ll need to replace it to restore the full set.
Start by gently filing off the remaining glue from your natural nail. Buff the nail surface lightly. Size the new tip to your nail and trim if needed. Apply nail glue inside the tip and position it at the edge of your natural nail, pressing firmly for about 30 seconds as it sets.
You may need to hold the sides of the tip as well until fully bonded.
Shape and buff the tip to blend it with your other nails. Be very careful when applying glue and replacing tips to avoid getting it on your skin or cuticles which can cause damage over time. Replacing loose tips as soon as possible will help prevent your other tips from lifting or your natural nails from becoming damaged under the loose tips.
Avoid Picking at Tips
It can be tempting to pick at your nail tips if they start to lift or feel rough. However, this is one of the worst things you can do! Picking at the edges of the tips damages the artificial and natural nail, which allows bacteria to get underneath and increases the chances of the tips popping off.
If you notice rough edges or lifting starting, avoid pulling at it. Gently buff any snags smooth and consider applying nail glue or a thin layer of base coat to seal the edge and prevent further lifting or damage from picking.
Using cuticle oil around the nail edges can also help hydrate the area and prevent lifting and temptation to pick. Always replace loose or damaged tips as soon as possible to avoid worse lifting or breakage over time.
Letting a professional reapply tips is safest if they become very damaged from picking.
Pros and Cons of Nail Tips
Pros: Easy, Fast, Affordable
Nail tips offer several advantages that make them a popular nail enhancement option (source: https://www.nailsmag.com/383900/the-pros-and-cons-of-nail-tips):
- They are very easy and fast to apply. The nail technician just needs to select the right size of premade tip, glue it on, and shape/file it to the desired length and shape.
- Nail tips are affordable compared to other enhancements like acrylics or gel polish. A basic nail tip application may only cost $25-$45 for a full set.
- They allow you to instantly lengthen your nails without waiting for your natural nails to grow out.
- Nail tips are a lightweight option that won’t put stress on your natural nails.
- You can easily change the shape and length of your nails by filing or clipping the tips.
Cons: Not as Durable as Acrylics, Higher Infection Risk
However, nail tips also come with some drawbacks to consider (source: https://www.byrdie.com/nail-tips-pros-and-cons-3517780):
- Nail tips are not as strong, durable or long-lasting as acrylics or hard gel extensions. They can chip, crack or pop off more easily.
- The adhesive glue used can damage your natural nails if not applied and removed properly.
- Tips have a higher risk of harboring bacteria, fungi and infection under the false nail. Improper application or lifting can allow moisture and debris buildup.
- They require more maintenance and reapplication (every 2-3 weeks) to keep them looking nice.
- Nail tips are not a natural looking enhancement and are obviously fake.
While the application is easy, clients need to be diligent about upkeep and hygiene to prevent damage or infections. Tips may also not last as long or hold up as well as other sturdier options. Those seeking long-lasting extensions may want to consider gels or acrylics instead.
Conclusion
Nail tips offer an easy, non-damaging way to temporarily extend your natural nails for a fashionable look. Now that you know what they are, the different types, how they’re applied, and the advantages and disadvantages, you can decide if nail tips are something you’d like to try out.
With proper application and care, tips can allow you to flaunt beautiful nails for special occasions without the long-term commitment of other enhancements. Consult with your manicurist to determine if tips are suitable for your nails and the length you desire.