How To Take Off Acrylic Nails Safely With Oil And Water
Getting tired of your acrylic nails but not sure how to take them off properly without damaging your natural nails? Using oil and water is an easy and safe DIY method to remove your acrylics at home. In this comprehensive guide, we’ll walk you through the entire process step-by-step.
If you’re short on time, here’s a quick answer: Soak cotton balls in acetone nail polish remover and place them on your acrylic nails. Then fill a bowl with warm water and add a few drops of oil. Soak your hands in the bowl for 15-20 minutes until the acrylics start to lift off.
Gently roll and push back the lifted acrylic from your natural nails. Repeat until all acrylic is removed. Moisturize after.
Gather the Supplies You’ll Need
Taking off acrylic nails safely at home requires having the right supplies on hand. Here are the main items you’ll want to gather before starting the removal process:
Cotton balls
Cotton balls are essential for soaking up acetone and removing the acrylic nails. Make sure you have a bag of cotton balls available.
Acetone nail polish remover
100% acetone nail polish remover is the most effective product for breaking down the acrylic and glue. Look for acetone without added moisturizers or oils which can leave residue. Have plenty on hand, at least 8 oz.
Bowl of warm water
Fill a bowl with warm water, not hot. The water helps soften cuticles and make removing acrylics easier. Use a medium-sized bowl that’s big enough to fit your fingers.
Oil (olive, coconut, etc.)
Have a bottle of oil like olive or coconut oil nearby. Applying oil after removal nourishes the nails and cuticles, preventing brittleness and breakage.
Nail file
A coarse 100/180 grit nail file is used to gently rough up the surface of the acrylics so the acetone can penetrate better. Look for a metal nail file specifically for acrylics.
Cuticle stick
A cuticle stick helps push back and protect cuticles during the removal process. Choose a metal cuticle stick and avoid wood or plastic which can absorb chemicals.
Nail clippers (optional)
Nail clippers allow you to trim acrylic nails down for easier removal. But this step is optional – acetone will dissolve the acrylics regardless of length.
Gather all these supplies in one place before starting the acrylic removal process. Having everything you need nearby makes the process quicker and easier. Be sure to work in a well-ventilated area and follow all safety precautions when using acetone nail polish remover.
Prepare Your Nails
Clip your acrylic nails if they are very long
If your acrylic nails have grown out significantly, it’s best to clip them with nail clippers before starting the removal process. This will make them easier to work with. Clip them down to a manageable length, but don’t cut them too short or you may expose your natural nails underneath the acrylics.
File the top shiny layer off your acrylics
Use a coarse nail file to gently file off the shiny top layer of your acrylic nails. This removes the hard, polished acrylic surface and exposes the slightly softer acrylic underneath. Be careful not to file too aggressively or you could thin out your acrylics too much.
Just a light filing to rough up the surface is all you need.
Push back and clean up your cuticles if needed
Before removing acrylics, it’s a good idea to tidy up your cuticles. Gently push back any overgrown cuticles with a cuticle pusher tool. This ensures the cuticles are out of the way for easy nail prep. You can trim any excess cuticle if needed, but be careful not to cut your skin.
It’s also helpful to use a cuticle oil or cream to hydrate the nail bed and surrounding skin, making removal easier.
Soften the Acrylics with Acetone
Soak several cotton balls in acetone nail polish remover
The first step in safely removing acrylic nails at home is to gather your supplies. You’ll need a bottle of 100% pure acetone, which is the active ingredient in nail polish remover that breaks down the acrylics. Soak several cotton balls fully in the acetone until they are saturated.
You’ll want to have enough cotton balls handy to cover each fingernail. Using pure acetone allows it to penetrate the acrylics more effectively compared to diluted versions.
Place the acetone-soaked cotton balls directly onto your acrylic nails
Once you have soaked the cotton balls, carefully place them directly on top of each acrylic nail, making sure they are fully covering the nail. Try to use the cotton balls to seal the sides of the nails too where they meet the skin.
The acetone will only be able to break down the parts of the acrylics that it is directly touching, so full contact is key for smooth removal.
Wrap each finger with foil or plastic wrap to hold cotton balls in place
To keep the acetone-filled cotton balls securely on your nails during the soaking process, you’ll want to wrap each finger individually with either aluminum foil or plastic wrap. Tightly wrap each finger to create a sealed environment.
This prevents the cotton balls from sliding off and maximizes exposure of the acrylics to the acetone for more effective softening. The wrappers also prevent the harsh acetone fumes from escaping into the air you’re breathing.
Let sit for at least 10 minutes so acetone can penetrate and soften acrylic
Once your nails are all wrapped up with acetone-filled cotton balls, you’ll have to patiently let them soak for at least 10 minutes. Set a timer so you don’t accidentally leave them on too long. This allows time for the acetone to fully penetrate through the layers of acrylic and break the bonds.
Check after 10 minutes – if the acrylics feel rubbery and softened, they are ready for removal. If they still feel hard, re-soak for a few more minutes until softened.
Loosen Acrylics Further in Oil Bath
Once you have soaked your acrylic nails in acetone and gently worked off the lifted edges, it’s time to take the removal process a step further. An oil bath can help loosen the acrylic bond even more for easier removal.
Fill a bowl with warm water and add a few drops of oil like olive or coconut oil
Grab a small bowl or dish that is big enough to fit your hands. Fill it with warm water, being careful not to make it too hot. Then, add a few drops of a natural oil like olive oil, coconut oil, or almond oil. The oil will help penetrate and break down the acrylic resin.
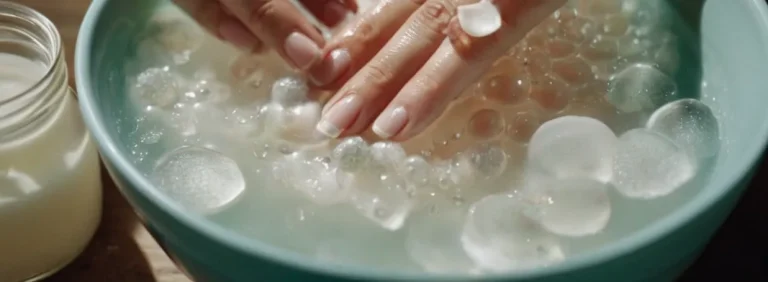
Soak your hands in the bowl for 15-20 minutes
Place your hands in the bowl and let them soak for 15-20 minutes. The warm water will open up your pores and allow the oil to penetrate better. As the oil seeps in, you’ll notice the acrylic starts to lift and become less sticky.
The oil will help loosen the acrylic bond even more
Here’s why the oil soak works: The main ingredient in acrylic powder is a polymer resin that hardens when mixed with a liquid monomer. Oils are able to break down polymers, helping to dissolve some of the acrylic structure. The oil loosens the acrylic grip on your natural nails.
According to nail experts, coconut oil is one of the best choices for soaking off acrylics. That’s because it contains fatty acids that are effective at breaking down acrylic polymers. Olive oil also works well too.
Start gently rolling off lifted acrylic from your natural nails
After soaking for 15-20 minutes, use an orangewood stick to gently roll off the lifted acrylic from your natural nails. Don’t force anything or peel acrylic off if it’s still stuck on tightly. The oil bath will have loosened the bond enough so the acrylic should start to roll off with light pressure.
If you have any stubborn spots, soak for another 5-10 minutes. Then, work the orangewood stick under the lifted edge and slowly roll it off. Take your time with this process to avoid damaging your natural nails.
Remove the Acrylics Completely
Use your nail file to gently file away any remaining acrylic on your nails
After soaking off the bulk of the acrylic nails, there may still be some residual acrylic left on the natural nail surface. It’s crucial to remove all of the acrylic completely to avoid damage to the natural nails. Here are some tips for safely filing away the last bits of acrylic:
- Use a medium-grit nail file and gently file in one direction across the nail to buff off any remaining acrylic residue. Do not saw back and forth as this can damage the natural nail.
- Focus on filing the top surface of the nail first where acrylic tends to stick stubbornly near the cuticle and sides of the nail.
- Never file too aggressively by bearing down hard as this risks filing into your natural nails.
- Rinse nails in water and dry to remove filing dust, then inspect again for any leftover patches of acrylic. Re-file as needed.
Do not file your natural nail surface
It’s vital that you only file off remaining acrylic and not the exposed natural nail surface. Filing the surface of your natural nail can lead to:
- Thinning of the nail plate, causing peeling or cracks
- Damage to the nail bed, which can impede healthy nail growth
- Over-dryness and brittleness
- Increased risk of infection due to micro-abrasions in the nail surface
So be very gentle and precise when filing off leftover acrylic residue. Do not file back and forth over the natural nail itself. It’s better to retain a thin layer of acrylic than to over-file your real nail.
If needed, apply more acetone-soaked cotton balls to stubborn areas
If there are still stubborn bits of acrylic that resist filing, you can:
- Soak a new cotton ball or pad in 100% pure acetone
- Hold it tightly against the spot of remaining acrylic for 3-5 minutes
- Then gently push back the acrylic residue with a cuticle pusher or orange wood stick
The acrylic should lift right off the natural nail if adequately soaked in acetone. Do not forcefully scrape at it with metal tools as this can damage the nail bed.
Keep soaking and gently pushing back acrylic until all is removed
Removing acrylic nails requires patience. It may take repeating the soaking and gentle filing process 2-3 times to fully eliminate every last bit of acrylic from the nail surface.
Here are some signs that all the acrylic has been successfully removed:
- No more white acrylic residue is visible on the nail surface
- Your natural nails feel smooth when running a finger over them
- The nail plate looks clear and slightly glossy without patches or rough areas
- You don’t feel any remaining bumps of acrylic if you close your eyes and run your fingertip over the nail
When these criteria are met, you can be assured you’ve safely removed the acrylics in their entirety and can now begin caring for your natural nails to recover their health and shine!
Clean Up and Moisturize Nails
Use cuticle stick to gently push back cuticles and clean under free edge
After removing acrylic nails, it’s important to gently push back and clean up the cuticles. Use a cuticle stick or pusher to gently push back the cuticles around each nail. Don’t cut or trim the cuticles, as this can damage the nail bed.
Gently work around each nail to push back overgrown cuticles and expose the nail plate. Next, use the cuticle stick to gently clean under the free edge of each nail, removing any residue or buildup left from the acrylics or glue.
Be very gentle during this process to avoid tearing or damaging the cuticles and nail bed.
Wash and scrub nails with soap and water to remove residue
After pushing back the cuticles, the next step is to wash your nails thoroughly with soap and water. Use a nail brush or cotton pad to gently scrub each nail. This will remove any remaining traces of nail glue, acrylic powder, nail polish, dirt, oil, etc.
You want the natural nail surface to be completely clean before moisturizing. Scrub gently under and around each nail bed. Avoid using very hot water, as this can be drying to nails. The nails may look a bit dull and dry after cleaning – this is normal, and the next steps will re-hydrate and condition them.
Apply cuticle oil or thick moisturizing cream to condition nails and cuticles
Once the nails are cleaned up, it’s time to condition them with moisture. Acrylic nails can leave nails feeling dry and brittle after removal. Apply a nourishing product like cuticle oil, petroleum jelly, or a thick cream to rehydrate the nails and cuticles.
Massage the product into the nail beds and cuticles. Let it soak in for 5-10 minutes. This helps replenish moisture and prevent peeling or cracks. Some good moisturizing ingredients to look for include:
- Vitamin E
- Shea butter
- Jojoba oil
- Avocado oil
- Glycerin
If your nails are very dry and damaged, you can apply moisturizer several times per day. Overnight treatments in gloves can also help condition them. Proper moisture will help nails look healthy again after acrylic removal.
Let your nails breathe before applying new polish or extensions
It’s best to give your natural nails some breathing room after removing acrylics before immediately reapplying polish or extensions. Try to go for a few days to a week with bare nails. This allows the nails to recover and absorbs the moisturizing treatments.
Going bare for a bit also allows you to monitor the health and condition of your natural nails, making sure they are strong enough for any additional products. If shaping or buffing your nails during the removal process, allow time for the nail surface to smooth out before adding polish.
Letting nails breathe helps avoid excessive, continuous damage over time.
Conclusion
Removing acrylic nails properly at home with oil and water takes patience but protects your natural nails. Avoid picking or forcefully pulling off acrylics. Combine acetone and oil soaking along with gentle filing and pushing back for safe DIY acrylic removal.
Give your nails some TLC after the process before starting a new nail art look!