How To Paint Flowers On Nails: A Step-By-Step Guide
Painting beautiful flowers on your nails is easier than you think! With some practice and the right techniques, anyone can create gorgeous floral nail art at home.
If you’re short on time, here’s a quick answer to your question: Start by cleaning and prepping your nails. Then use a base coat, floral nail stickers or stamps, and nail polishes in different colors to paint on delicate flowers. Finish with a topcoat for protection and shine.
In this comprehensive guide, you’ll learn everything from choosing the right nail polish colors and brushes to techniques for painting roses, daisies, orchids and more on your nails. Read on for tips from expert nail artists that will have your nails looking like works of art.
Gather Your Nail Art Supplies
Having the right nail art supplies on hand is key to creating fabulous nail designs. Here are some essential items you’ll want to get before painting flowers on your nails:
Nail polishes in various colors
Build up a collection of nail polishes in an array of colors. You’ll want bright hues like red, pink, orange, yellow, green, blue, and purple to paint flower petals. Pastels like mint, peach, and lavender are great for flower centers. White and black polish are useful for outlining and adding details.
Detail and striping brushes
Invest in some small detail brushes and striping brushes to help you paint intricate flower designs. The finer tip allows you to have more control vs. using the brush in the nail polish bottle.
Nail art stamps and decals
Nail art stamping kits come with image plates and a scraper and stamper tool to easily transfer designs like flowers to your nails. Water decals (decals that need to be soaked in water to slide off the backing) also offer quick floral motifs.
Base coat and topcoat
Use base coat to help flower nail art adhere to nails. Topcoat is critical to seal in your design and add shine and longevity.
Nail art embellishments
Rhinestones, glitter, and other nail art embellishments can be used to accent your floral nails. Try adding some sparkle to the flower centers.
Nail art remover or acetone
Have pure acetone or nail art remover on hand so you can erase any polish mistakes and start over.
Once you have these supplies ready, you’ll be fully equipped to create stunning floral nail art designs! Check out tutorials online for tips, tricks, and flower nail art inspiration.
Prepare Your Nails
Properly preparing the nails is a crucial first step before painting any nail art. Ensuring the nails are shaped, buffed and dehydrated will allow the nail polish to adhere correctly and last longer without chipping or peeling.
Follow these key steps below to get your nails ready for the fun floral designs.
Trim and file nails into desired shape
Use nail clippers and files to trim and shape your nails into your preferred length and shape. Most recommend shaping into a gentle square or round edge for nail art. Be sure to file in one direction and buff the edges to prevent snags.
Push back and clean up cuticles
Use a cuticle pusher gently push back and neaten the skin around the nails. Then a cuticle trimmer can remove any loose pieces for a tidy nail bed. Don’t cut any healthy cuticles. Finish by massaging cuticle oil into the nail folds to soften and hydrate.
Buff nails lightly to remove shine and oils
Gently buffing removes the natural shine and any oils from the nail surface using a nail buffer or file. This roughens them slightly to allow polish to bond securely. Take care not to over buff as this can damage nails.
Wipe nails with nail prep/dehydrator
Wipe nails thoroughly with a nail prep pad or acetone nail polish remover to remove any residue and dehydrate the surface. This is an essential step so bases and polishes properly adhere without lifting or peeling. Allow nails to air dry.
Apply base coat and let dry
Paint 1-2 thin coats of clear base coat over nails and allow to dry fully. This is key for protecting natural nails and allowing polish to last without staining nails or peeling. Be patient and let the base coat dry completely before designs.
With nails now neatly shaped, buffed, cleaned and dehydrated, you have the perfect blank canvas ready for painting beautiful blooms!
Techniques for Painting Different Flower Types
Painting roses with graduating pink and red shades
Roses are a classic and romantic flower design for nails. To paint them, start by painting all nails a soft pink base color. Let it dry completely. Then use a makeup wedge sponge to dab on brighter pink starting from the base and gradually lightening as you move upwards to create a gradient effect.
Finish with some red polish just on the tips to mimic rose petals. This ombre look mimics the varying shades in real roses. For best results, use polishes with a creme or pearl finish rather than shimmer or glitter, which can look messy in gradients.
Painting daisies with white nail art pens
Daisies have a fresh, spring-like feeling on nails. Paint nails a sunshine yellow first as the base. Once dry, use a thin white nail art pen to draw petal shapes, starting with larger petals in the center and making smaller petals as you radiate outwards.
Add a white circle in the very center for the daisy interior. Fill in gaps between the petals with smaller white lines to complete the daisy shapes. Yellow and white symbolize happiness and purity, perfect for daisies.
For extra dimension, try shading the centers of the petals with a light gray polish using a detail nail art brush.
Painting orchids with purple and fuschia polishes
Orchids are an exotic and elegant choice for painted nails. Base your nails with a light, sheer purple or lilac. Create orchid blooms by making scattered brush strokes in fuchsia starting from the base and flare outwards.
Use a detail brush dipped in deep purple to outline the fuchsia petals for definition. Next, paint small deep purple teardrop shapes for the orchid centers. Fun fact: true orchid colors in nature span almost every hue! Feel free to play with different color combinations like orchid pink and violet.
Add nail art rhinestones or glitter tips to really make your orchids sparkle.
Painting sunflowers with yellow polish and brown striper brush
What says summer better than cheerful sunflowers? For this mani, cover nails in a bright, opaque yellow. If you have a striper brush, lightly dip just the tip in a dark brown polish to stamp short vertical lines around the edges of your nails to create “sunflower stems.” Then take the striper horizontally across your nail to paint oval or U-shapes for the flower petals.
Add a brown circle in the center for depth. An alternative is painting on the stems with a toothpick and flower heads with a dotting tool. Outline petals with yellow and fill in brown for centers. Yellow and brown pair perfectly. For extra flair, stud a glittery yellow rhinestone in each center!
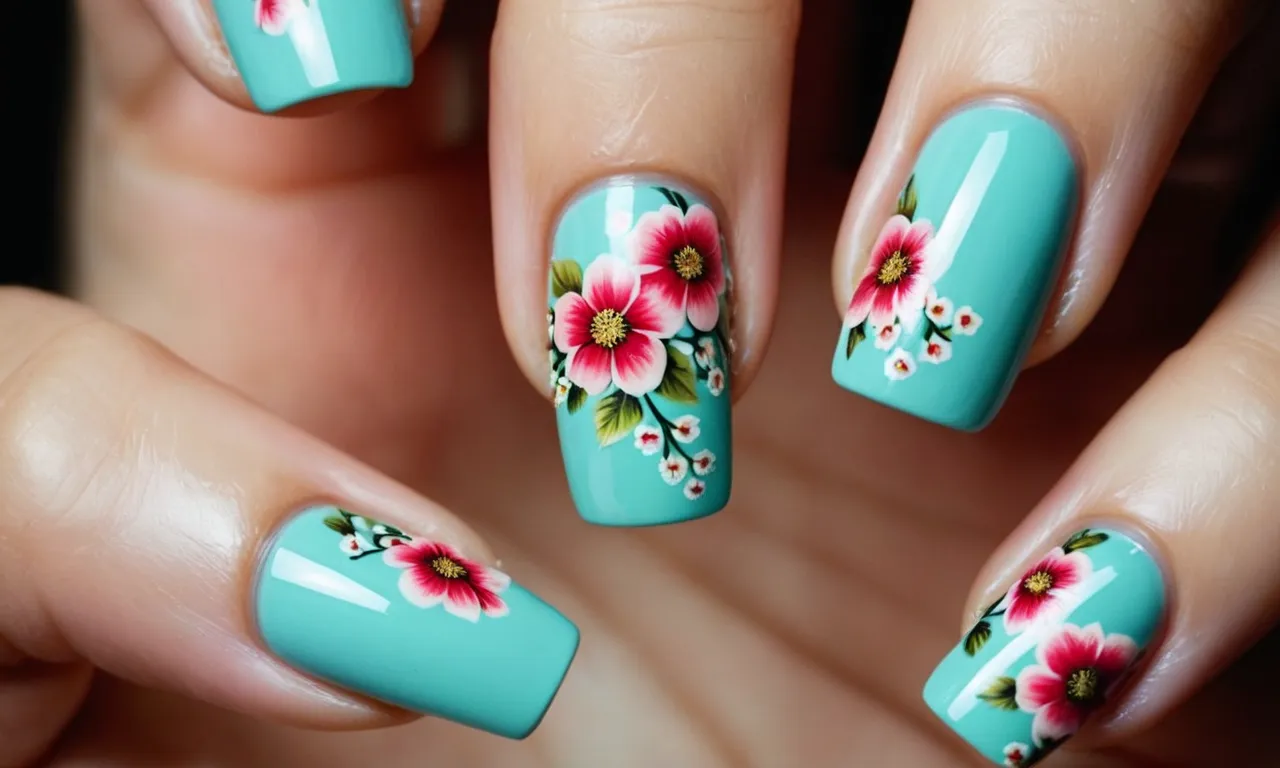
Painting cherry blossoms with light pink and nail art stamps
Cherry blossoms conjure up visions of springtime blooms. For this girly nail art look, first paint your nails a very pale, ballerina pink color. After drying, press on cherry blossom floral nail art stamps randomly on each nail, using a clear or pink stamper head for the best color transfer.
Once stamped, take a dotting tool dipped in deep pink polish to add tiny dots in flower centers. For finishing details, use a toothpick and white polish to add delicate lines around flower edges. According to surveys, over 60% of women think cherry blossoms are the prettiest flower for nail art.
Add pearls or glitter for that extra pop!
Finishing Touches
Outline and detail flowers with thin nail art brushes
Once the base colors and initial flower shapes are painted, it’s time to add finer details with a thin nail art brush. Gently outline each petal and add veins, dots, or other patterns to make the flowers look more realistic. Be sure to let each layer dry before moving on.
The trick here is to have a steady hand – go slowly and don’t press too hard so the brush doesn’t drag through the polish. A bit of practice on paper or fake nails can help perfect your technique.
Add touches like leaves and stems
Consider painting simple leaves or curved stems to complement the floral designs. Greens, browns, and other earthy tones work well for leaves, while greens or browns painted with a thin brush can imitate stems. Make sure to connect any leaves or stems directly to the flowers for a cohesive look.
If desired, tiny buds or decorative swirls could also enhance the overall floral nail art.
Apply topcoat for smooth, shiny finish
Once the nail art is complete, seal it in with a layer of regular topcoat or a quick-drying topcoat formula. This step helps smooth out any ridges and brushstrokes while giving an even, salon-quality shine. It also locks in the design to prevent chipping and smudging for longer-lasting nail art.
Allow adequate drying time between the final design layer and topcoat application. Remember to cap the tips of the nails with each layer for the best protection.
Consider embellishments like rhinestones or glitter (optional)
For extra sparkle and dimension, consider adding glitter or rhinestones on top of the dried floral nail art. Small crystal rhinestones can serve as dewdrops or flower centers when carefully placed with tweezers and sealed with clear nail glue.
For quick and easy shine, sprinkle iridescent glitter lightly over the flowers and seal it with another topcoat layer. This step is totally optional but can elevate basic floral nail art to a glamorous new level in just minutes!
Try different color schemes and flower types
One of the best things about floral nail art is the creative freedom to experiment with different colors and flower varieties. While classic red roses are a popular choice, pink peonies, purple orchids, yellow daisies, blue hydrangeas, and more can make for unique, eye-catching manicures.
Go for an all-over floral explosion with mixed flowers on every nail, or do individual motifs like a single rose or tulip per finger. Spring pastels, summer brights, and moody fall hues all work beautifully depending on the overall vibe you want.
Let your creativity run wild with the flower types, color combos, and arrangements!
Conclusion
With some creativity and practice, you can paint stunning floral designs on your nails! Start simple, then work your way up to more advanced techniques. The beautiful results will be totally worth the effort. So grab your favorite polishes and brushes and let your inner artist shine!