How To Mix Nail Polish Like A Pro
Whether you’re looking to create a custom color or needing to revive a dried-out bottle, learning how to properly mix nail polish is a useful skill for any beauty lover. With some simple techniques and the right tools, you’ll be mixing polishes like a pro in no time.
If you’re short on time, here’s a quick answer to your question: Use a clean glass mixing container and disposable wooden stir sticks to combine a small amount of each polish. Stir gently in a figure 8 pattern until fully blended. Add nail polish thinner as needed for a smooth, even consistency.
Gather Your Mixing Supplies
When embarking on the exciting journey of mixing your own custom nail polish colors, having the right supplies on hand is key. The basic items you’ll need include:
Glass mixing container (shot glass, small glass jar)
You’ll need some kind of small, clean glass container to mix the polish in. Shot glasses and small glass jars or bottles (around 2 oz. capacity) work perfectly. Glass allows you to easily see the color as you mix and is less likely to react with the nail polish ingredients than plastic.
Disposable wooden stir sticks
These will let you thoroughly incorporate all the ingredients without introducing bubbles. Bamboo skewers also work in a pinch.
Nail polish thinner
A few drops of nail polish thinner helps get the consistency just right. You can find this at beauty supply stores or online shops specializing in nail and beauty products.
With just these three basic supplies, you’ll be ready to channel your inner makeup chemist and start blending beautiful polishes! Be sure to add polish remover and cotton balls to fully remove existing manicures first before applying your new customized color.
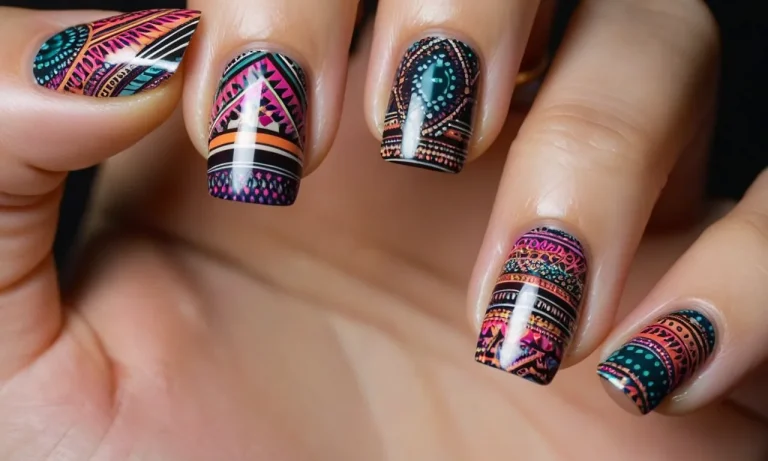
Choose Your Polish Colors
2-3 nail polish colors maximum
When undertaking a professional DIY nail polish mixing project, limiting your selection to 2-3 lacquer shades ensures better control over the final blended hue. Picking merely a couple of tones avoids muddy color outcomes from too many pigments blending together.
Additionally, a maximum trio of polishes simplifies replicating your homemade mixed polish later. Keep the color count low for mixology success.
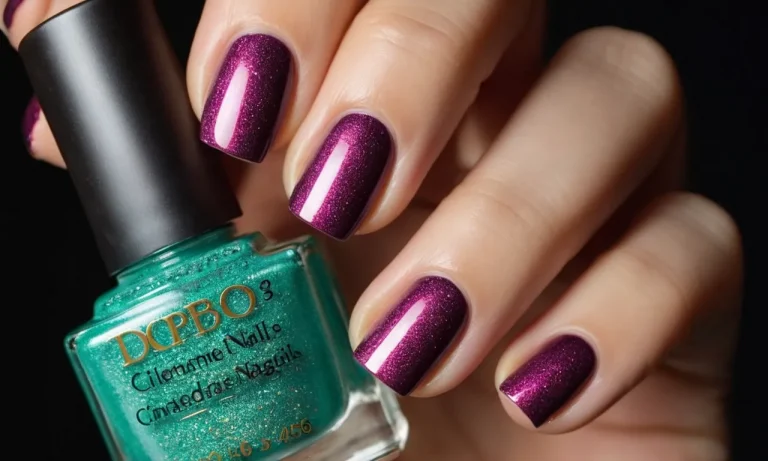
Opaque creams work best
Make sure to use highly pigmented cream polishes for blending. Sheer or translucent shades won’t mix well. Opaque creams, not thinned with solvents, combine best for vibrant custom polishes. Consider quality color brands like OPI or Essie. Avoid no-name polishes lacking rich pigmentation.
When mixing polishes, layering sufficiently covering lacquer allows the colors to blend optimally into a new shade.
Working with thicker polishes also prevents messy dripping when layering multiple tones. Thin runny polishes become challenging to control when painting overlapping coats. Creamier nail lacquers blend more easily without messy dripping.
Avoid quick-dry, matte, and shimmer finishes
Due to their unique formulations, quick-drying, matte, or glitter/shimmer nail polishes don’t blend well with standard creams. Quick-dry polishes contain extra solvents and set too rapidly to allow proper blending.
Matte polishes obscure underlying shine and color. Glitters and shimmers overtake color mixing with sparse yet highly pigmented particles.
The recessed grinding surface of matte finishes makes layering multiple coats difficult. Shimmer particles stubbornly maintain their sparkle no matter what color lies underneath. And fast-drying polishes set too quickly for blending tone-on-tone.
For best DIY polish mixing, stick with standard opaque creams.
| Type to Avoid | Why |
| Quick-Drying | Sets too fast, prevents blending |
| Matte Finish | Obscures and blocks other polishes |
| Glitters/Shimmers | Sparkle overpowers color mixing |
Get Mixing!
Add a small amount of each polish to the glass
When you’re ready to start mixing, add a little bit of each nail polish color you want to include to a clear glass container. Use a separate glass for each custom polish mix you create. Only pour about 1 tablespoon of polish to start – adding too much too soon can result in wasting product if you don’t get the ratios right.
Stir gently with wooden stick in a figure 8 pattern
After adding the initial polish colors, take a disposable wooden stick and stir gently to fully incorporate them. Stir in a smooth figure 8 motion rather than roughly mixing. This will help blend the polishes smoothly without creating bubbles.
Add thinner for a smooth, flowing consistency
Once the colors are blended, you may need to thin the mixture so it has a nice, flowing consistency for painting onto nails. Add a few drops of nail polish thinner into the glass and mix again. The amount needed will vary based on the polish brands used.
Repeat as necessary until reaching the desired viscosity that coats nails evenly without dragging.
Continue mixing until polishes are fully blended
Keep gently moving the stick in a figure 8 pattern for 30-60 seconds to ensure thorough blending. The color should appear uniform with no streaks. Mixing for too long introduces more air into the polish, which can cause bubbling when applied, so don’t overmix.
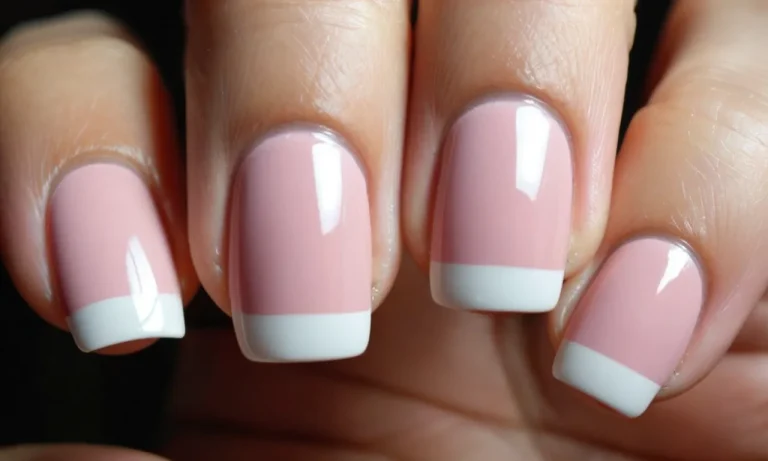
When done, the custom nail polish is ready to use!
Following this easy technique, you can create trendsetting nail shades that perfectly match your outfits or mood. Once mastered, let your creativity shine by coming up with dazzling color combinations to wow at your next nail party!
Store and Use Your Custom Mix
Transfer to an empty nail polish bottle
Once you have blended your perfect custom nail polish color, the next step is to transfer it to an empty nail polish bottle for easy use. Make sure you have cleaned and fully dried an empty nail polish bottle before transferring your creation into it. An uncleaned bottle can contaminate the polish.
Once your bottle is ready, carefully pour your custom blend into it.
Getting the polish into the bottle without spilling can be tricky. Work slowly and tilt the mixing container gradually as you pour. If you do spill a little bit, wipe it up right away with nail polish remover so it doesn’t stain.
An easy-pour funnel can help guide the liquid cleanly into the opening of the bottle.
Make sure bottle is clean and completely dry first
Cleaning the nail polish bottle properly before you transfer your custom mix into it is a vital step. Any debris, old polish, or moisture left behind can ruin your beautiful new shade. Start by removing all old labels and stickers from the bottle.
Use nail polish remover and a cotton ball to eliminate every trace of color or gloss from the interior of the bottle and brush.
Once the inside is completely stripped, it’s time to wash. Use warm water and a small amount of mild soap, then rinse several times. Set the clean bottle upside down to air dry for at least 24 hours before pouring your mix inside. This prevents moisture from contaminating the polish formula.
Shake well before each use to reblend
No matter how perfectly you blended the nail polish colors originally, you’ll still need to shake the bottle before each use. This mixes everything back together again. Over time, the ingredients can separate a bit, especially glitters, shimmers, and metallics.
Give the closed bottle 5-10 vigorous up-and-down shakes.
Listen and look closely as you shake. You’ll hear and see the mixing balls rolling around inside. When contents appear uniformly mixed again, you’re ready to paint! Not shaking first can result in inconsistent color or too much glitter across your nails.
Store in a cool, dark place
For longest lasting quality, always securely tighten the cap and store your custom nail polish mix in proper conditions between uses. Keep bottles in a relatively cool area between 60-80°F. Avoid direct heat and sunlight which can cause formulas to thicken up or discolor over time.
For extra protection, store inside a closed drawer or box.
These storage tips prevent the volatile chemicals in nail polish from breaking down too quickly. With ideal care, a handmade color could last over a year without needing to be remade! Be sure to check consistency and test a swatch periodically.
When application starts getting gloopy or thick, it’s time to remix.
Extra Mixing Tips
Use a ratio of 2 parts polish to 1 part thinner
When mixing custom nail polish colors, it’s important to use the right ratio of polish to thinner for optimal consistency and wear. The general guideline is to use 2 parts nail polish to 1 part nail polish thinner.
This ratio helps thin out thick polishes and allows enough thinner to properly mix the colors without making the polish too runny. Using too much thinner can cause chipping, while too little may not mix the colors thoroughly.
Mix small batches – no more than 1/4 oz polishes
Instead of mixing up large amounts of custom polish, it’s best to mix small batches of no more than 1/4 oz (7.5ml). This allows better control over the color mixing process and avoids wasted product if the custom color doesn’t turn out quite right.
Small batches also make it easier to recreate the custom color if more is needed later on.
Clean stir stick before switching polish colors
Be sure to clean off the stir stick before mixing different color polish combinations. Even small amounts of polish residue left on the stirrer can contaminate the new color mixture. An easy way to clean the stick is to wipe it on a paper towel moistened with nail polish remover.
This prevents colors from getting muddied.
Don’t over-mix or you may cause bubbling
It’s important not to over-mix nail polish when creating custom colors. Excessive mixing introduces too many air bubbles into the polish, which can cause bubbles on the nail after application. As a guide, aim to mix the polish with around 50 circular strokes.
This is usually sufficient to fully incorporate the colors. Let the custom polish sit for 5 minutes before mixing again to release trapped air bubbles.
Conclusion
With the right supplies and techniques, it’s easy to become a nail polish mixing pro. By choosing complementary polish colors, gently stirring, and adding thinner, you can create beautiful custom shades in the comfort of your home.
Mix things up and try your favorite color combinations to design unique polishes that match your personal style and mood.