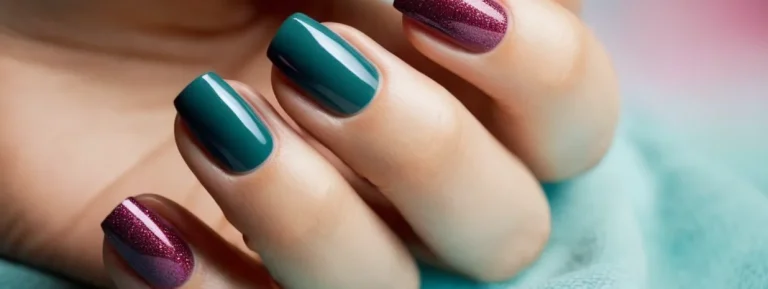
How To Make Your Dip Nails Last Longer
Dip powder nails have become one of the most popular nail trends in recent years. With their durable, chip-resistant finish and ability to grow out gracefully, it’s no wonder why. But like any manicure, dip nails aren’t invincible.
With the right prep and care, you can get your dip manicure to last 3-4 weeks or more. If you’re looking to prolong the life of your dip powder nails, read on below for tips and tricks.
Here’s a quick answer: Proper nail prep, using thin layers of powder, capping the free edge, and regular maintenance like cuticle oil and avoiding water damage will all help extend the life of your dip powder manicure.
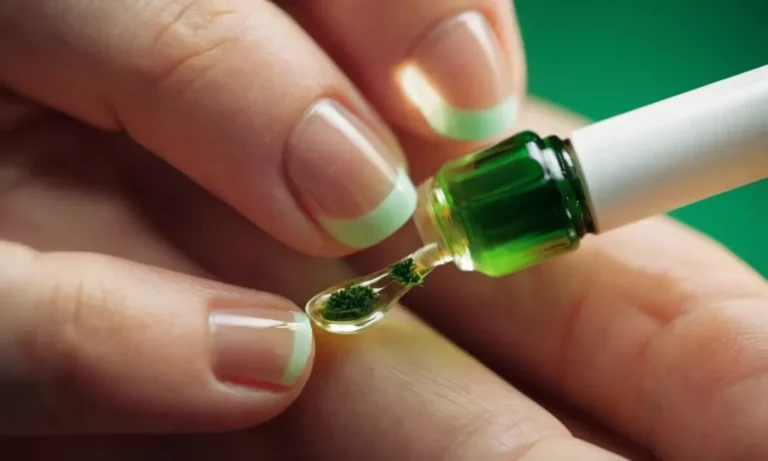
Start With Proper Nail Prep
Preparing the natural nails properly before applying dip powder is crucial for getting the manicure to last longer. Taking the time to remove old polish, trim and push back cuticles, and dehydrate and balance the nails will allow the dip powder layers to adhere better and be more durable.
Remove old polish and buff away shine
Start by removing any old nail polish or residue with nail polish remover. Use a nail file or buffer to gently buff the surface of each natural nail until smooth and shine-free. This removes oils and creates texture for the dip powder liquid and powder to grab onto.
Be careful not to over-file the nails.
Push back and trim cuticles
Use a cuticle pusher and cuticle nippers to gently push back and trim any overgrown cuticles around each nail. Cuticles protect new nail growth, so don’t cut into live skin or cuticles. Just remove excess dead cuticle so it doesn’t interfere with the manicure. Trim hangnails too.
Use dehydrator and pH bonder
Wipe nails with nail prep dehydrator/cleanser, which removes residue and oils and dries the nails. Then apply pH bonder, which balances nail pH and allows better adhesion. Let the bonder set for 60 seconds before applying dip powder according to the brand’s instructions.
Using both regularly will allow dip powder layers to grip better and be more durable.
Taking just 5-10 minutes to properly prep nails before starting a dip powder manicure allows for maximal wear time. Studies show dehydrator and bonder prep can lead dip manicures to last 3-4 weeks without lifting or excessive wear at the tips or cuticle area when applied properly.
Apply Thin Layers of Powder
When it comes to getting long-lasting dip nails, less is more. As tempting as it may be to cake on the powder for an ultra-thick manicure, keeping your layers thin is key for avoiding cracks, breaks, and lifiting.
Dip nails should be paper-thin
Expert nail techs recommend getting a finish that’s as thin as paper. This allows the layers to fully cure and bond together. Going too thick doesn’t allow the liquid resin to fully saturate into the bottom layers, creating weak spots.
Thick layers lead to lifting and breaking
Overly thick dip powder layers are more likely to crack and break since the stress isn’t evenly distributed. The thick rigid finish also has a harder time adhering to the natural nail, eventually lifting around the edges.
Do more dips with less powder
Rather than caking on the powder with each dip, let any excess fall off before setting in the activator liquid. It’s better to do 4-5 thin layers than 2-3 thick coats. This allows full saturation and an even application. Thinner applications also use less powder overall, saving your dip powder stash.
When in doubt, remember the thinner the layers the better. Resist the urge to achieve an ultra-thick finish in just a few dips. Building up gradual, paper-thin layers leads to a supple, flexible finish that hugs the natural nail.
Taking your time leads to a long-lasting manicure that can last over three weeks without issues!
Cap the Free Edge
Paint liquid over the tip of the nail
Applying a layer of clear nail polish or top coat over the free edge of your dip powder nails can help seal the layers and prevent lifting or peeling at the tips (1). This protective barrier creates a smooth finish over the edge and prevents moisture and debris from getting underneath the nail extension where it meets your natural nail.
When topping off your manicure, use a clean detail brush to neatly paint the liquid onto the free edge, going from one side of the nail to the other and covering the entire tip. Allow it to dry thoroughly. Doing this after each fill or new set can extend the wear time of your dip nails (2).
Creates a protective layer
That extra top coat seals the very end of the nail and keeps the layers of dip powder bonded together strongly. Much like painting the tips of your natural nails, it forms a sort of “cap” over the free edge (3).
This helps block water and moisture from sneaking underneath as you go about your daily activities.
Without that protective top layer, the free edge is more vulnerable to catching on things, beginning to lift, or letting in debris and moisture that breaks down the adhesion (4). Taking this small extra step each time you get your nails done can go a long way in preventing lifting and increasing longevity.
Prevents water from getting under nail
Perhaps the biggest reason to add a topcoat over the free edge is that it acts as a barrier to keep water from getting underneath the false nail (5). Exposure to water is one of the biggest culprits of lifting and premature breakdown of nail enhancements.
Whether you’re doing dishes, swimming, or just washing your hands frequently, that moisture and wetness can begin to compromise the bond between the false nail and your real nail if the free edge is not properly sealed (6). The topcoat layer blocks that water access point and minimizes the risk.
Make sure to recap the free edges every two weeks or so because the top coat can wear down over time. This will ensure you always have maximum protection against moisture damage (7).
Use Cuticle Oil Daily
Using cuticle oil daily is one of the best ways to help your dip nails last longer. Cuticle oil nourishes and hydrates the nails and cuticles, preventing cracking, peeling and other damage that can lead to chipping or losing your manicure prematurely.
Here’s why using cuticle oil is so important if you want your beautiful dip powder nails to stand the test of time:
Hydrates and Nourishes Nails
The ingredients in cuticle oil like vitamin E, coconut oil, jojoba oil and more penetrate deep into the nails to soften, hydrate and nourish. This keeps them flexible so they can endure daily wear and tear without becoming dry and brittle.
Well-hydrated and nourished nails are less likely to crack or chip.
Prevents Cracking and Peeling
Frequent use of cuticle oil creates a protective barrier that locks in moisture and prevents cracking and peeling. It also helps reinforce your nails and make them more resilient, so they don’t split or break as easily.
Keeping your nails and cuticles supple and hydrated with oil is key to avoiding cracks and chips that can ruin your manicure.
Apply around Nails and Gently Push Back Cuticles
When applying cuticle oil, be sure to massage it into the skin around your nails, not just on top of them. Also use the time during application to gently push back overgrown cuticles, which can tear and allow bacteria under your nails leading to possible infection.
Take the opportunity to tend carefully to the cuticles each time you use the oil for the healthiest nail beds.
By making cuticle oil application a part of your regular nail care routine, you’ll give your dip powder or other manicures the best chance at going the distance. Just a few minutes a day can lead to stronger, flexible and resilient nails that stay chip-free for weeks!
Avoid Water Damage
Water can cause lifting near cuticles
Water is the number one enemy of long-lasting dip nails. When water gets under the nail tips, it can lead to lifting and peeling, especially around the cuticle area. This allows bacteria and fungus to get underneath the nails, potentially causing infection or damage. Here’s why:
- Water loosens the adhesive bond between the natural nail and the acrylic/dip powder overlay, allowing air pockets to form.
- Soaking hands in water exposes the underside of nails to moisture, softening the keratin and breaking the seal.
- Excess moisture gets trapped underneath the hard nails, creating an environment for bacterial and fungal growth.
Even brief exposure to water can begin deteriorating the nail tips. Washing dishes, showering, swimming, etc. should all be avoided or done carefully with gloves to prevent premature lifting or peeling.
Wear gloves for dishes, cleaning, etc
Wearing waterproof gloves is a must to protect the nail tips from excess moisture. Latex, nitrile, or rubber gloves work well for:
- Washing dishes
- Cleaning with wet products
- Gardening, working with soil
- Swimming in pools or salt water
- Using harsh chemicals like bleach
Look for snug fitting gloves that cover the entire nail and seal around the cuticle area. Change gloves immediately if they become damp inside. Avoid submerging the nails in water with gloves on. Waterproof gloves preserve the nail integrity and prevent lifting near the cuticles caused by water penetration.
Thoroughly dry hands after washing
Even with gloves, some water exposure is inevitable day to day. Thoroughly drying the hands and nails after washing is crucial. Here are some tips:
- Gently pat dry with a clean towel – don’t rub vigorously.
- Use a hair dryer on a cool setting to blow dry nails if needed.
- Apply cuticle oil around the nails to rehydrate.
- Allow extra time for the underside of nails to fully dry before reapplying gloves.
Getting in the habit of actively drying the dip nails and cuticles prevents water from being trapped against the natural nails. This minimizes the chances of lifting or detachment from getting wet. Keep nails looking freshly done by always thoroughly drying after contact with water.
Fill in Regrowth Promptly
One of the biggest challenges with maintaining dip powder nails is dealing with regrowth. As your natural nails grow out, the dip powder can start to lift and separate from the natural nail. This not only looks unsightly, but can lead to chipping, cracking and potentially fungus or bacteria getting trapped underneath the lifted powder.
That’s why it’s crucial to stay on top of fills to prevent excessive regrowth.
New nail growth leads to lifting
Dip powder adheres best to freshly filed natural nails. As your nails grow out, the adhesion weakens which allows air pockets to form between the powder and your natural nails. This leads to lifting around the cuticles as the bond breaks down.
If left too long, the lifting can spread down the nail and cause the dip to pop off in one piece.
Typically, your nails grow about 3 to 5 millimeters per month. So every 2 to 3 weeks, you’ll have enough new growth that filing and refilling will be required to prevent lifting and keep your manicure looking tidy.
Schedule fills every 2-3 weeks
To maintain your dip manicure and prevent excessive regrowth, schedule a fill appointment every 2 to 3 weeks. This may seem frequent compared to fills for acrylics or gel polish which are needed every 3 to 4 weeks.
But dip powder does not adhere as strongly to natural nails as other enhancement options.
During your fill appointment, your nail tech will:
- File down the grown out section of your natural nails
- Gently push back and trim away any lifted or loose dip powder
- Smooth and buff the remaining dip on your nails
- Apply a fresh layer of dip to the new growth section
- Shape and polish as desired
Getting regular 2-3 week fills will help the dip stay tightly adhered and allows you to go longer between full removal and reapplication services. This saves time and money while keeping your manicure looking fabulous.
Filing down and refilling regrowth
If you allow too much natural nail growth before getting a fill, your nail tech may have difficulty getting the new dip to adhere properly. According to nail care brand Kiara Sky, anything more than 2mm of regrowth means extensive filing will be required to completely remove the lifted sections and roughen the surface for better adhesion.
Removing all of the lifted dip can result in your nails feeling thin and weak afterwards. To avoid this, stick to the recommended fill schedule. When done properly, only a small amount of filing should be needed to smooth away just the very edge of lifting around the cuticles and side walls.
Filling in new regrowth every 2 to 3 weeks is the best way to prevent lifting dip powder nails. Schedule regular appointments and be diligent about checking for any early signs of lifting. With proper fill maintenance, you can keep your dip manicure looking fabulous for weeks at a time.
Remove Properly at End of Life
No picking or peeling!
When your dip nails reach the end of their life cycle, it’s tempting to pick and peel them off. However, this can lead to damage of your natural nails underneath. Instead, properly removing your dip nails helps preserve the health of your natural nails.
Use foil method or acetone
The best removal methods for dip nails are the foil method or pure acetone. The foil method involves filing off the top layer of dip powder, applying acetone to foils placed on each nail, then wrapping them. This allows the acetone to fully saturate into the layers of powder.
After 10-15 minutes, the products lift off easily with no damage to your natural nails. Using pure acetone works similarly – file surface layer first, then soak cotton balls in acetone. Place these on each nail for 15-20 minutes for easy removal.
Helps preserve nail health
Taking time to properly remove your dip nails prevents you from picking or peeling layers off forcefully. This preserves the condition of your natural nails underneath. According to nail care experts, incorrect or rushed removal results in weakness, peeling, cracking, and thinning of your actual nails (source).
Proper technique like the foil and acetone methods protect your nails from becoming damaged. Your natural nails will thank you next time you get ready to apply your favorite dip powders again!
Conclusion
With some diligent prep and care, you can keep your dip powder manicure looking freshly-dipped for 4 weeks or longer. Focus on thorough prep, thin layers of product, and regular maintenance. Avoid water damage and get prompt refills.
Dip powders can last even longer than gel or acrylics when done properly. With these tips, you’ll be rocking long-lasting, beautiful nails in no time!