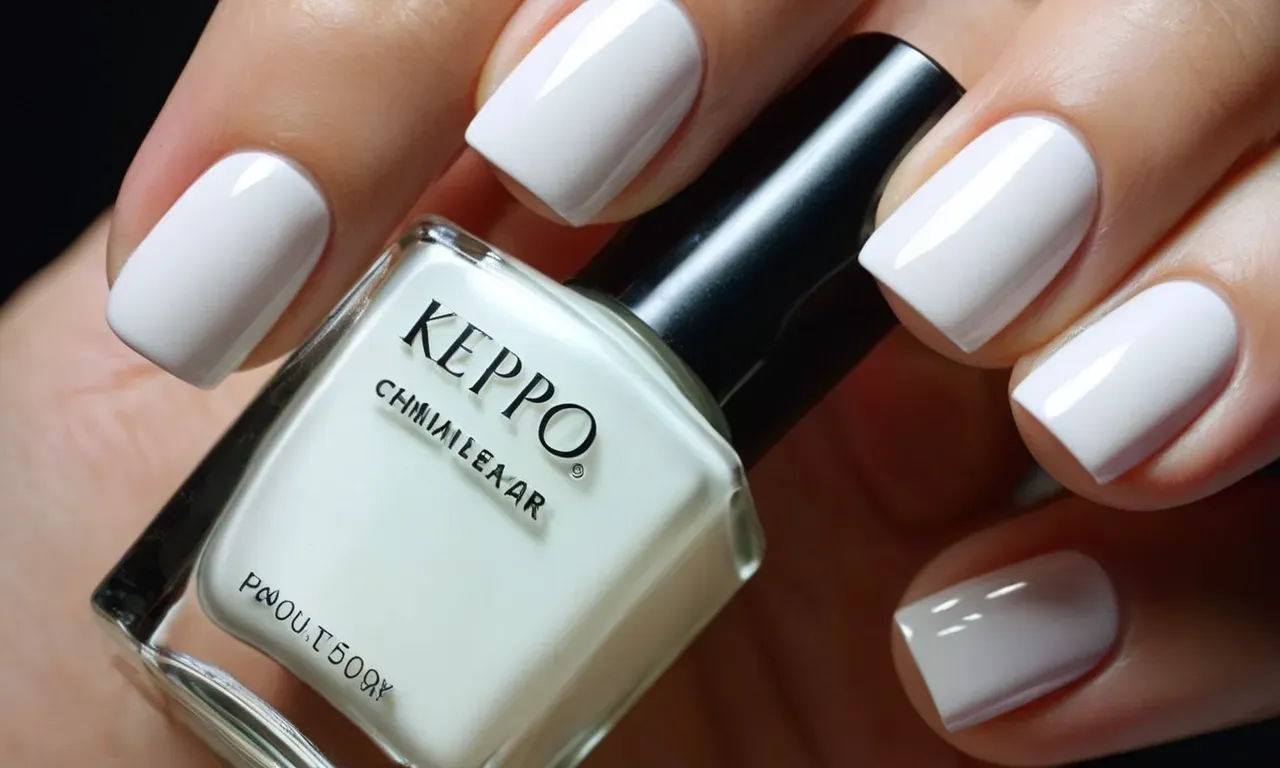
How To Make White Nail Polish At Home
There’s nothing more classic and elegant than a fresh coat of pearly white nail polish. But finding that perfect crisp white shade at the drugstore can be hit or miss. If your hunt for the ideal opaque white polish has come up empty, why not make your own at home?
Read on to learn how to whip up a salon-worthy white nail lacquer with just a few simple ingredients.
If you’re short on time, here’s a quick answer to your question: To make white nail polish, you’ll need titanium dioxide pigment, nail polish base, alcohol, and fixatives like plasticizers or silicone. Simply mix the titanium dioxide into the base until fully blended.
Then add alcohol dropwise until the polish reaches the desired consistency. Fixatives help the polish dry smoothly.
Gather the Necessary Ingredients
Making your own white nail polish at home is easy with just a few key ingredients. Here are the main items you’ll need to get started:
Titanium Dioxide Pigment
Titanium dioxide powder is the key to creating a bright white nail polish. It is an inert pigment that provides opacity and whitening capabilities. You can find cosmetic-grade titanium dioxide online or at some craft stores. Be sure to choose a food-grade powder.
Nail Polish Base
You’ll need a clear nail polish base to mix with the pigment. You can use a basic clear nail polish from the drugstore. Alternatively, you can purchase a specific nail polish base made for pigments. These bases are less viscous and mix better with pigments.
Isopropyl Alcohol
A small amount of isopropyl alcohol helps thin out the polish and enhances flow and leveling. This allows the polish to apply smoothly without streaking.
Plasticizers and Silicone
Plasticizers like dibutyl phthalate (DBP) help prevent chipping and improve flexibility. Silicone oils enhance flow and prevent bubbling. These are optional but do create a more durable, professional quality polish.
That covers the key ingredients! With just a few simple supplies, you can easily whip up a salon-quality white polish. Adjusting ratios and adding extras like glitter allows for tons of customization. Not to mention it saves money compared to store-bought!
So grab your materials and get ready for bright, beautiful nails.
Measure Out the Pigment
Making your own white nail polish at home allows you to customize the color and texture exactly how you like. An important step is properly measuring out the pigment that will give your polish its bright white color.
There are a few options for white pigments that work well in nail polish:
- Titanium dioxide – This is a very common pigment used to make white nail polish. It provides great opacity and whitening ability.
- Zinc oxide – Another option that gives a bright white color. Zinc oxide can be found in mineral makeup and sunscreens.
- Calcium carbonate – Also called chalk, this mineral powder makes an effective white pigment.
Experts recommend using titanium dioxide or zinc oxide for the best white nail polish results. These ingredients are more stable in nail polish formulas.
For a standard sized bottle (about 15 ml) of nail polish, you’ll need:
- 10-20 grams of white pigment powder
- Or about 1-2 teaspoons
It’s important to carefully measure out the pigment. Too much will make the polish thick and hard to apply. Too little won’t give you the desired bright white opacity.
Use a sensitive scale for the most accurate measurement. Or use measuring spoons to portion out the pigment powder if you don’t have a gram scale.
When adding the pigment, it’s best to do so in small increments. Mix in the powder a little at a time, testing the color as you go. This allows you to better control the shade.
Adding in 1/4 teaspoon increments is a good approach. Mix thoroughly and check the color after each addition. When you achieve the perfect bright white polish, stop adding pigment.
Getting the pigment measurement right is crucial for smooth, flawless white nail polish. Carefully portioning out the titanium dioxide, zinc oxide, or other white powder will ensure your homemade polish has a beautiful salon-quality look and feel.
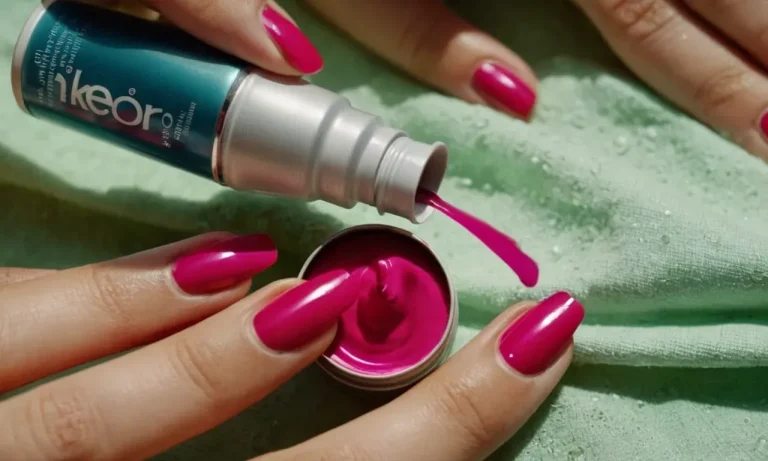
Mix the Titanium Dioxide into the Base
Adding titanium dioxide powder is a key step to transform regular clear nail polish into a bright white shade. Here are some tips for properly incorporating the pigment:
Choose the Right Titanium Dioxide
Opt for cosmetic-grade titanium dioxide to ensure purity and safety. Food-grade is also acceptable. A fine powder with a particle size around 0.2 microns works best to distribute evenly and provide opacity.
Measure Out the Amount
A good starting amount is 1 teaspoon of titanium dioxide per 2 fluid ounces of nail polish base. You can adjust up or down from there depending on the level of coverage you want.
Disperse Evenly
Add the powder very slowly while mixing to prevent clumping. Use a plastic or silicon spatula to break up any aggregates as you go. Thorough incorporation is vital for an uniform, smooth polish.
Mix Well
After adding all the pigment, mix vigorously for 5-10 minutes to fully disperse the particles. This prevents settling later on that can alter the color or application.
Check the Consistency
Test the viscosity by dipping a nail brush into the mixture. An ideal white polish should flow off the brush smoothly and not be too thick or thin. Adjust with more base or titanium dioxide if needed.
With the proper titanium dioxide ratio and mixing method, you’ll have a bright blank canvas for nail art or a perfect neutral polish on its own. For best results, make sure to store properly after mixing.
Thin the Polish with Alcohol
Thinning out thick nail polish can help make application easier and smoother. Here are some tips for thinning out white nail polish at home:
Use Clear Polish Thinner
Clear nail polish thinner is specifically designed to thin thick polishes. Add a few drops at a time directly into the bottle of white polish and roll gently between palms to mix. Test consistency on a piece of paper or spare nail tip before applying to nails. Add more thinner gradually if needed.
Try Nail Polish Remover
Acetone-based nail polish remover can also be used to thin very thick polishes. However, only use a tiny amount – too much acetone can break down the formula. Start with 1-2 drops per 5ml of polish. Roll bottle between hands to incorporate.
Use Isopropyl Alcohol
Isopropyl alcohol, often called rubbing alcohol, works to thin nail lacquer. Put 1-2 drops into the bottle of thick white polish and mix thoroughly. Check consistency before painting nails. Add another drop or two if it needs more thinning. Be conservative as too much alcohol can make polish gummy.
Considerations When Thinning
- Only thin small amounts at a time, not the whole bottle
- Thin in a separate container if concerned about ruining polish
- Test thinned polish first before painting all nails
- Store thinned polishes away from heat and sunlight to maintain integrity
- Avoid over-thinning as it may cause streaky application
With a few household products and gentle mixing, thick nail lacquer can be thinned out for easier use. Remember to add thinning agents sparingly and check consistency along the way. Happy polishing!
Add Fixatives for an Even Finish
Plasticizers
Plasticizers are crucial ingredients that help give nail polish an even, smooth finish. They prevent chipping and cracking by making the polish more flexible. Two of the most commonly used plasticizers in nail products are dibutyl phthalate (DBP) and camphor.
DBP helps prevent polish from becoming brittle and flaky. It allows the polish to better adhere to the nail surface. However, there are some health concerns around DBP, as it can potentially disrupt hormone function. Many brands have reformulated to remove DBP.
Camphor is a natural plasticizer derived from the wood of the camphor tree. It has a cool, minty aroma and leaves a smooth finish. Camphor is considered safer than synthetic options like DBP. However, some people may be sensitive to camphor and experience irritation.
Always do a patch test before wider use.
Other plasticizer options include acetyl tributyl citrate (ATBC), which is made from non-toxic citric acid. Polymer plasticizers made from acrylic are another option. The ideal plasticizer creates a durable, chip-resistant polish without negative health effects.
Silicone
Adding silicone is another way to create an impervious, even finish with your homemade nail polish. Silicone provides a protective barrier that helps polish self-level on the nail. This prevents streaking and an uneven look.
Common silicones used in nail products include cyclopentasiloxane and dimethicone. Cyclopentasiloxane is a volatile, quickly-evaporating silicone that helps polish dry smoothly and quickly. Dimethicone is a conditioning oil that provides a slick, glossy finish.
Silicone oils can repel water, which prevents chipping and peeling. Start with small amounts of silicone, like 5% of the total formula, as too much can make polish gummy. Try methicone or phenyl trimethicone for a durable yet flexible finish.
While silicones help create flawless polish, some avoid them due to potential health and environmental concerns. Alternatives like lecithin and arrowroot powder can provide similar smoothing effects. Experiment to find the right fixatives for your ideal homemade polish.
Conclusion
Learning how to make your own nail polish at home opens up a world of color possibilities. With just a bit of practice, you can create the perfect white (or any other shade!) tailored to your preferences. No more guessing games in the drugstore aisle.
Take control and blend the ideal colors and textures for your nails.
Next time your nails are in need of a fresh white coat, grab the ingredients and mix up a batch yourself. Making it yourself means quality ingredients and custom results. For more DIY beauty tricks, check out our nail art ideas and nail care tips.