How To Make Gel Nails Look Shiny Again
If your gel manicure is starting to look dull and faded, don’t worry – with a little TLC, you can bring back the shine and luster to your nails. Gel polish naturally loses its glossy finish over time, but properly caring for your manicure and doing gel nail polish touch-ups can keep your nails looking freshly-done.
If you’re short on time, here’s a quick answer to your question: Cleaning nail beds with gel cleanser and gently buffing the surface of the gel polish with a buffing block before applying fresh top coat can help restore shine to dull gel nails.
Thoroughly Clean Nails Before Applying Top Coat
Use gel nail cleanser to prep nails
Before applying a fresh top coat to your gel manicure, it’s crucial to thoroughly clean the surface of the nails. Gel nail polish can get stained or dull looking over time from exposure to things like hand sanitizer, soap, lotion, and just general wear and tear.
Using a gel nail cleanser is the best way to prep the nails prior to topping off your manicure.
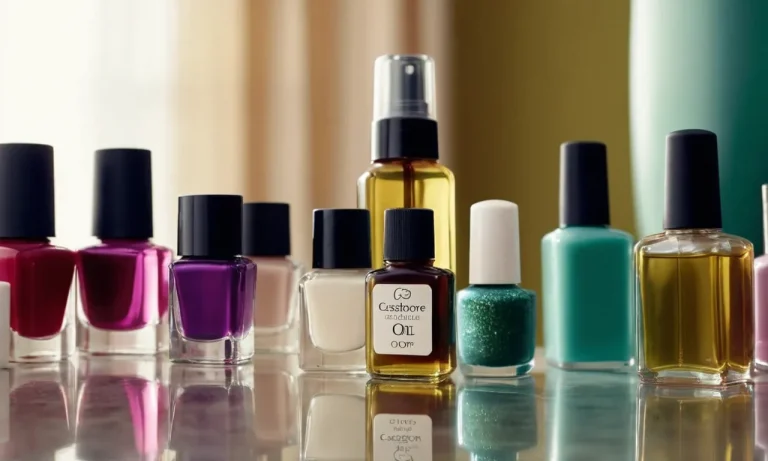
Look for a cleanser made specifically for gel nails, like CND Shellac Gel Polish Cleanser or Essie Apricot Cuticle Oil. Apply a small amount to a cotton pad or lint-free wipe and gently rub over the entire surface of each nail.
The cleanser will dissolve any residue and prep the nails for maximum shine.
Gently file surface of gel polish
After cleaning, you’ll also want to gently buff away the top layer of the gel polish. This removes any damaged or stained upper layer and exposes the fresh color underneath. Use a fine grit nail file or buffer block and lightly go over the surface of each nail using short, light strokes.
Don’t file too aggressively or you could thin out the gel layers.
Make sure to brush away any dust after buffing. The nails should look refreshed and lightly abraded – this roughness will help the new top coat layer adhere properly.
Wipe nails with alcohol prep pad
The final prep step is to wipe each nail with an alcohol prep pad or cotton ball soaked in rubbing alcohol. This removes any fine dust and ensures the nails are squeaky clean for optimal top coat application.
Take your time and carefully wipe down each nail. The alcohol will dry quickly, leaving the nails sanitized and ready for a shiny new top coat!
Following these simple prep steps of cleansing, gently filing, and wiping down with alcohol allows for a smooth, even application of the top coat. Taking the extra few minutes to properly prep the gel manicure will help the new top coat layer bond and achieve that salon-quality glassy shine.
Apply Thin Layer of Gel Top Coat
Don’t apply too much top coat
When applying a gel top coat, it’s important not to use too much product. Using a thick layer of top coat can lead to shrinking or cracking as it cures under the LED lamp. Aim for a smooth, thin layer that just evenly coats the nails.
Wiping away any excess around the cuticles and edges before curing will help prevent thick edges that can easily peel off.
Cure top coat per manufacturer instructions
Be sure to cure the gel top coat according to the brand’s instructions, usually 30-60 seconds under an LED lamp. Undercuring can lead to a tacky finish, while overcuring risks heat spikes that can damage the nails. When in doubt, cure for the full recommended time to ensure proper setting.
Wipe nails after curing
Once cured, wipe each nail with a lint-free pad or brush dipped in 99% isopropyl alcohol. This removes any tacky residue on the surface for a smooth, glossy finish. Be gentle when wiping – you want to remove the sticky layer, not scrub off the top coat.
Let the nails air dry for a minute or two after wiping before applying cuticle oil or hand cream.
Following these simple steps when applying a gel top coat helps create a flawless, glass-like shine. Allowing proper thin application, full curing, and surface cleaning gives the nails a salon-perfect finish that will turn heads.
With the right technique, it’s easy to keep gel manicures looking freshly-done for weeks at a time!
Get Gel Manicure Fill-Ins
Schedule fill-ins every 2-3 weeks
To keep your gel manicure looking fresh and flawless, it’s important to get fill-ins done regularly every 2-3 weeks. The gel polish lasts around this long before growth starts to show at the cuticle area and the shine begins wearing off.
Scheduling appointments ahead of time ensures you won’t go too long between fill-in sessions and damage the gel or your natural nails underneath.
Many salons allow you to pre-book standing appointments so you have a guaranteed time slot available every couple of weeks without having to call and check on availability. This makes it easy to stay on top of maintaining that gel perfection!
Technician will buff away shine, replace it with fresh layers
When you come in for gel fill-ins, the manicurist will get to work restoring the look of your manicure. First, they’ll gently buff off the surface shine with a nail file or buffer. This removes the top layer of gel polish so new product can adhere properly.
Next, your technician will use a gel cleanser and primer to prep the natural nail plate for fresh layers of color. This helps the new polish grip nicely. After applying your color choice and curing it with an LED or UV lamp, she’ll finish up with a glossy top coat to seal everything in and bring back that coveted glassy sheen.
In most cases, a fill-in session only requires one new layer of gel polish to make your mani look like new again! The process preserves your natural nails underneath and lets you change up polish colors if desired.
Use Cuticle Oil for Extra Hydration
Keeping your cuticles hydrated is one of the best ways to make your gel manicure shine. Hydrated cuticles help the gel adhere better to your nails, resulting in a flawless finish that gleams. Using cuticle oil is an easy and effective way to hydrate your cuticles and nails.
Softens cuticles and hydrates nails
Cuticle oil is formulated with nourishing ingredients like vitamin E, jojoba oil, and essential oils. When massaged into the cuticles and nails, these ingredients work to deeply moisturize and soften dry, ragged cuticles.
The emollients in cuticle oil help seal moisture into the nails, hydrating the nail plate and improving overall nail health.
Regular application of cuticle oil helps prevent hangnails and other cuticle damage that detracts from the look of your manicure. The hydration provided by cuticle oil also helps prep the nails for gel application by allowing the gel to glide on smoothly and adhere tightly.
Makes nails look healthier and shinier
Well-hydrated nails have a visibly smoother, glossier appearance. The moisturizing effects of cuticle oil give nails a plumper, more vibrant look. Vitamin E and other antioxidants in cuticle oil also promote strong, healthy nail growth.
In addition, polished nails simply reflect light better when they are well-hydrated. The water content helps light bounce off the nails, creating that sought-after wet shine. So essentially, keeping your cuticles oiled maximizes the luminous, mirror-like finish of your gel manicure.
Applying cuticle oil once a day is recommended for hydrating your nails. Massage just a drop or two into the nail beds and cuticles, pushing back the cuticles gently. The best time to apply cuticle oil is after removing old gel polish, during the manicure process, and after washing hands.
For added nourishment, apply a thicker layer of oil and allow it to soak in before bedtime. With this simple regimen, you can keep your cuticles soft and nails shining their brightest!
Avoid Prolonged Water Exposure
When it comes to keeping your beautiful gel manicure looking flawless, avoiding too much contact with water is key. Water can cause the polymer layers of gel polish to break down prematurely, leading to peeling, cracking and dullness.
Water can make gel manicures peel and dull faster
The polymer layers that make up gel nail polish harden and set under UV lamps. However, exposure to water over time can break down the bonds between these layers. This allows moisture to seep into the layers and between the gel and natural nail surface below.
As moisture accumulates, it creates bubbles and cracks in the gel layers that worsen over time. This is what causes the unsightly peeling and lifting you’ll notice around the edges and tips of your nails. It also causes the gel surface to look foggy and lose its shine.
Wear gloves for household chores and swimming
To help your gel manicure last, protect your nails from excess moisture by slipping on waterproof rubber gloves when doing household chores involving water. For example, wear gloves when:
Also, wear gloves in the pool or ocean to create a protective barrier against chlorine and salt water, which can be very drying and damaging to gel polish.
Pat nails dry after washing hands
While quick hand washing shouldn’t harm your gel manicure too much, over time, excess moisture around the nails can cause lifting and peeling. So remember to gently pat nails dry after washing, rather than rubbing vigorously with a towel. The less prolonged moisture exposure, the better.
You can also apply an oil around the nail edges and cuticles after washing, like vitamin E or jojoba oil, to counteract drying from any small amount of water exposure. This helps seal in moisture and prevents lifting and peeling.
Conclusion
While gel manicures are long-lasting, they can lose their shine over time. With some simple at-home care and maintenance like buffing, applying fresh top coat, and staying hydrated with cuticle oil, you can keep your gel nails looking freshly polished.
Getting fill-ins every few weeks will also refresh the gel and bring back the glossy just-done look. With proper care, your gel manicure can maintain its flawless shine and luster.
Taking a few minutes to buff, hydrate and add top coat to dull gel nails will have them looking salon-perfect again in no time!