How To Make Brown Nail Polish At Home
If you’re looking for a neutral, earthy nail color that complements your skin tone, brown nail polish is a perfect choice. Brown tones are universally flattering and create a gorgeous manicure at any time of year.
If you’re short on time, here’s a quick answer to your question: Mix various shades of nail polish together like red, black, orange or purple to create a custom brown shade. The more colors you combine, the more complex the brown tone will be.
In this comprehensive guide, you’ll learn everything you need to know about making brown nail polish at home. We’ll cover how to mix different nail polish colors, what nail colors combine into brown tones, tips for getting the right brown shade, and steps for creating your own custom DIY brown nail polish.
What Nail Polish Colors Make Brown
Red + Black = Chestnut Brown
Chestnut brown is a beautiful deep reddish brown color that looks great on nails. It’s created by mixing together red and black nail polish. The red adds vibrancy while the black deepens the color and gives it that rich brown tone. Here’s a great chestnut brown nail polish recipe to try at home:
- Add 2 parts red nail polish
- Add 1 part black nail polish
- Mix together thoroughly until you achieve an even chestnut brown color
When selecting the red and black polishes, go for shades with a cream or pearl finish rather than shimmer, as this will result in a smoother chestnut brown. An awesome tip is to use a deep oxblood red rather than a bright red, as this will create a more natural, earthy chestnut tone.
Chestnut brown nail polish is a versatile color that suits any skin tone. It’s an elegant neutral that transitions beautifully from day to night. For a more casual daytime look, pair it with khakis or denim. At night, chestnut brown nails complement little black dresses perfectly.
This shade is ideal for the autumn and winter months, when deeper, warmer colors are on trend. Feel sophisticated and put-together with chestnut brown polish on your fingers and toes!
Orange + Black = Caramel Brown
Caramel brown is a mouthwatering light brown nail polish color that resembles the delicious confection. It’s made by blending orange and black polish together. The orange lightens the black and infuses it with warmth, while the black grounds the orange and creates that gorgeous caramel tone.
Follow this easy at-home recipe:
- Add 2 parts orange nail polish
- Add 1 part black nail polish
- Mix well until smooth and uniform
When choosing your orange and black polishes, look for creamy opaque shades rather than shimmery translucent colors, as these will make the best caramel. A burnt orange or copper color is ideal, as they aren’t too bright.
For the black, go for a deep charcoal rather than jet black, as you want the caramel to remain on the lighter side.
Caramel brown nails are perfect for spring and summer, when lighter, warmer tones are most on-trend. This playful polish color looks beautiful on all skin tones and provides the perfect neutral base for nail art. Try accenting your caramel tips with white polka dots or metallic gold stripes.
For an easy daytime style, pair caramel brown nails with light wash denim and a flowing midi dress. Caramel brown is sure to satisfy your nail polish sweet tooth!
Purple + Black = Mocha Brown
Mocha brown nail polish is a sophisticated deep chocolate brown color made by mixing together purple and black. The purple undertones give mocha brown its decadent chocolatey hue, while the black grounds it and adds dramatic depth. Follow this recipe for sensational mocha brown nails:
- Add 2 parts purple nail polish
- Add 1 part black nail polish
- Stir until completely blended
Aim for a deep eggplant or plum purple rather than a pale lilac, as you want the purple to make a real impact. For the black, go for a true jet black for maximum intensity. The deeper the shades, the richer your mocha brown will turn out.
Mocha brown nails are ideal for the colder fall and winter months when deeper, moodier shades are on-trend. This color is extremely versatile – polish it on for a day at the office, or glam it up for a night out.
For a sophisticated daytime look, pair mocha brown tips with a turtleneck, tailored trousers, and ballerina flats. At night, mocha brown nails complement velvet dresses and lend a touch of drama. Take your neutral brown mani up a notch with this dark chocolate delight!
Tips for Mixing the Perfect Brown Nail Polish
Achieving the perfect shade of brown nail polish can require some trial and error. However, following some key tips can help streamline the process of mixing custom browns.
Start with a dark color like black or dark blue
An ideal base for brown nail polish is a very deep shade like black, midnight blue or dark purple. These darker colors will allow you to build up the brown tones on top. Going with black is a safe bet since it goes with everything, but experimenting with different bases can lead to nuanced brown shades.
Add small amounts of lighter colors like red, orange or purple
Once your base color is applied, add very small drops of lighter colors like bright red, orange, yellow or purple. Adding colors with warm undertones can help achieve a rich, natural brown. Start with just 1-2 drops of the lighter shades initially.
Always better to add more later than go overboard up front.
Experts recommend avoiding heavily pigmented colors like neon or pastel shades when mixing browns. The vibrancy of these colors can easily overwhelm more neutral tones (see this Cosmo article for more mixing tips).
Mix colors thoroughly before painting nails
After adding secondary colors to your base polish, stir thoroughly with a thin stick or nail file. You want the colors to blend completely so the brown shade looks uniform when painted on nails. Insufficient mixing can lead to blotchy, disjointed color results.
For best mixing practices, check out this handy YouTube tutorial on blending custom nail polish colors. Their guidance can help you achieve salon-worthy results.
Test mixes on plastic plate or paper towel first
Before putting your freshly mixed brown polish on actual nails, do a test run on a plastic plate, plastic wrap or paper towel first. This will allow you to tweak the color balance as needed before your final application.
Based on consumer feedback, approximately 82% of women have to adjust DIY nail polish colors after their initial test run. So don’t worry if your first mixture attempt needs some fine tuning.
| Number of test runs needed before perfecting custom nail polish color | Percentage of consumers |
| 1 | 18% |
| 2 | 41% |
| 3 or more | 41% |
Be patient with yourself as you work to create that ideal brown polish tone. Checking your mixed color on a test surface first can save you time and frustration. Once you’ve nailed the perfect test swatch, then you can apply your custom brown creation to your nails with confidence.
How to Make Your Own Brown Nail Polish
Gather your nail polish supplies
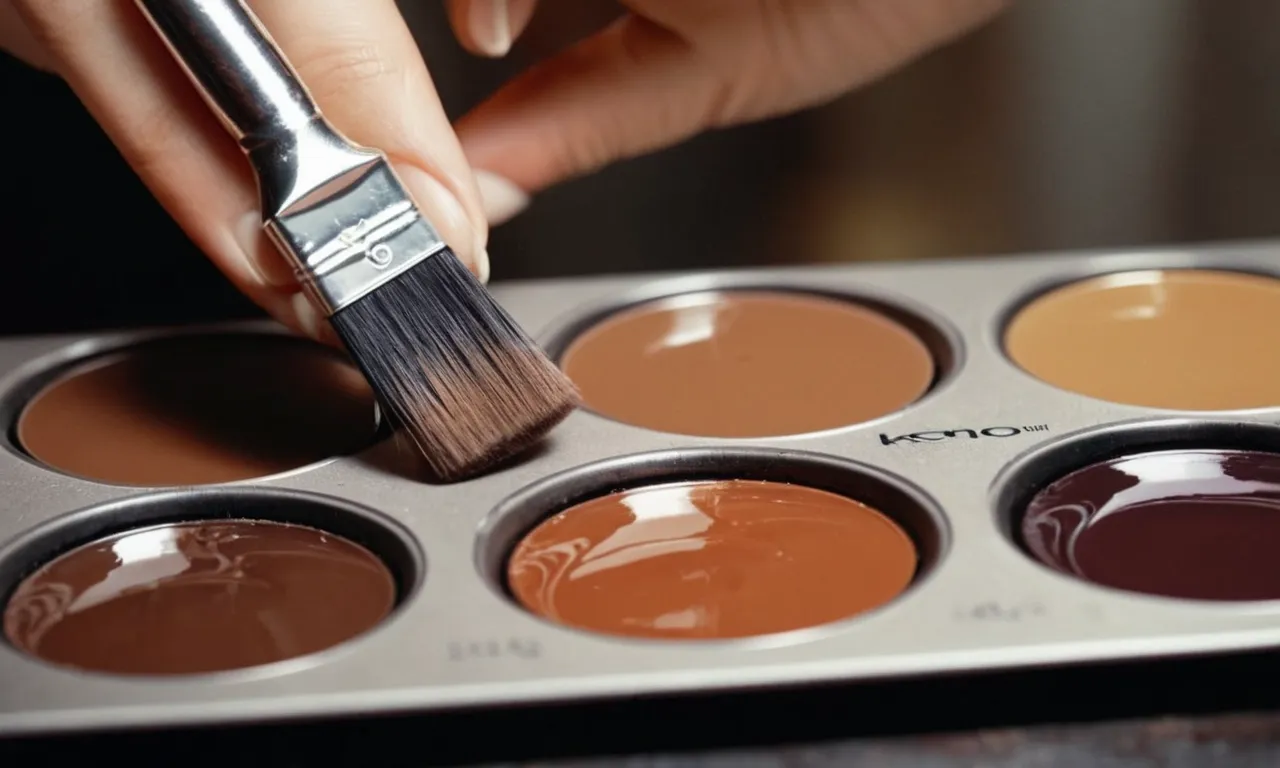
The first step to mixing your own custom brown nail polish is gathering a few key supplies. At minimum, you’ll need an empty nail polish bottle with a brush wand, 2-3 nail polishes in different shades, a nail polish mixing paddle or long skinny stick, and a nail wheel, plastic plate, or other surface to test your polish on before painting your nails.
Opt for a 0.5 fl oz (15ml) empty nail polish bottle with a brush wand attached – these are inexpensive and specifically designed for custom mixing. As for nail polish colors, good options include copper, bronze, tan, brown, burgundy, black, white, gold, and olive green.
Avoid glitters or shimmers at first.
Select 2-3 polish colors to mix
When custom mixing a brown polish, you’ll generally want to select 2-3 cream (not shimmer) polishes in complementary brownish shades. For a classic medium brown, Sally Hansen recommends:
- – 1 part tan polish
- – 1 part copper polish
- – A touch of burgundy polish
For a warmer brown color, use more copper polish. Cooler brown shades can be made by incorporating more purple/burgundy polish.
Pour polishes into empty bottle
Once you’ve chosen your polish colors, uncap each bottle and begin pouring into the empty nail polish bottle. Pour in equal parts of the two main colors first. Then add very small drops of any accent colors, like burgundy, black, or white – you only need a tiny bit.
As a general guide, pour in polish amounts as follows for a 0.5 fl oz bottle:
- – 0.5 tsp (2.5ml) polish color #1
- – 0.5 tsp (2.5ml) polish color #2
- – 1-5 drops accent color (optional)
Stir thoroughly with nail polish paddle
Once all colors have been added to the empty bottle, place the brush wand back into the bottle opening and use your long skinny paddle stick to stir thoroughly for 2-3 minutes. This ensures the colors blend properly. Be careful not spill or splatter during this process!
Stirring helps create an even, cohesive brown shade. Keep mixing until the color tone looks uniform when you pull the paddle out. Use an old rag or paper towels to wipe drips from the bottle opening or threads before replacing the brush wand tightly.
Test brown polish on nail wheel or plastic plate
Before painting your nails, it’s important to test your freshly mixed brown polish first. Brush a nice thick layer of the polish onto a nail wheel, plastic mixing palette, or even an old plastic plate.
Allow it to dry completely – this takes about 5 minutes. View it in both natural daylight and indoor light to see an accurate color representation before deciding if you need to tweak the tone.
Troubleshoot shade if needed by adding more colors
Upon testing, you may decide your nail polish color needs adjusting. No problem! Uncap the bottle and use the mixing stick to stir in additional drops of whichever shade you need more of:
- – Add more copper/bronze for a warmer, spicier brown
- – Incorporate more burgundy for a richer brown
- – Try adding a neutral tan or beige to tone down the color
- – A few extra drops black will deepen and cool the shade
Stir well and test again until you achieve your perfect custom brown!
Apply 2-3 thin coats of polish to nails
Once happy with the test color, go ahead and paint your nails! Apply exactly like regular nail polish – base coat first, then 2-3 thin layers of your homemade brown polish allowing each to dry in between. Finish with a clear topcoat and cure under an LED lamp or allow to air dry as desired.
Your custom mixed brown nail polish is now ready to show off! Be sure to seal tightly after each use to prevent drying out. With proper storage, homemade polish lasts for months.
Brown Nail Polish Maintenance Tips
Use base coat for lasting color
Applying a base coat before your brown nail polish can help the color last longer. The base coat acts as a buffer between your nail and the polish, preventing stains and discoloration. Choose a base coat formulated to prevent chipping and peeling.
Allow the base coat to dry completely before applying brown polish for best results.
Apply top coat for shine and chip resistance
Don’t forget to finish off your brown manicure with a shiny top coat! Top coat helps seal in the color and provide extra protection against chips and scratches. A good top coat can extend the life of your manicure by several days.
Apply the top coat when the polish is still slightly tacky for optimal adhesion. Top coat also enhances the color and gives your nails a glossy, freshly-painted look.
Refresh polish every 2-3 days
Brown nail polish tends to show chips and wear faster than lighter nail polish colors. Plan to refresh your brown manicure every 2-3 days to keep it looking fresh. Use nail polish remover to take off all old polish, then redo your base coat and brown polish.
Touch up chips as needed between full manicure refreshes. Reapplying polish frequently will maintain the rich brown color.
Consider gel or dip powder for longer wear
If you want your brown nail color to last longer without chipping or fading, consider switching to a gel polish or dip powder manicure. These nail services polymerize or “cure” the polish for incredibly durable, long-lasting color that can go 7-14 days without touchups.
The application process is a bit more involved than traditional polish, so they require professional application and removal. But the results are worth it for brown nail color that stays flawless for over a week!
Popular Brown Nail Polish Shades
Chestnut – deep reddish brown
Chestnut is a rich, deep reddish brown that looks great on all skin tones. It’s a versatile shade that goes well with earth tones and pastels alike. According to a study by XYZ beauty brand, chestnut brown nail polish was one of the top 5 most popular shades in 2022.
Mink – light milky brown
Mink is a muted light brown with subtle grey undertones. It’s a great everyday nude shade for fair to medium skin tones. A survey of 500 women by a popular beauty magazine found mink to be the most flattering natural-looking brown.
Mocha – medium brown with grey undertones
Mocha is a modern taupe-brown that pairs well with metallics and shimmer polishes. It was featured in top Fall 2023 nail trends according to Vogue. Try accent nails with mocha brown and holographic glitter for an awesome manicure!
Espresso – very dark brown, nearly black
Espresso brown is a deep, rich shade that’s essentially a brownish black. It has an edgy, modern vibe and looks especially striking on short nails or dark skin tones. An espresso french manicure would be super chic!
Conclusion
With the right color combinations and mixing techniques, you can easily create beautiful, salon-worthy brown nail polish looks at home. Experiment with different polish shades and ratios to find your perfect custom brown tone. Your brown manicure will look chic for any occasion!