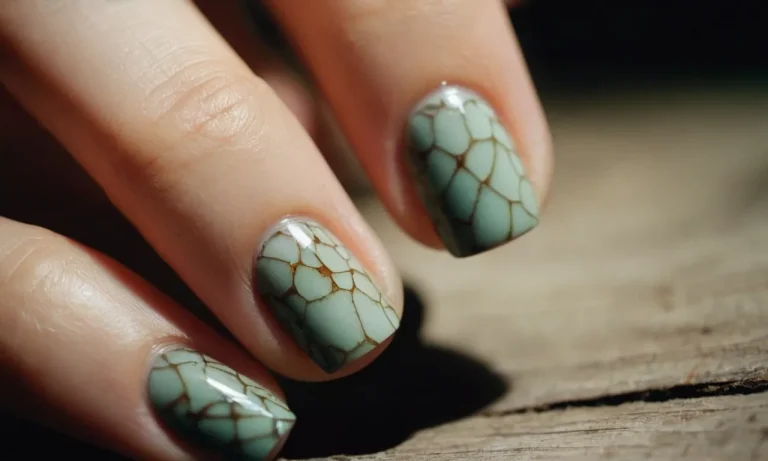
How To Fix A Broken Nail With Gel Polish On
Dealing with a broken nail can be frustrating, especially when you have a fresh gel manicure. Nothing ruins a perfect mani faster than a cracked or split nail. If you’re short on time, here’s a quick answer to your question: Use nail glue or a tea bag and nail glue to patch the broken nail, then seal it with gel polish.
Read on to learn the steps in detail.
In this comprehensive guide, we’ll walk you through the best methods for repairing a broken nail with gel polish already applied. You’ll learn tips for temporary and long-term fixes using household items. We’ll also cover how to avoid further damage to the nail while it grows out.
Assess the Damage
When you notice a crack or break in your gel manicure, it’s important to take a close look at the damage before deciding how to fix it. Here are a few things to consider:
Look at the size and location of the break
Examine the broken nail carefully. Is the break small and near the tip of the nail? Or is it a large crack extending down toward the nail bed? The size and location of the damage will determine the best repair method.
A tiny chip at the end of your nail may only need a touch-up application of gel polish. However, a full break across the entire nail will require more intense repair.
Determine if the nail bed is exposed
Check to see if the crack in the gel polish has exposed any part of your natural nail or nail bed. This is important for two reasons:
- An exposed nail bed could allow water or bacteria to enter, increasing infection risk.
- If the break extends deep enough to reveal new nail growth, this can prevent gel polish from adhering properly during repair.
If the break has exposed a large part of your nail bed, it’s best to remove all the gel polish and start fresh after the nail has healed.
Consider removing the gel polish if needed
Even if the break itself is small, there are times when it’s wisest to soak off all of the gel polish and reapply a new manicure:
- If the break resulted from trauma like a closing door, the remaining gel may have weakened bonds.
- If you notice multiple cracks or chips, the gel polish may be nearing the end of its durability.
- If the break exposed a large area of new nail growth, this can prevent proper adhesion when repairing.
Removing all the gel allows you to start over with a fresh, seamless manicure that will last. But if the break is minor, you can likely get away with a targeted gel repair.
Try a Temporary Fix with Household Items
Use a tea bag and nail glue for splits or cracks
If you have a small split or crack in your gel manicure, you can temporarily repair it with items commonly found around the house. Tea bags contain tannins that can help mend fingernails when applied topically. Here’s what to do:
- Cut a small piece of tea bag to fit over the cracked or split section of your nail.
- Apply a thin layer of nail glue over the tear and press the tea bag piece on top.
- Apply another coat of nail glue to seal the tea bag in place.
- File the edges smooth.
The tea bag acts like a bandage, helping to hold the nail together. The tannins may also help stimulate keratin production to mend the nail. This fix will last 2-3 days before you’ll need to reapply. But it can temporarily patch things up if you can’t get to the salon right away!
Brush on layers of nail glue for minor breaks
For minor cracks or chips in your gel manicure, you can apply coats of nail glue as a quick fix until you can properly repair things. Here’s the method:
- Make sure the area around the crack is clean and dry.
- Apply a thin layer of nail glue over the cracked section, letting it dry between coats.
- Build up 3-5 layers of glue, allowing each to dry for 60 seconds before adding more.
- File the edges smooth for a tidy appearance.
The layers of nail glue act like gel polish to seal the cracked area. This can temporarily patch things up for a few days. But be careful not to use too much glue as it can make your nail feel stiff. And avoid getting glue on your skin or cuticles.
File the edges smooth when dry
Once you’ve applied either the tea bag and nail glue fix or built up layers of nail glue, it’s important to file the edges smooth. This helps blend the repair seamlessly into your existing gel manicure. Follow these tips for filing:
- Use a fine-grit nail file in one direction to get a smooth edge.
- Avoid filing back and forth as this can weaken the nail.
- Don’t file into your natural nail, just shape the repair material.
- File just until even with the rest of the gel polish.
- Buff gently to blend and shine.
Proper filing ensures your temporary fix looks neat and tidy. It also prevents snagging or chipping. File gently to avoid putting too much pressure on the cracked nail. And be patient – filing and buffing to get just the right shape can take practice!
Repair the Nail with Gel Polish
Prep the nail by removing shine
Before applying gel polish to fix a broken nail, it’s important to properly prep the nail. Start by using a nail file to gently remove any shine or slick layer on the natural nail. This helps the gel polish adhere better. Filing the nail also smooths any ridges or uneven surfaces.
Be careful not to file too much or damage the nail further. Just a few light strokes is all you need. You can also use a nail buffer block to gently buff the nail and remove shine. Avoid using acetone or nail polish remover prior to gel polish application, as this can dry out the nails.
Apply gel primer base coat
After prepping the nail, apply a thin layer of gel nail primer or base coat. This helps the gel polish bond properly to the natural nail. Apply the primer over the entire nail, avoiding any skin around the nail.
Let the primer dry fully before moving onto the next step, usually 30 seconds under an LED lamp. The primer creates a tacky surface for gel polish to grab onto. Using a primer is especially important when applying gel over broken nails, as it helps reinforce and build up the nail.
Brush on layers of gel polish to fill the nail
Here’s where you’ll use the gel polish itself to fill in the broken part of the nail and strengthen it. Apply a layer of gel polish, focusing on covering the crack or tear in the nail completely. Make sure to cap the tip of the nail so the entire nail is sealed with gel polish.
Cure the first layer under an LED or UV lamp for 30-60 seconds. Apply at least 2-3 additional thin layers of gel polish, fully curing between coats, to build up and smooth over the nail. This layers the gel product over the damaged nail, helping reinforce it.
The multiple layers essentially create a protective gel cast over and into any cracks or splits in the nail. Take care not to apply too thick of layers, as this can weaken or peel off.
Seal with gel top coat and cure
Finish off by applying a gel top coat over the built-up gel polish layers. This helps seal and protect the nail repair. Apply top coat over the entire nail and tip, then cure under the LED lamp as directed, usually 30-60 seconds.
The top coat helps lock in the polish and creates an ultra glossy, durable finish. It seals the free edge and helps prevent the gel polish from lifting or peeling up. This completes the gel polish nail repair.
Avoid picking at the nail and file only gently, as the new layers of gel need about 2 weeks to fully and securely attach to the natural nail.
Using layers of gel polish is an easy, quick way to fix a cracked or broken nail at home. The gel product helps reinforce and fill nails tears better than regular polish. Just be sure to prep the nail properly first and apply thin, even coats. Let each layer cure fully under the lamp.
Finish with a glossy topcoat to help the nail repair last 2+ weeks. Gel polish is durable and flexible enough to withstand daily activities without cracking again.
Avoid Further Damage While the Nail Grows Out
Moisturize to keep nails flexible
Keeping your nails moisturized is key for avoiding further damage as your broken nail grows out. Using cuticle oil, hand cream, or nail treatments that contain moisturizing ingredients like vitamin E, shea butter, and jojoba oil can help keep your nails flexible so they don’t become brittle and prone to more breaks (1).
Massage the oil or cream into your cuticles and nails at least twice per day. Consistent moisturizing will help the layers of your nail adhere together better and prevent cracks and peeling.
Avoid picking or peeling the repaired nail
It can be tempting to pick at or peel the repaired section of your broken nail, but this can lead to even more damage. The key is to leave the repaired nail alone as much as possible while the natural nail grows out underneath it.
Picking or peeling can cause the nail to separate from the nail bed, increasing the chances of infection. It also creates rough edges that are more prone to snagging and catching on things (2). If you feel tempted to pick, try rubbing cuticle oil on the nail or keeping your hands busy with another task.
Use cuticle oil daily
Using cuticle oil around your nails is one of the best ways to nourish the nail bed and improve nail health. The oil moisturizes the cuticles and nails, while also stimulating circulation to encourage faster nail growth (3).
Apply a drop of oil to each nail and cuticle area in the morning and before bed. Gently massage in the oil until it’s absorbed. This simple habit helps lock in moisture so your nail stays strong and supple.
As your nail grows out, the well-hydrated nail bed will improve the integrity of the new sections of nail.
File gently while shaping
As your natural nail grows in under the repaired section, you’ll need to shape and file the nail so it has a smooth edge. File gently in one direction, using a fine emery board. Avoid sawing back and forth aggressively, as this can damage the nail layers.
Focus on filing the surface of the natural nail just until it’s even with the acrylic or gel overlay (4). Don’t try to thin out or taper the artificial nail, since this could weaken its adhesion before the natural nail has grown all the way in.
With a light touch, you can keep the edges smooth without risking more breaks.
When to See a Professional
For a severe break with detached nail
If you have a severe nail break where a large piece of the nail has broken off or become fully detached, it’s best to see a professional nail technician or dermatologist. Trying to fix it yourself risks further damage and infection.
A professional can properly trim and shape the nail, as well as assess if the nail bed or surrounding skin is damaged. They may also apply antibiotics and advise you on proper care as the nail grows back to avoid future breaks.
If the nail bed is damaged
In addition to a broken nail, you may also see damage to the nail bed (the skin underneath the nail) such as a cut or tear. This requires professional medical attention to properly disinfect and bandage the area to avoid an infection. Your doctor may also prescribe oral antibiotics.
Allowing the nail bed to heal fully before applying gel polish again is important.
For persistent splitting and peeling
If you constantly have issues with cracking, splitting, or peeling nails despite good nail care, see your dermatologist. According to the American Academy of Dermatology, this can be a sign of an underlying condition causing brittle nails, like hypothyroidism, fungal infection, psoriasis, or vitamin deficiency.
Your dermatologist can determine the cause and recommend tailored treatments to strengthen your nails.
If an infection is suspected
Signs of a possible nail infection include redness, swelling, foul odor, discharge, thickening nail, or pain. This requires prompt medical attention to prevent the infection from worsening and spreading. Your doctor can prescribe oral or topical antifungal medications.
Leaving nail fungus untreated risks permanent nail damage and the infection spreading to other nails and skin.
Conclusion
Repairing a broken nail with gel polish can be a quick and easy fix. With household items like nail glue and tea bags, you can temporarily patch cracks and splits. For more lasting repairs, gel polish itself can fill in and seal broken nails.
While the nail grows out, moisturize and avoid further damage. In some cases, it’s best to see a professional nail technician for medical assistance. With the right supplies and techniques, you can salvage your manicure and get your nail back into shape.