How To Dry Gel Nail Polish Without A Uv Light
Gel nail polish has become a popular choice for its glossy finish and long-lasting wear. But what do you do when you want that salon-perfect manicure at home without investing in a UV or LED lamp? Don’t worry – with some simple tricks, you can dry gel polish without specialized equipment.
If you’re short on time, here’s a quick answer to your question: You can dry gel nail polish without a UV light by using a hair dryer or bathing your nails in ice water. The cold temperatures will help the polish set.
In this comprehensive guide, we’ll cover everything you need to know to dry gel polish at home with things you likely already have on hand, from using cold water to drying with acetone. We’ll also provide tips to help the polish last as long as possible without a lamp.
Understanding Gel Nail Polish
Gel nail polish has become increasingly popular in recent years due to its longer lasting effects and durable finish. But what makes it different from regular nail polish? Here’s an overview of the unique properties of gel polish.
What Makes Gel Different from Regular Nail Polish
Unlike traditional nail lacquers which are made from nitrocellulose, gel polish contains methacrylate monomers and oligomers. These allow the polish to harden under UV lamps through a process called photocuring. Some key differences between gel and regular polish include:
- Application method – Gel polish is applied on the natural nail in very thin coats and cured between each layer under a UV or LED lamp for 30-60 seconds. Regular nail polish is simply painted on and left to air dry.
- Longevity – With proper application, gel polish can last on the nails for up to 2-3 weeks without chipping or peeling. Regular polish typically lasts only 3-7 days before needing a refresh.
- Thickness – Gel polish layers are very thin, even with 2-3 coats. Regular varnish tends to get thicker with each coat.
- Finish – Gel has an even, glossy finish and vivid color payoff. Regular polish can sometimes end up with streaks or dull spots.
- Removal – Gel must be soaked off with pure acetone. Regular polish can be removed with normal nail polish remover.
Why Gel Nail Polish Needs UV Light
The UV and LED lamps used during gel manicures play a crucial role – they initiate the curing process that sets and hardens the gel polish. Here’s a bit more about how they work:
- The lamps emit UV radiation at a wavelength that activates photoinitiators in the gel polish. These photoinitiators help kickstart the polymerization process.
- Polymerization causes the liquid monomers and oligomers in the gel to link together into long, durable polymer chains. This transforms the polish from a viscous liquid into a hardened plastic.
- Each individual layer of gel needs to be cured under the light. Without this UV exposure, the polish would simply remain in liquid form and never set on the nails.
- Curing also allows the succeeding layer of gel to adhere properly. Skipping the curing step would lead to insufficient nail bondage.
- LED lamps are the most common today as they work just as effectively as UV lamps but without the risks associated with UV exposure. Curing times are similar – 30 to 60 seconds per coat.
Drying Gel Polish without a UV Lamp
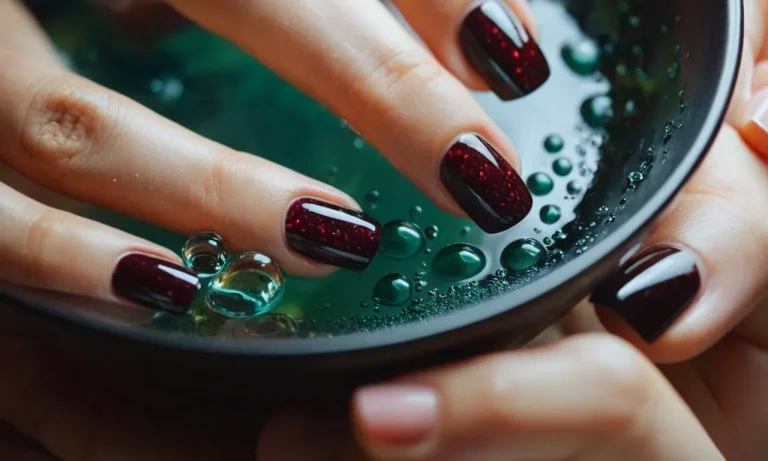
Using Cold Water
After applying the gel polish, you can hold your nails under cold running water for 2-3 minutes. This helps “set” the polish by cooling it down quickly. Just be careful not to hit your nails against the sink or expose them to any pressure, as the polish will still be soft.
The cold water creates a kind of makeshift top coat to let the color start to dry.
Using a Hair Dryer
Similarly, a hair dryer on a cool setting can be used to speed up drying time. Hold the dryer 6-10 inches from your nails and lightly blow air over them for 30-60 seconds at a time. Be careful not to hold it too close or use too much heat, as this can cause bubbles in the polish.
Take breaks in between to allow the nails to set without completely hardening.
Letting it Air Dry
You can always just let your gel manicure air dry, but this will take more time. Try to avoid using your nails or exposing them to any pressure. Gently wave your hands around to circulate the air to allow the polish to cure.
This may take 15-20 minutes or even longer depending on the thickness of the coats.
Drying with Acetone
As a last resort, you can dab some acetone around the tips of your nails. This helps thin and set the polish quicker. However, be very gentle, as too much pressure or acetone can break down the color and cause it to streak.
This method should only be used sparingly and is not a great long-term solution.
In the end, investing in a decent UV lamp is the best way to properly cure gel polish. But in a pinch, these household methods can help when you forgot to replenish the batteries! Just remember to be patient and gentle with your manicure.
Tips for Making Gel Polish Last
Prep Your Nails
Properly preparing your nails is crucial for getting gel polish to last. Here are some tips for prep:
- Remove any existing nail polish and use a nail file to shape your nails. Shaping them can remove any ridges or rough edges that gel could peel off of.
- Push back and trim your cuticles so they are neat and tidy. Overgrown cuticles provide a place for gel to lift.
- Use a nail dehydrator and pH bonder. This removes any oils from your nails and creates a tacky surface for gel to bond to.
Proper nail prep removes anything that could cause lifting and creates the ideal canvas for a long-lasting gel manicure.
Apply Thin Layers
Applying gel polish in very thin layers is important to help it cure properly under the UV or LED lamp. Thick globs of gel won’t harden all the way through.
- Wipe excess gel off the brush before each coat.
- Gently glide the brush across the nail to deposit a thin, even layer.
- Cure each layer for 30 seconds under an LED or 2 minutes under UV.
Building up thin layers prevents cracking or peeling. Three thin coats are better than one or two thick coats for a durable manicure.
Use a Top Coat
A quality gel top coat is essential for getting your polish to go the distance. Top coats help seal in color and provide a smooth, shiny finish.
- Apply top coat after your color layers and cure it fully. This seals the color underneath.
- Look for a long-lasting top coat formulated to extend wear and prevent chipping.
- Reapply fresh top coat every 2-3 days to refresh shine and smother any small dings in the polish.
Don’t skip the top coat – it’s the difference between a manicure that lasts 2 weeks vs. one that only lasts a few days.
Avoid Water Exposure
Water is the enemy of a long-lasting gel manicure. Avoid excessive moisture to keep your polish from lifting or peeling:
- Wear gloves when washing dishes, cleaning, etc.
- Avoid soaking nails in water when bathing – take quick showers instead.
- Protect hands thoroughly when swimming.
- Gently pat nails dry after washing – don’t rub.
Shielding your nails from moisture minimizes the chances of water seeping under the gel and breaking the seal. Be mindful of water when caring for your manicure.
When to Visit a Salon
Getting gel manicures can be super convenient and fun, but they do require more maintenance than regular polish. While you can easily remove regular nail polish at home with acetone, gel polish needs to be soaked off for 10-15 minutes to break down the polymers.
This usually requires UV or LED light to cure it. Trying to peel off gel polish at home can damage your nails. Here’s when you should visit a salon to get your gel manicure removed properly:
1. For Gel Polish Removal
The safest way to remove gel polish is by soaking your nails in pure acetone or an acetone-based remover. You need the acetone to fully saturate under the gel polish to break the bond. Trying to scrape or peel off gel can pull layers of your nail off, leading to thinning and weakness.
The best and safest method is to go to a salon and have the gel polish professionally removed by soaking in acetone and gently scraping off with a tool.
2. When Reapplying Gel Over Gel
When you get gel polish applied at a salon, it’s best to maintain it by getting follow-up gel manicures. If you apply regular nail polish over gel it can cause peeling and chipping. The new gel needs to bond properly with the previous layer.
Salons have the right lamps and tools to buff off the surface shine of old gel and get the new application to adhere properly.
3. If You Have Damage or Peeling
If you try removing gel polish at home and end up with peeling or cracked nails, it’s best to see a professional. They can examine the damage and determine if your nails need to be patched, sealed or repaired in any way. Don’t try to cover up the damage by applying more products at home.
Seek help from an experienced nail tech to get your nails healthy again.
4. When Changing Nail Shape or Length
If you want to change up the length or shape of your gel manicure significantly, it’s safest to have this done at a salon. Drastic length changes require the nails to be filed into the proper shape, which can lead to weakness or cracking if not done properly.
A professional will know how to change the shape without compromising the nail integrity.
5. Every 2-3 Weeks
Most experts recommend getting gel polish changed every 2-3 weeks. The polymers start breaking down over time, leading to cracking and lifting. Frequent salon visits ensure the gel is removed and reapplied properly before major damage occurs.
Coming in at the 2-3 week mark also allows for a quick gel polish change without having to trim or shape the nails.
While gel manicures are convenient and chip-resistant, they do require more careful removal than regular varnish. Visiting a salon helps avoid damage so your natural nails stay healthy and strong underneath the gel polish.
With proper application and removal done by a pro, you can enjoy durable, long-lasting gel manicures safely.
Conclusion
While gel manicures give you extended wear and cut down on chipping and peeling, you don’t need high-tech equipment to achieve salon-quality results at home. With some clever tricks using ingredients you likely already have, you can successfully dry gel nail polish without a UV light.
Just remember to properly prep and apply the polish in thin layers, seal it with a top coat, and avoid water exposure. Follow our tips, and your gel mani will stay chip-free and shiny for over a week – no lamps required!