How To Dip Nails At Home: A Step-By-Step Guide For Beautiful Nails
Having beautiful nails can make you feel polished and put together, but getting them done at the salon can be time-consuming and expensive. Luckily, with some practice and the right supplies, you can dip powder nails at home for a gorgeous, long-lasting manicure.
If you’re short on time, here’s a quick answer to your question: Dipping powder nails involves applying several layers – a base coat, dipping the nails in colored powder, sealing in layers with activator spray, and finishing with a top coat. Using an e-file helps shape and smooth nails.
In this comprehensive guide, you’ll learn everything you need to know to dip beautiful powder nails at home, including supplies needed, step-by-step application instructions, shaping tips, removal process, and more.
Supplies Needed for Dipping Nails at Home
Nail clippers and file
The first step to any fabulous DIY manicure is neatly trimmed and filed nails. Invest in a high-quality steel nail clipper to precisely trim nails straight across, then use a crystal nail file in long, single strokes to smooth edges. This prepares the foundation for long-lasting dipped color.
The $15 Zizzon Professional Nail Clipper Set on Amazon has nearly 5,000 5-star reviews and comes with bonus cuticle trimmers.
Nail dehydrator
After filing, use a nail dehydrator like Treatment Beauty Flash Dry to remove oil and moisture from nails prior to base coat. These quick-drying solvents prep nails for maximum polish adherence. Without properly dehydrated nails, dip powder can develop bubbles and lift off prematurely.
The Treatment Beauty dehydrator has a 4.6/5 rating from over 3,500 reviewers.
Base coat
Next, apply a grippy base coat so colored powders stick directly to nails rather than sliding off the slippery nail surface. Popular professional-quality base coats like Sparkle & Co. Dip Base Coat, Kiara Sky Dip Base Coat, and Revel Nail Dip Base Coat yield a textured, gritty finish for dip powder to grip.
Apply a very thin layer according to package directions. Let the base fully dry before moving onto powders.
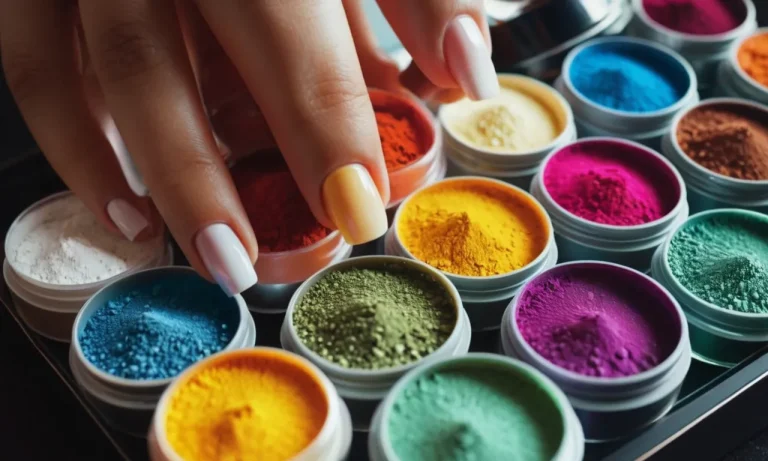
Colored dip powders
Dip powder colors bring the fun and personality! Stock up on an assortment of brights, nudes, and neutrals based on your personal style and wardrobe. Consider a French tip powder for an instant polished look. Just dip the tip of nails into white powder, avoiding skin contact.
Sparkle & Co. and Triple Vitamin both offer budget-friendly dip powder starter kits. For maximum longevity of 2-3 weeks, apply 2-3 layers of colored powder, allowing to fully dry in between.
Activator spray
The activator spray, made of acrylic polymer, solidifies layers of colored powder into a hard, protective top. After dipping each nail into the powder pot, gently blow off excess. Then liberally spritz activator spray over the entire nail and use an old makeup brush to ensure full coverage activation.
This bonds the layers together so they move as one structure and avoids cracks or breaks. An activator like Sparkle & Co. Dip Activator has excellent holding power when applied properly.
Top coat
Lastly, protect your gorgeous dipped tips with a fast-drying top coat for dazzling shine and chip defense. Apply top coat after the full colored structure has set and filed into desired shape. As with traditional polish, finish with cuticle oil for hydration and let fully cure 24 hours before water exposure.
For dipped nails, top coats with adhesive power specifically formulated for powders perform best. Gelish Dip Top Coat is a top rated option.
Cleanup brush
Don’t forget small but mighty cleanup tools! Having a stiff angled brush soaked in acetone helps tidy up edges, cuticles, and any powder that gets on fingers before hardening. Placement is easier with one hand dedicated to dipping nails into powder while the other uses the brush as needed for accuracy.
| Tool | Purpose |
| Nail clippers and file | Trims nails evenly and smooths edges |
| Nail dehydrator | Preps nails for dip base adherence |
| Base coat | Creates a gritty texture for powders to grip |
| Colored powders | Adds layers of bright shades for personal style |
| Activator spray | Hardens and bonds powder layers into one structure |
| Top coat | Protects manicure with shine and chip resistance |
| Cleanup brush | Keeps cuticles and skin neat for an expert look |
Step-by-Step Instructions for Dipping Powder Nails
Prep Nails
The first step is to properly prepare your natural nails. Start by filing and shaping your nails into your desired length and shape. Use a nail file to gently buff away any shine from the nail plate to remove oils and create texture for better powder adhesion.
Next, use cuticle remover cream and a cuticle pusher to gently push back and remove any excess cuticle tissue. Then, scrub nails with a nail brush and soap to thoroughly cleanse. Rinse nails and pat dry with a towel. Your nails are now prepped and ready for dipping!
Apply Dehydrator and Base Coat
After prepping, apply a dehydrator primer like DipWell Liquid Conditioner to further remove oils and moisture from the nail plate for maximum adhesion. Wait 30 seconds before wiping away any residue with a lint-free wipe.
Follow with a thin layer of base coat, covering all of the nail from sidewall to sidewall and just barely wrapping over the free edge. This adhesion layer is key for getting a long-lasting dip manicure. Allow base coat to become tacky, about 45 seconds, before moving onto the next step.
Dip Nails in Powder
Working one nail at a time, carefully dip into the colored dipping powder, wetting about 1/3 of the free edge into the powder. Tap gently against the jar’s rim to remove any excess product. Repeat dipping until you’ve built your desired thickness, usually 3-4 dips per nail.
Remember to be patient and take your time here. Rushing this step can cause lifting or cracking. Allow small amount of time between coatings for layers to set up. After your final dip, use a brush to dust away any leftover powder on the skin or cuticles.
Activate Layers
Now it’s time to harden those layers into a strong, protective nail. Take your activating liquid, which is usually a form of acrylic polymer, and brush over the entire coated nail. Wait about 60 seconds for full reaction before wiping away any tacky residue with a lint-free wipe.
Apply at least 2 coats of activator liquid, sealing in those powder particles.
Shape and File Nails
Time to perfect that shape! Start filing and buffing your set into the desired length and shape using a coarse nail file followed by finer grits. Be sure to pay close attention to sidewalls and free edges, filing them flush and even. The goal is to create an evenly smooth surface across all nails.
Shape the free edge into a rounded or square shape, being careful not to file too aggressively near the cuticles or you may cause lifting.
Apply Activator and Top Coat
Apply another thin layer of activator liquid across all nails to ensure full curing and hardening before moving onto the last step. This seals the deal! Finish with a glossy top coat like DipWell Top Coat for brilliant shine and chip resistance. Be sure to cap the free edges.
Allow 2 minutes of drying time before touching nails.
Finish with Cuticle Oil
Lastly, massage in some nourishing cuticle oil like Sally Hansen Vitamin E Nail & Cuticle Oil around the nail and cuticles. This hydrates the skin and completes your at-home dip powder manicure. Enjoy your gorgeous, long-lasting dip nails!
Tips for Shaping Dip Powder Nails
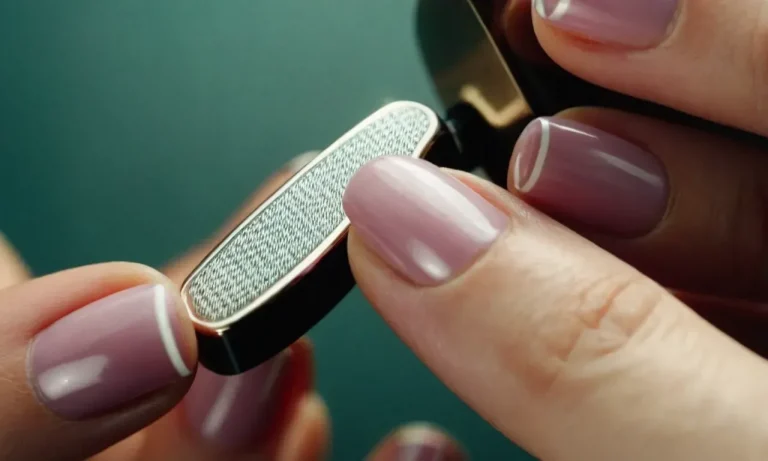
Use an e-file for smooth shaping
An electric nail file, also called an e-file, is the best tool for smoothly shaping dip powder nails (source). The spinning bits quickly and precisely file away excess material to create your desired shape. Always keep the e-file moving and use a light touch to avoid overfiling.
Work from multiple angles to ensure even shaping. An e-file leaves a smooth finish that looks professionally done.
Shape the tip before activator
It’s easiest to file and shape the tip of dip powder nails before applying activator liquid (source). The powder will still be somewhat soft and easy to manipulate at this stage. Shape each nail’s tip by holding the e-file flat and filing straight across to get the exact length and shape you want.
You can then follow with shaping the sides of the nails after applying activator when the dip powder has fully hardened.
Blend sidewalls into cuticles
Creating a smooth transition between the nail sidewalls and cuticles gives a sleek, finished look. Use the corner of a foam file to blend and soften this area after shaping with the e-file (source). Glide the foam over the seam in downward strokes concentrating on the edges.
Blend until there are no more harsh lines or ledges, leaving a gradual slope down into the cuticles. Be very careful not to file into or damage the cuticles and surrounding skin.
Shape nails from multiple angles
When filing dip powder extensions into the desired shape, it’s important to look at your nails from every angle (source). Turn your fingers or move yourself around to see all sides of each nail. You may notice uneven areas that need more filing when viewing from a different perspective.
Place your hands flat on the table and stand overhead to see the nail shape clearly. Shape straight across the free edges and use the file’s sides for creating angles. Refine and perfect the shape by double checking from all possible viewpoints.
Avoid overfiling nails
It’s easy to get carried away when filing dip powder nails, but overdoing it weakens extensions and natural nails (source). Stick to only removing the minimum amount needed to achieve the shape you want. If you remove too much material the nails will be thin, flexible, and prone to breaks.
Check the nail thickness frequently when filing using an appropriate nail gauge. Maintain at least 2 millimeters thickness for strength and structure. Know when to stop filing by not excessively repeating the same motions unnecessarily.
Removing Dip Powder Nails at Home
File off top coat
The first step in removing dip powder nails at home is to file off the shiny top coat. Use a coarse nail file and file in one direction until the surface is dull and matte. This removes the protective layer so the acetone can penetrate and dissolve the layers underneath.
Be gentle and avoid over-filing or damaging the natural nail.
Soak in acetone
Next, it’s time to soak off the color. Pour pure acetone into a small bowl and submerge your nails. Let them soak for 10-15 minutes. The acetone will break down the layers of dip powder, causing it to soften and lift from the natural nail.
Gently move your fingers through the acetone to help it penetrate faster. The longer you soak, the easier removal will be.
Gently scrape off powder
After soaking, use an orangewood stick, cuticle pusher, or old credit card to gently scrape off the softened powder. Apply light pressure and slide the tool under the loosened edges. Work slowly and carefully to avoid ripping off chunks of your natural nail.
Repeat soaking and scraping until all traces of color are gone. The nail should look slightly rough and porous after dip powder removal.
Use foil method for faster removal
For quicker dip powder removal, try the foil method. After filing, paint each nail with acetone. Wrap the nail tightly with a small piece of aluminum foil. The foil prevents evaporation, allowing the acetone to penetrate faster.
Leave wrapped for 10-15 minutes before unwrapping and scraping away the softened powder. This traps the acetone against the nail for better absorption.
Moisturize after removing
Once all remnants of dip powder are gone, it’s important to replenish moisture to the nails. The acetone can leave nails dry and brittle. Apply cuticle oil, petroleum jelly, or a rich hand cream. Gently massage into the nails and cuticles.
This helps rehydrate and condition them after the harsh acetone soak. It’s best to give nails a break and go bare for a few days before applying polish or new dip powder.
With the right products and technique, you can successfully and safely remove dip powder nails at home. Just be patient, take your time, and moisturize after to help nails recover. It may take practice, but you’ll be a pro at dip removal in no time!
Maintaining Your Dip Powder Manicure
Use cuticle oil daily
Using cuticle oil daily is crucial for maintaining healthy nails and cuticles with dip powder manicures. The acrylics and powders can cause nails to become dry and brittle over time. Massaging in cuticle oil 1-2 times per day provides moisture and prevents cracking and peeling.
Look for formulas enriched with vitamins like vitamin E and coconut oil for added nail nourishment. Consistent use of cuticle oil will help extend the life of your manicure and keep nails looking fabulous.
File away lifting
It’s normal for some lifting and cracking to occur as the manicure grows out. Using a nail file to gently buff away any raised edges or rough patches can help the manicure last longer before needing a fill. Focus on filing the nail edge near the cuticles and sides where lifting begins.
Go slowly and avoid filing too much to prevent weakening or thinning the nails. Filing as needed helps maintain the manicure and prevent snagging that can worsen lifting.
Avoid picking at nails
Picking at the nails is one of the worst habits for any manicure and especially damaging for dip powder. The acrylic layers are adhere very strongly to the natural nail, but can become weakened over time. Picking causes more lifting and cracks for bacteria and moisture to get underneath the powders.
This can lead to infection and more extensive damage. It’s best to avoid picking and filing away small lifted areas to maintain the health of the manicure.
Go slowly when removing
When it’s finally time to remove your dip powder manicure, be patient and go slowly to avoid nail damage. Don’t try to peel or pick off the powders, which can pull up layers of the natural nail. Use pure acetone and cotton balls to soak nails for 15-20 minutes until the powders soften.
Gently roll the cotton back and forth over nails to dissolve the acrylics. Then you can lightly file away residue and apply cuticle oil to condition nails. Taking your time prevents excessive filing and damage to the nail bed.
Give nails a break between sets
It’s recommended to give nails a breather between dip powder sets, even if your manicurist says you can put them on back-to-back. Taking a week break allows nails to recover from filing and acetone soaking and avoids excessive thinness.
Use the time to moisturize nails and cuticles and consider a strengthening treatment. Your nails will be healthier and ready for the next set of beautiful dip powders after a short rest period.
Conclusion
With the right supplies and techniques, you can achieve stunning, long-lasting dip powder nails at home. Take the time to prepare nails, apply layers slowly, and shape carefully for the best results. Your nails will look like you just left the salon when you follow this comprehensive guide to dipping powder nails at home.
Happy dipping!