How To Effectively Clean Nail Polish Brushes
If you love painting your nails at home, you know how important it is to keep your nail polish brushes clean. Nothing is more frustrating than pulling out a bottle to find the brush covered in thick, gloopy polish.
Luckily, cleaning nail polish brushes is easy – and doing it regularly will keep them working like new.
If you’re short on time, here’s the quick answer: Soak brushes in pure acetone or brush cleaner, gently roll against a paper towel, repeat until clean, reshape, and let air dry. For a more thorough clean, read on!
In this comprehensive guide, we’ll cover everything you need to know about cleaning nail polish brushes. You’ll learn about the different products you can use, tips for removing every last bit of polish, how to maintain the brush’s shape, storing brushes properly, and more.
With these simple techniques, you can keep brushes looking and performing like new for many manicures to come.
Why It’s Important to Clean Nail Polish Brushes
Remove Old Polish
Cleaning nail polish brushes regularly helps remove any dried polish, clumps, or debris that may have built up on the bristles (1). If old polish is allowed to accumulate on the brush over time, it can make application streaky, gloppy, or uneven.
Giving brushes a quick clean helps restore them to like-new condition so polish glides on smoothly and easily with each use.
Prevent Clumping
Another reason to clean brushes is to prevent clumping of the bristles. When wet nail polish dries on a brush, it can cause the bristles to stick together and clump up. Clumped bristles don’t pick up enough fresh polish from the bottle and can’t spread it evenly across the nail.
Taking a minute to clean a brush prevents this problem and allows for flawless application every time.
Make Polish Last Longer
Cleaning nail polish brushes also helps extend the life of polishes. When residue builds up on a brush, some of the pigment comes off into the bottle and contaminates the remaining polish each time the brush is used without cleaning. This speeds up the thickening and drying out of polish.
Keeping brushes residue-free minimizes contamination so polish stays usable longer (2). Just a quick wipe with acetone or brush cleaner between manicures can add weeks or months onto your favorite polishes.
References:
(1) https://www.today.com/style/how-clean-your-nail-polish-brush-every-manicure-t151939
(2) https://www. allure.com/story/how-to-clean-nail-polish-brush
(3) https://www.marthastewart.com/7981021/clean-nail-polish-brush
Supplies Needed for Cleaning Brushes
Acetone or Brush Cleaner
The most important supply for cleaning nail polish brushes is a bottle of pure acetone or a commercial brush cleaner. Acetone is the primary ingredient in most nail polish removers and brush cleaners. It can break down and dissolve nail polish, removing it from the bristles of the brush.
Look for 100% pure acetone without additives or fragrances. Some options are Beauty Secrets Pure Acetone from Sally Beauty or Onyx Professional 100% Acetone from Amazon. Brush cleaner products like Zoya Remove+ are also very effective.
Small Jar or Container
You’ll need a small jar, cup, or container to soak the nail polish brush in the acetone or cleaner. Glass and ceramic work best as acetone can degrade some plastics with repeated use. Choose something wide enough to allow the brush to move freely while soaking.
Baby food jars or glass candle containers work perfectly.
Paper Towels
Have some paper towels or soft rags on hand to wipe excess acetone and polish off the brush. Paper towels are ideal for soaking up the dissolved polish. Smaller pieces allow you to grip the brush better while cleaning. Paper towel scraps are a nail polish brush’s best friend!
Old Toothbrush (Optional)
An old toothbrush can be useful for scrubbing any stubborn, dried polish off the brush bristles. The stiff bristles help exfoliate the old lacquer. This step is optional but comes in handy if the brush seems impossible to get clean. An old mascara wand or small wire brush could also work.
With the right supplies on hand, you’ll be removing each colorful coat of nail polish from the brush in no time! Proper brush care helps the bristles last longer and apply polish smoother. Dedicate 5-10 minutes after painting to clean the brushes thoroughly and they’ll reward you with flawless manicures for years. Taking good care of your nail tools is the secret to salon-quality results at home.
How to Thoroughly Clean Nail Polish Brushes
Remove Excess Polish
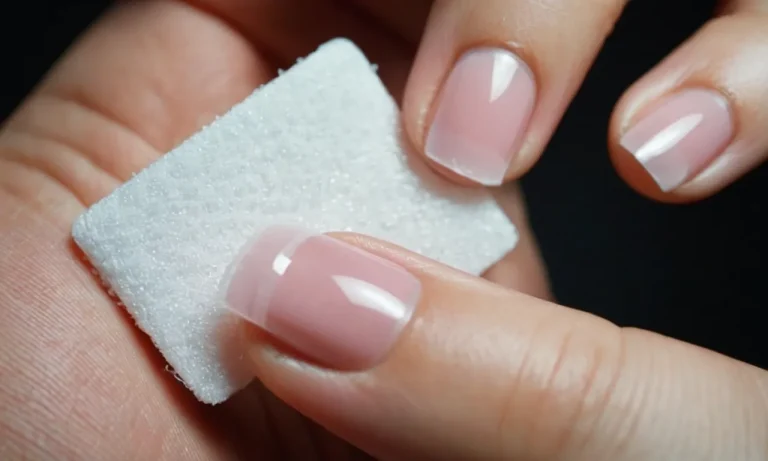
Before cleaning your nail polish brushes, it’s important to remove any excess polish that may be clinging to the bristles. After painting your nails, take a paper towel or cloth and gently wipe or roll the brush back and forth across it.
This will absorb any excess polish so it doesn’t dry and harden on the brush.
Soak in Acetone
Next, you’ll want to soak the brush in pure acetone, which is the most effective solvent for breaking down nail polish. Pour some acetone into a small glass or bowl, then submerge the brush fully and let it soak for 5-10 minutes.
This will allow the acetone to dissolve any remaining dried polish on the brush.
Roll Against Paper Towel
Once the brush has soaked, take it out and gently roll or wipe it across a clean paper towel or cloth again. The acetone will have loosened up the polish, so this helps remove any residue. You may need to wipe a few times to get all the color off.
Scrub with Toothbrush (If Needed)
If there is still some visible residue or buildup on the brush after soaking and wiping, you can use an old toothbrush to scrub it away. Put a drop of acetone on the toothbrush bristles, then gently brush back and forth over the nail polish brush.
The toothbrush bristles will help exfoliate away any remaining flecks of pigment.
Repeat Process
You may need to repeat the soaking and wiping process 2-3 times to fully clean off all traces of polish. If the brush seems very gunky, do a 10 minute acetone soak followed by wiping and scrubbing until it’s completely clean.
Reshape Bristles
Once all the old polish is removed, gently reshape the bristles on the brush back into a nice pointed tip using your fingers. This will restore the brush and make it easier to use for neat, precise application.
Allow to Dry
Finally, let the brush air dry completely before using it again to apply polish. Lay it on a paper towel and give it at least 15-20 minutes. Residue acetone could affect the quality and application of new polish if the brush isn’t fully dried.
Thoroughly cleaning nail art brushes regularly will help prevent polish buildup and keep brushes working like new for longer! Investing just a few minutes each time saves you from having to replace brushes as often.
Tips for Keeping Brushes in Good Condition
Clean After Each Use
Cleaning nail polish brushes after each use is crucial for keeping them in good condition and prolonging their lifespan. Here are some tips for proper cleaning:
- Use nail polish remover – Soak the bristles in remover and gently roll against a paper towel to remove leftover polish.
- Clean with brush cleaner – Special brush cleaners help break down polish buildup and condition bristles.
- Avoid water – Water can damage the glue holding the bristles together.
- Remove excess polish – Wipe excess polish off the brush against the bottle rim before closing.
Proper cleaning removes residual polish that can dry and make bristles stiff. It also prevents polish in different colors from mixing together on the brush.
Store Horizontally
Storing nail polish brushes horizontally helps maintain their shape between uses. Here are some storage tips:
- Lay flat – Store brushes flat instead of upright in a cup.
- Use a drawer – Place brushes in a drawer compartment or makeup case.
- Wrap bristle tip – Cover bristle tips with foil or plastic wrap if storing upright.
Letting brushes dry upright can cause bristles to bend permanently. Storing horizontally avoids gravity’s effects on bristle shape.
Replace Bristles Regularly
With regular use, nail polish brush bristles will eventually wear out and need replacement. Here are some signs it’s time for a new brush:
- Fraying – Bristles appear split, broken, or frayed.
- Splaying – Bristles splay out in different directions.
- Clumping – Bristles stick together and don’t fan out.
- Stiffness – Bristles feel stiff and lack flexibility.
Replacing brushes every 6-12 months ensures fresh, usable bristles for neat, easy application. Quality brush heads typically range $3-$8 and many attach to reusable handles.
Avoid Exposing to Heat or Sunlight
Heat and sunlight can damage and dry out nail polish brush bristles over time. Here are some tips to limit exposure:
- No temperature extremes – Don’t leave brushes in very hot or cold areas.
- Store in drawers – Keep brushes in drawers away from windows.
- Limit bathroom time – Minimize time left in steamy bathrooms.
- Travel containers – Use makeup bags when traveling.
Taking steps to shield brushes from sunlight helps retain proper bristle flexibility. Storing in climate-controlled areas avoids damage from temperature swings.
FAQs About Cleaning Nail Polish Brushes
How often should I clean brushes?
Experts recommend cleaning your nail polish brushes after every 2-3 uses. Allowing polish to build up on the bristles can make application messy and streaky. Frequent cleaning, about every 3 manicures, prevents clumping and keeps brushes looking fresh.
What household products can I use?
You likely have everything needed to clean brushes at home already! The most common DIY cleaning agents are:
- Acetone nail polish remover – best for removing pigment buildup
- Brush shampoo/conditioner – gently cleans bristles
- Dish soap – cuts through polish and oil
- Olive oil – conditions bristles
Use remover alone for a deeper clean or try a combo like shampoo + olive oil to clean and condition in one step.
How do I clean dried polish?
Dried, caked-on polish is no fun but these tips can help:
- Soak bristles in pure acetone nail polish remover for 5-10 minutes
- Gently roll brush against paper towel, which helps loosen polish
- Use an old toothbrush to gently scrub bristles if needed
- Rinse with water and reshape bristles once clean
Getting into a regular brush cleaning routine, like every few manis, prevents polish from fully drying and building up. But when it does happen, a good acetone soak does the trick!
Conclusion
With the right supplies and techniques, it’s easy to keep your nail polish brushes clean and functional. By removing all traces of old polish and reshaping bristles after each use, you’ll get smooth, even application every time.
Following proper storage methods will also extend the life of your brushes.
Remember to act quickly when polish gets on the brush, as it becomes very difficult to remove once dried. With regular cleaning and care, your brushes can continue helping you create beautiful manicures for years to come!