How To Apply Nail Wraps: A Step-By-Step Guide
Nail wraps, also known as nail decals or stickers, allow you to get a salon-quality manicure in the comfort of your own home. If you’re wondering how to apply these trendy nail enhancements, you’ve come to the right place!
If you’re short on time, here’s a quick answer to your question: Prepare your nails by filing and buffing them. Cut the nail wraps to fit each nail. Apply a base coat. Remove the plastic layer from the wraps and place them on your nails. File the edges smooth. Apply a top coat to seal in the design.
In this comprehensive guide, we will walk through each step of the nail wrap application process in detail, from prepping your nails to finishing with a protective topcoat. We’ll also provide tips to help the wraps last longer and avoid common mistakes.
With the right technique, nail wraps can look amazing and fool people into thinking you just got a professional manicure.
Prep Your Nails
Preparing your nails properly before applying nail wraps is crucial for getting the best results. Follow these key steps to ensure your nails are ready for flawless nail wraps.
Remove Old Nail Polish
Start by removing any existing nail color or residue with a gentle yet effective nail polish remover. Avoid removers with acetone, as these can dry out your nails and skin. A great option is Zoya Remove Plus Nail Polish Remover – it gets rid of polish cleanly without drying or damaging the nails.
File and Shape Nails
Use a nail file to shape your nails into a uniform length and shape. File in one direction, starting from the outside corner of the nail towards the center. This helps prevent possible tearing. For the perfect nail wrap application, aim for a squoval or rounded square nail shape.
Use a Buffer to Smooth Nails
After filing, buff the surface of each nail with a 4-way nail buffer. Buffing removes shine and any small ridges on the nails, allowing nail wraps to adhere evenly. When buffing, be sure to use delicate pressure and buff in multiple directions.
Clean Nails with Remover
Before applying cuticle oil or nail wraps, wipe nails with nail polish remover or isopropyl alcohol to remove any dust or oil. This helps the wraps stick properly. Use SECHE CLEANSE for a gentle swipe.
Apply Cuticle Oil
Finish your nail preparation with a nourishing cuticle oil like Sally Hansen Vitamin E Nail & Cuticle Oil. Massage just a drop around each nail to condition the skin and cuticles. This helps prevent lifting or damage to wraps. Let the oil soak in for 5-10 minutes before nail wrap application.
With properly prepped nails, you’ll achieve stunning nails with nail wraps every time. It’s worth the effort for fabulous fingertips!
Size and Cut the Nail Wraps
Choose Your Nail Wrap Design
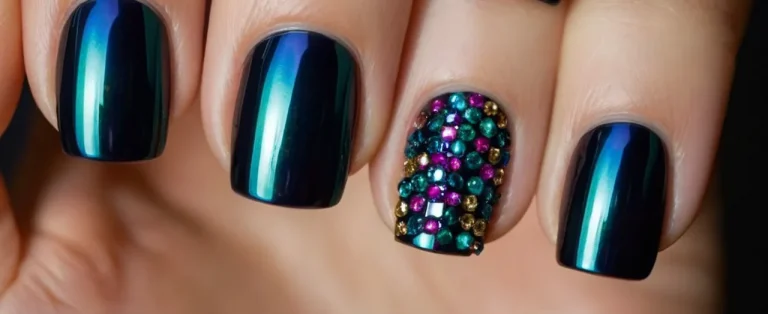
The first step is selecting the nail wrap designs that appeal most to your sense of style. Nail wraps come in a spectacular range of colors, patterns, and images like florals, marble, holographic, and more. Consider if you want the nail wraps to be subtle and neutral or eye-catching and vibrant.
Also, think about whether you want the same design on each nail or prefer mixing up the looks with different wraps on different nails for a funky manicure.
Measure and Cut Wraps for Each Nail
Once you have picked out your favorite nail wrap designs, it’s time to cut each wrap to fit the size of each individual nail. Lay your finger over the wrap and use scissors, nail clippers, or a craft knife to snip off any excess material around the edges of your nail.
Be sure to leave a tiny border of about 1-2mm remaining around the perimeter of the nail bed for easier application.
Some key tips when custom-sizing the wraps:
- Aim for precision in cutting – wraps that are oversized may cause wrinkling or lifting
- The thumb, pointer and middle finger nail wraps can be slightly wider around the nail edges
- Leave more border space near the cuticles and nail sidewalls to allow for expansion
Take your time cutting each wrap and check the fit by holding it against your nail. Careful measuring and custom cutting helps the wraps adhere smoothly and last longer without lifting or damage.
File Edges of Cut Wraps
The final preparation step before applying your tailored nail wraps is to gently file any rough or rigid edges left from cutting. Use a fine-grit nail file and lightly smooth down the trim lines so they don’t catch on clothing or lift up.
Be very delicate when filing as you don’t want to damage, rip or thin out the nail wrap material itself. Just soften any hardness around the visible outer edges.
You can also use cuticle scissors for more detailed filing work around intricate corners or curves if need be. Filing removes roughness and ensures maximum comfort and longevity.
Apply Base and Top Coat
Paint On Base Coat
Applying a base coat is a crucial first step when putting on nail wraps. The base coat helps the nail wrap adhere properly to the nail and last longer without peeling or popping off. Start by painting a thin but complete layer of base coat onto each clean nail.
Allow the base coat to dry fully before moving onto the next step, usually about 60 seconds. Using a base coat also helps prevent the nail wraps from staining or discoloring the natural nail underneath. Top base coat picks include Sally Hansen Hard As Nails and OPI Natural Nail Base Coat.
Apply Nail Wraps to Each Nail
Once the base coat has dried, it’s time to apply the pre-cut nail wraps to each fingernail, one at a time. First, determine if the wraps have a top, bottom or side that should be placed closest to the cuticle. Many wraps will have a subtly textured side that should face upwards.
Slowly peel the plastic coating off the back of the wrap while avoiding touching the adhesive side. Line up one edge near the cuticle, then gently smooth the wrap down the nail from top to bottom, pressing firmly to secure it.
If the wrap shifts position, gently lift and reposition while the adhesive is still tacky. Use a nail file to file off any excess material hanging off the edge of the nails. Finish sealing the free edge with a final press. Complete this process on each nail until all nail wraps are applied.
Avoid getting moisture or water under lifted edges by working one hand at a time. Patience is key for getting the wraps placed accurately.
File Excess Material
Once the nail wraps are stuck onto each nail, use a nail file to gently smooth and shape the material at the tip and sides. File in one direction, usually front to back across the nail. Be very careful not to tear or rip the thin nail wraps.
Check from several angles that the nail shape looks evenly filed. Stop filing where the nail wrap material ends to avoid hitting your natural nails. Lightly buff the entire surface of the wraps to ensure they lay smoothly over your nail.
Gently wipe away any nail dust and debris from filing with a lint-free wipe or dry cotton pad. Filing excess wrap material creates a clean, professional look and aids in avoiding snags that might lift or peel the wraps earlier. Take your time and avoid rushing this step to get the shaping right.
Seal in Design with Top Coat
The final step is to apply a fast-drying top coat over the nail wrap on every nail, covering both natural nail showing around the cuticles as well as the decorative wrap itself. This seals and protects the design while adding a glossy sheen.
Apply the topcoat carefully around the edges without getting it underneath and lifting the wraps. Let the top coat dry for at least 60-90 seconds between adding multiple thin layers for extended wear. Reapply top coat once a week to maintain the seal.
Top-rated durable top coats to try are Seche Vite Dry Fast Top Coat and Essie Gel Couture Top Coat.
Caring for Nail Wraps
Avoid Picking at Wraps
Nail wraps can easily lift at the edges or corners if you pick at them, so it’s important to avoid this temptation. Picking can cause the wrap to peel up quickly. If you catch yourself picking, try to keep your hands busy. If you notice a lifted edge, apply a small amount of nail glue to secure it.
Use Cuticle Oil Daily
Applying cuticle oil around your nail wraps every day will help keep the wraps looking smooth and your nails hydrated. Jojoba, vitamin E, and coconut oils work well. Massage a few drops into the skin around each nail wrap daily. This helps prevent lifted edges and keeps the wraps looking polished.
Reapply Top Coat Regularly
A fresh layer of top coat is key for making nail wraps look their best. Reapply top coat every 2-3 days to keep the wraps shiny and smooth. This also helps prevent chipping. Use a quick-drying top coat formulated for nail wraps. Seche Vite and Essie Gel Setter are great options.
Let each coat dry completely before adding another.
With some simple care, nail wraps can last 1-2 weeks on most people. Avoiding water exposure as much as possible, moisturizing the nail area daily, and frequently reapplying top coat will help you get the most wear time.
If you notice excessive lifting or damage, don’t hesitate to remove and replace the wrap. With proper application and care, wraps are a stylish, damage-free alternative to polish.
Common Mistakes and Solutions
Wraps Won’t Stick
One of the most frustrating issues when applying nail wraps is when they just won’t stick properly to your nail. This can lead to the wraps lifting off after only a day or two. There are a few reasons why your wraps may not be adhering:
- Not properly preparing the nail – Be sure to buff and dehydrate the nail so the wrap can properly bond.
- Putting the wrap on crooked – Carefully line up the wrap and smoothly apply to prevent air bubbles and lifting edges.
- Using too much top coat – More than one layer of top coat can cause lifting. Keep it thin.
- Oils on nail plate – Clean nails to remove any lotions, oils or creams that may prevent sticking.
If you follow all the right preparation steps and application techniques, your wraps should stay put for 7-10 days without issues. Don’t get frustrated – practice makes perfect!
Air Bubbles Under Wrap
Those pesky air bubbles can form when applying nail wraps for a couple reasons:
- Not smoothing wrap on firmly – Be sure to use the application tool to firmly smooth out the wrap as you apply.
- Wraps are not fitting nail plate – Make sure you choose the right size wraps for your nail size to prevent excess air pockets.
- Overworking the wrap – Too much adjusting and repositioning can lead to creases and bubbles. Apply carefully.
If you do notice a bubble, use a straight pin to gently poke a hole and smooth it out. This is better than lifting the wrap and reapplying. Avoid bubbles by working slowly and gently during application.
Edges Lifting Up
Seeing those wrap edges already peeling off your nail after a day or two is super annoying. But don’t worry, it’s an easy fix!
- File edges – Sometimes filing the edges of your nail plate before application can help wraps adhere better.
- Avoid flooding cuticles – Prevent lifting by not getting too much glue on the skin around the nails.
- Wrap nail tips – Extend wraps just slightly over the tip of the nail so there is no exposed edge.
- Use thinner top coat – Too thick of a top coat layer can make the edges lift up faster.
If you do notice lifting edges, just use nail glue to gently push them back down and seal it up! Then be very careful with your nails to avoid any snags.
Discoloration Under Wraps
After removing your nail wraps, you may notice an oddly colored or stained look to your natural nails underneath. What causes this?
- Not enough prep – For pigmented nails, thoroughly buff and use dehydrator for better adhesion.
- Low-quality wraps – Cheap wraps use dyes that can seep into nails. Invest in better quality wraps.
- Wearing too long – Nails need to breathe! Don’t go longer than 10-14 days before removing/replacing.
To prevent discoloration, carefully follow the nail prep steps and don’t wear wraps too long. If you do have staining, gently buff the nails to remove the top stained layers. Avoid super dark wrap colors which tend to bleed more and cause more staining issues.
Conclusion
With the right prep and technique, applying nail wraps at home can give you stunning nails that rival professional manicures. Don’t be intimidated by the process – just take your time and use the steps outlined here as a guide.
Pay attention to properly sizing the decals for each nail and taking care of the edges to help the wraps last longer without lifting or peeling. Top it off with a glossy topcoat to seal and protect your design.
Nail wraps offer so many fun patterns, designs, and colors to choose from. Get creative and switch up your style often! With a little practice, you’ll be able to apply flawless nail wraps whenever the mood strikes.