Achieve Salon-Perfect Nails With Glossy Top Coat Polish
Nothing completes a beautiful manicure like a glossy top coat. If you want your at-home manicures to look professionally done, top coat is a must-have. The right formulas can help lock in color, add eye-catching shine, and protect nails from chipping and fading.
If you’re short on time, here’s a quick answer to your question: Using a fast-drying top coat as the final step when painting your nails will help seal the color, create an ultra-glossy shine, and prevent chips and smudges so your mani lasts longer.
What Does Top Coat Do for Nails?
Seals in Color and Adds Shine
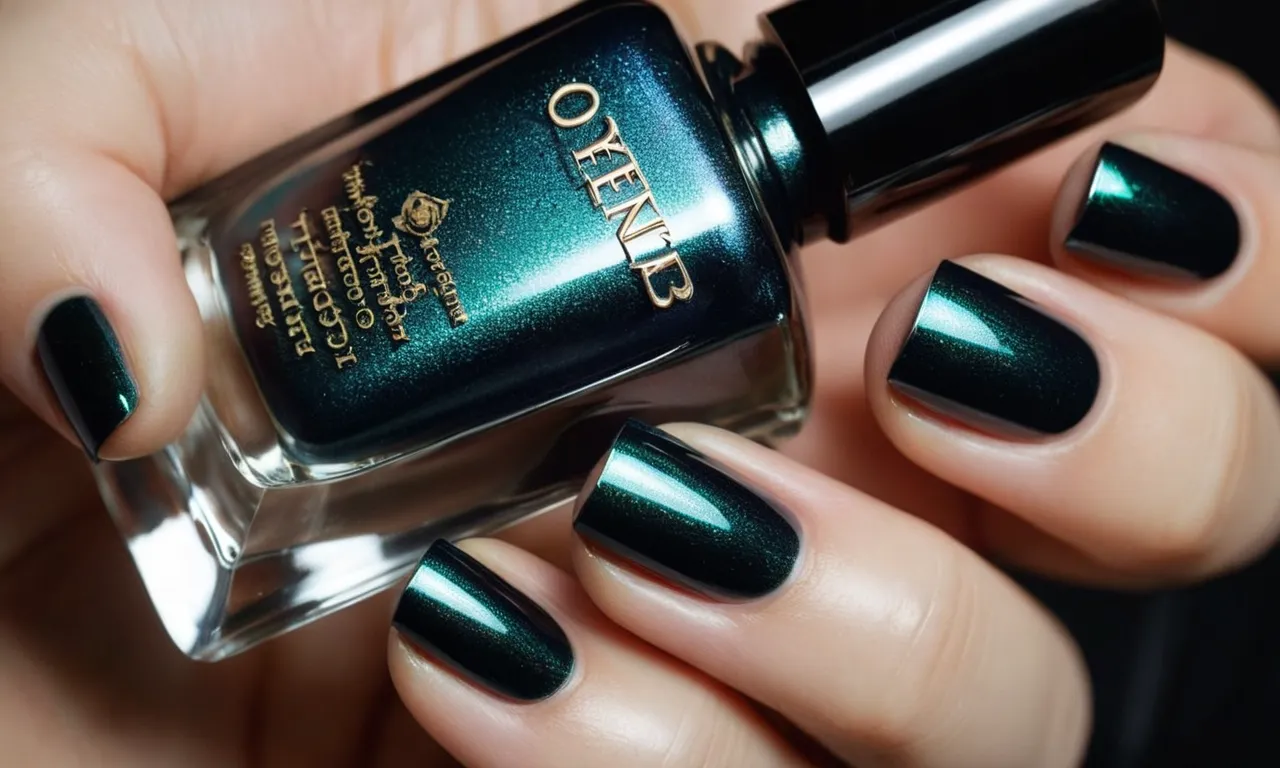
Applying a glossy top coat is key for locking in nail polish color and amping up the shine factor. The clear lacquer forms a protective barrier over painted nails that prevents the color underneath from fading, chipping or becoming dull.
Top coat creates a smooth, glass-like surface that reflects light for an ultra-glossy just-out-of-the-salon look.
Helps Prevent Chipping and Peeling
Without a layer of top coat, nail polish tends to chip and peel relatively quickly. The top coat acts as armor against normal wear and tear, helping to significantly extend the lasting power of your manicure.
Its flexible formula smooths out ridges in polish and binds to color underneath for maximum adherence. Top coat also hardens, preventing scratches and dings that can lead to chips and peels.
Protects From Elements and Damage
Environmental elements like water, extreme temperatures, sunlight and chemicals can all wreak havoc on naked polish, causing fading, discoloration and increased chances of chips and cracks. Top coat forms an impenetrable seal that safeguards nail color against assault from these external aggressors.
Its water-resistant properties are especially key for preserving your manicure through hand washing, swimming and more.
Types of Top Coats for Different Needs
Regular Top Coat for Standard Wear
A basic top coat is great for sealing in the base color polish and adding a glossy finish. It helps prevent chipping and extend the wear-time of your manicure. A standard top coat allows you to get a solid week of wear without major chips or tip wear.
Popular mainstream brands like Sally Hansen Insta Dri and Essie Good To Go provide a quick-drying protective layer.
Apply your favorite nail base color, let fully dry, then apply 1-2 coats of top coat, allowing each layer to dry in between. Proper application is key for maximum longevity! Cost for regular top coat at drugstores runs about $6-10.
Quick-Dry Top Coat
A quick-drying top coat like Seche Vite Dry Fast or Orly Sec ‘N’ Dry is great if you’re short on time. They contain more solvents to speed up drying time. Most dry to the touch in under a minute! This is a godsend if can never seem to sit still long enough for regular polish and top coat to set.
Quick-dry top coats offer the standard protection qualities – prevents smudges, dings and damage. However, they don’t last quite as long as a standard top coat, about 5-6 days max before showing tip wear and minor chips. But the fast dry element makes it very convenient!
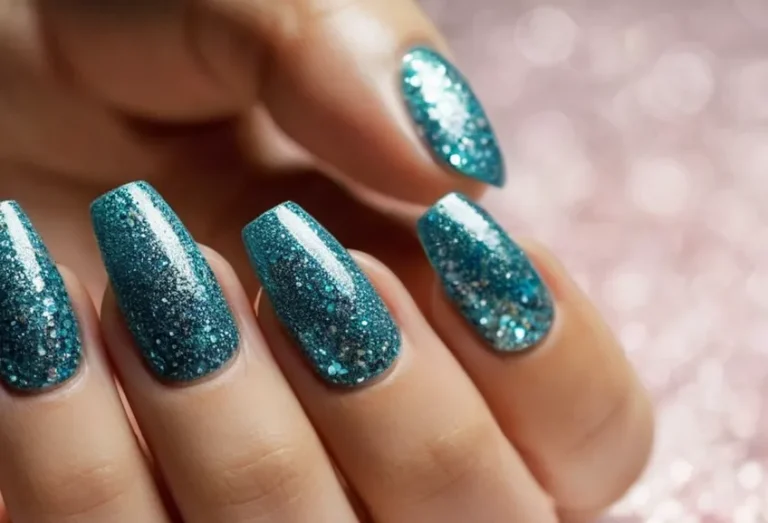
Gel Top Coat for Extended Wear
A gel top coat offers two weeks+ of super glossy, chip-free nail polish wear! Brands like OPI GelColor and Shellac Luxe are salon quality and deliver the most durable, scratch resistant wear possible from polish.
The gel formula is the thickest of the top coats and dries to an intensely hardened gloss that flexes with the natural nail. No nicks, chips or dulling! Gel top coat requires curing under an LED or UV lamp.
At home systems available, or get a professional manicure for that special gel mani/pedi with awesome longevity!
How to Apply Top Coat for Best Results
Wait for Base Color to Dry First
Before applying a glossy top coat, it’s crucial to allow the base color polish ample drying time first. Industry experts recommend waiting at least 20-30 minutes after the final layer of color has been painted on.
This ensures the underlying nail lacquer layers have fully set, preventing them from getting disturbed or dragging when the top coat brush strokes over them. Rushing this step can cause bubbling or denting in the color underneath. Patience pays off with a smooth, professional-looking manicure.
Use Thin, Even Layers
When using a top coat polish, the application motto is “less is more.” Only a thin, even layer is needed to create a gorgeous glossy finish. Using too much product in each stroke can result in longer drying times, drips down the sides of nails, and a thicker top coat texture.
For best results, lightly drag the brush down the nail to deposit a fine, uniform coating of the polish. According to nail expert Suzie from Nail Care HQ, two thin layers of top coat is the “magic number” for achieving a salon-perfect shine while avoiding globs.
Cap the Free Edge of Nails
It’s important when applying a top coat to polish to “cap” the free edge of each nail. This means using the brush to paint a layer of top coat over the front tips of nails so it slightly overlaps off the edge. Capping seals in layers of color polish and protects the fragile free edge from chipping.
Repeatedly applying top coat only to the surface of the nail can cause peeling and cracks in the polish right at the tip. Take those last brush strokes all the way over the edge for long-lasting glossy nails.
Don’t Forget the Sides of Nails
While perfecting polish application on the main surface of nails, it’s common to overlook finishing touches on the sides. However, leaving these sidewalls bare can ruin all your hard work when the exposed nail plate begins to peel and chip.
Use the nib of the top coat brush to lightly apply gloss down the length of each side edge. The Sally Hansen blog recommends turning the brush vertically to access the thin edges. Don’t glob on too much product, just seal the side seam for flawless polish adherence.
Allow Each Layer to Dry In Between
For longest lasting nails, it’s key to avoid rushing and allow proper drying time between top coat layers. Most mainstream top coat polishes today advertise “fast-drying formulas” that set in 60 seconds or less.
However, to play it safe, give each fine layer at least 2 full minutes to cure before adding another. Attempting to stack wet polish leads to globbing, denting, and ultimately a gummy, uneven gloss finish.
Have patience and let each application dry thoroughly before moving onto the next layer or nail. Your tips will thank you!
Caring for Nails After Applying Top Coat
Avoid Water Exposure Right After
It’s crucial to avoid getting your nails wet right after applying a glossy top coat polish. Water can cause the polish to become bubbly or crack. Give your nails at least 1 hour to fully dry and cure before exposing them to water. This includes washing dishes, showering, swimming, etc.
Having patience allows the top coat to harden properly for a smooth, lasting manicured look.
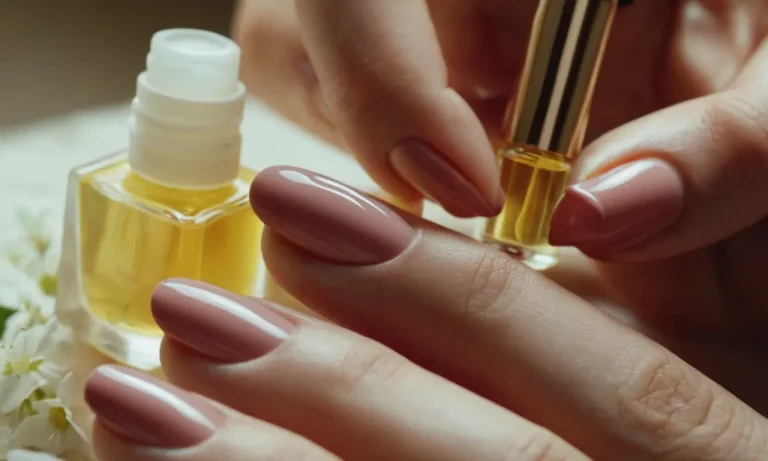
Use Cuticle Oil for Hydration
Using a daily cuticle oil helps keep your nail beds and cuticles hydrated, preventing cracks and peeling. Massage just a drop or two of cuticle oil onto each nail and cuticle area morning and night. Jojoba and vitamin E oils work wonders.
Properly hydrated nails enhance the top coat’s shine and prevent chipping along the edges and cuticles. Healthy, moisturized nails simply look more vibrant and youthful.
File Gently to Avoid Chipping
Filing and buffing your nails with care is key after applying a glossy top coat. Aggressive filing can cause the polish to crack or peel. Use a fine grit file and buff the surface ever so gently in one direction. This smooths the top layer without removing too much color.
It’s best to avoid metal nail files as they can damage the nail bed. A soft crystal or glass file is ideal. Filing every few days maintains the polished look.
Remove with Non-Acetone Polish Remover
When it’s time to remove the top coat polish, be sure to use a non-acetone nail polish remover. Acetone-based removers are too harsh and drying. A non-acetone formula with nourishing oils like soy, aloe and vitamin E will break down the polish gently without stripping your nails and cuticles of moisture.
Lightly saturate a cotton ball and hold on each nail for about 30 seconds before wiping away – the polish will slide right off! Your nails will thank you.
Troubleshooting Common Top Coat Issues
Bubbles and Brush Strokes
Seeing bubbles or brush strokes in your top coat can be frustrating! Here are some tips to avoid them:
- Make sure to apply thin, even layers of top coat. Thick globs can cause bubbles.
- Let each layer of polish dry completely before adding the next. Rushing can lead to bubbles.
- Use smooth strokes and avoid going over the same area repeatedly when applying top coat.
- Choose a high-quality top coat formulated to prevent bubbles and self-level after application.
If you do end up with bubbles, try lightly sweeping over them with the brush to pop them before the top coat dries. For visible brush strokes, apply another thin layer of top coat to smooth them out.
Chipping and Peeling
Nothing ruins a perfect manicure like chips and peels. Follow these tips for long-lasting top coat:
- Always apply top coat to completely dry polish. If the layers underneath are still wet, your manicure can shrink and pull away as it dries, causing peeling and chips.
- Use thin layers of top coat and allow each one to dry fully. Thick layers take longer to dry and are more prone to shrinking.
- Lightly buff nails before polishing to remove any oils. Oil on the nail plate can prevent proper adhesion.
- Wrap the tips of your nails with top coat to protect the edges from chips.
- Avoid excessive hand washing and submerging nails in water soon after polishing. Give them time to fully cure first.
If your top coat starts chipping quickly, it may be a formula issue. Opt for a long-wearing top coat made to extend manicure wear.
Sheet Marks and Dullness
Visible sheet marks (lines in the top coat) and a dull finish can make nails look less than flawless. Here are some ways to prevent this:
- Apply top coat in one direction, from cuticle to tip, to prevent sheet mark lines.
- Use thin, even layers and allow each layer to dry before adding another.
- Choose a quick-drying top coat so you can reapply smoothly if needed.
- Gently cap the free edge of the nail with each stroke for an ultra-shiny finish.
- Avoid touching or scraping nails until completely dry.
If your top coat looks streaky or dull even when applied properly, the formula may be old or defective. Trying a fresh bottle of quality top coat can help revive the glossy look you want.
Achieving flawless, salon-worthy nails with a glossy top coat takes patience and practice. But with these troubleshooting tips, you can get picture-perfect polished nails at home. Let your natural nails shine through with a smooth, shiny top coat!
Conclusion
A quality top coat is the key to extending the life of your manicure and achieving salon-worthy results at home. With the right formulas and proper application techniques, you can get ultra-glossy, chip-free nails that turn heads.
Experiment with different top coats to find your favorites and don’t be afraid to layer them to customize the finish. Your nails will look polished and professional with the perfect top coat shine.