A Complete Guide To Gel Nail Polish By Sally Hansen
With an ever expanding array of nail polish options on the market, gel nail polish has become one of the most popular choices for its long-lasting color, chip-resistant formula, and easy application. If you’re looking for a top brand of gel nail polish that delivers salon quality results at home, Sally Hansen is a top contender.
Sally Hansen offers a wide selection of gel nail polish colors and effects that last up to 14 days without chipping or smudging.
If you’re short on time, here’s a quick answer: Sally Hansen Miracle Gel is one of the best and most popular gel nail polish lines by Sally Hansen. It offers over 100 shades of chip-resistant, salon-quality gel polish that lasts up to 14 days.
The formula applies like a regular polish but cures in an LED or UV lamp for long-wearing color.
In this comprehensive guide, we’ll provide an in-depth look at Sally Hansen’s gel nail polish collections, top-rated shades, application tips, removal process, and how it compares to other popular gel polish brands on the market.
Overview of Sally Hansen Gel Nail Polish
Sally Hansen is one of the top brands when it comes to gel nail polish. They offer a wide range of long-lasting, chip-resistant gel polish colors and collections to choose from. Here is an overview of some of Sally Hansen’s most popular gel nail polish lines:
Miracle Gel Collection
The Miracle Gel collection features over 100 trendy gel polish shades. This line is known for its extended wear – up to 14 days of chip-free nails! The gel polish applies smoothly and cures in just 60 seconds under an LED lamp. Miracle Gel is available in creams, shimmers, glitters, and more.
It’s a go-to choice for fashionable nail art and nail designs.
Good. Kind. Pure. Gel Collection
This collection is Sally Hansen’s first gel polish line to be certified as 10-free, meaning it’s formulated without 10 harmful chemicals like formaldehyde, toluene, and dibutyl phthalate (DBP). The Good. Kind. Pure.
shades provide a glossy, cushiony finish and a wide color selection of nudes, pinks, reds, and neutrals. The gel manicure lasts up to 14 days.
Xtreme Wear Gel Collection
The Xtreme Wear gel polishes deliver extended wear for up to 10 days without chipping. With a speedy 45-second cure time under an LED light, this collection offers a quick manicure option. The formula is designed with care for natural nails.
There are over 60 trendy and classic colors available, from pale nudes to deep wines. Overall, it’s a quality drugstore gel polish line.
No matter which gel polish collection you choose, Sally Hansen is known for offering accessible and innovative gel manicures. Their wide shade ranges allow you to get salon-worthy nails from the comfort of home.
Just remember to properly prep and prime nails, apply thin coats, and properly cure under a gel UV/LED lamp. With some basic technique, you can achieve stunning, chip-free gel nails for up to 2 weeks.
Most Popular Shades and Effects
Top-Rated Reds
When it comes to bold, eye-catching nail polish shades, reds are always a top choice. Sally Hansen has an extensive range of gorgeous reds to suit any taste or occasion. Some of their most popular and top-rated reds include:
- Scarlett – A rich, classic blue-based red. Universally flattering and perfect for any event.
- Red Carpet – A bright, cherry red cream with a creme finish. Pops against any skin tone.
- Firey Island – A hot coral red cream with a fiery orange undertone. Fun and summery.
- Razzmatazzle – A bright raspberry red cream. Playful yet sophisticated.
- International Flare – A deep wine red cream. Vampy and romantic.
- Pat on the Black – A very dark oxblood red cream. Edgy and dramatic.
Sally Hansen reds come in both creme and shimmer finishes to suit any preference. Many have won awards and have become cult classics among beauty lovers thanks to their high-impact color payoff and excellent wear time of up to 7 days without chipping.
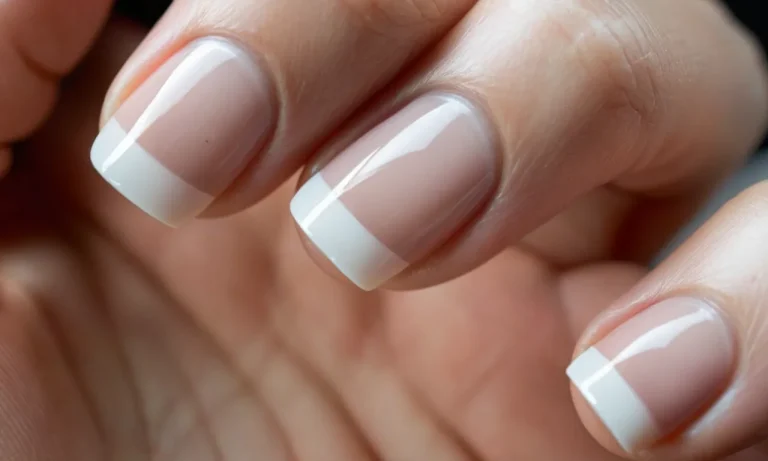
Popular Nudes and Neutrals
Nudes and neutral nail polish shades are always in style because they are so versatile and flattering. Sally Hansen has many gorgeous options to suit any skin tone. Customer favorites include:
- Mudslide – A rich brown nude with subtle shimmer. Pairs perfectly with denim.
- Beige-ing to You – A soft caramel beige cream. Ultra feminine and chic.
- Commando – A pale, milky nude. The perfect “barely there” manicure.
- Grey By Grey – A cool-toned mushroom grey cream. Edgy yet understated.
- Tan Fan – A warm peach-beige cream. Brightens the hands.
- Barracuda – A shimmery sandy tan metallic. Subtly glam for every day.
In addition to single polishes, Sally Hansen offers popular nude and neutral palettes like the Neutral Territory Mini Kit. With 6 mini shades, these are perfect for trying out an array of nudes to find your perfect match.
The nude and neutral shades have excellent coverage in just one coat and last days without chipping.
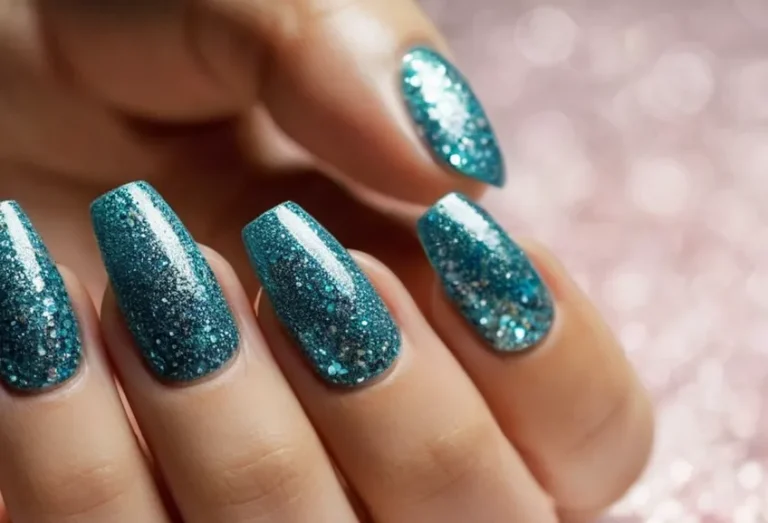
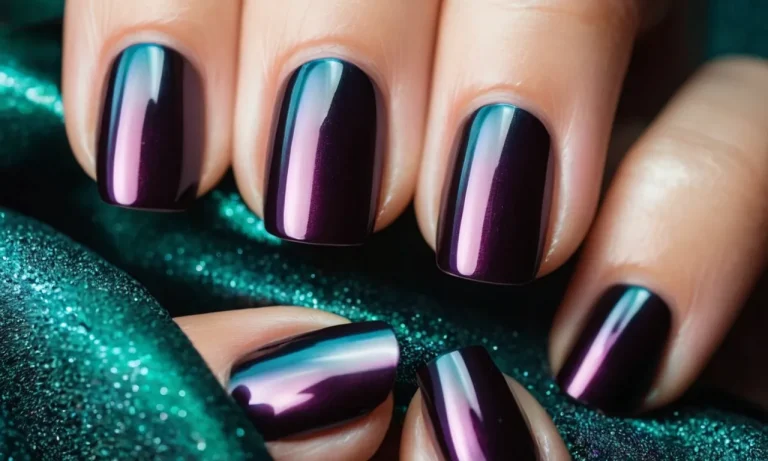
Best Glitters and Special Effects
No nail polish range is complete without fun, eye-catching glitters and special effects polishes. Sally Hansen has an array of gorgeous toppers and polishes with different textures, finishes, and effects like crackle, chrome, and holographic.
Top choices include:
- Shooting Star – A dense silver holographic glitter. Creates a rainbow prism effect.
- Pink Boom – A chunky pink and silver hexagonal glitter. Statement-making.
- Golden-I – A linear gold bar glitter. Glamorous touch for any mani.
- Cracked Ice – Adds a frosted crackle effect. Transform any polish.
- Chrome Finish – Creates a mirror-like chrome effect. Super edgy and cool.
The special effect polishes are perfect for nail art accents, tips, ombré, and more unique looks. The dense glitters provide full opaque coverage on their own in just 2-3 coats. Sally Hansen’s glitters and special effects bring any manicure to the next level.
Application Tips and Tricks
Prepping Your Nails
Before applying gel polish, it’s important to properly prep your nails. Here are some tips:
- Remove any existing nail polish and buff away shine from the natural nail. This helps the gel adhere better.
- Trim and shape your nails into your desired style.
- Push back and clean up your cuticles with a cuticle cutter or pusher.
- Dehydrate the nails by wiping them with nail polish remover or alcohol. This gets rid of any oils.
- Gently buff the surface of each nail with a fine grit nail file or buffer block. This creates texture for the gel to grip onto.
Applying Gel Polish
When applying gel polish, work one nail at a time and follow these steps:
- Apply a thin layer of gel base coat to protect the nails and help adhesion.
- Apply two thin coats of color, allowing each coat to dry in-between for 30 seconds under an LED lamp or 2 minutes under a UV lamp.
- Cap the free edge, which means apply gel over the tip of the nail, to help prevent chipping and peeling.
- Be sure to cure properly after each layer – don’t skip this important step!
Curing Under a LED/UV Lamp
Proper curing is essential for gel polish to set completely and get hard, long-lasting results. Follow these curing tips:
- Cure each layer under an LED lamp for 30 seconds or a UV lamp for 2 minutes.
- Keep hands still and flat inside the lamp to ensure even exposure.
- Invest in a quality LED or UV lamp designed for gels. Cheap lamps may not cure properly.
- Replace LED and UV bulbs once a year for optimal performance.
- Don’t wipe or wash nails between coats, just cure. Wiping can compromise adhesion.
Finishing With a Top Coat
The final step is to seal in your manicure and add extra shine and protection:
- Apply a thin layer of gel top coat over cured color and cure again under the lamp.
- Consider using the Sally Hansen Hard as Nails No Chip Top Coat for extreme chip resistance.
- Avoid traditional nail polish top coats, as they are not formulated for gel and can cause chipping or peeling.
- Reapply top coat every 2-3 days to refresh shine and protection.
By following all the application steps properly, your DIY gel manicure can last 7-14 days with no chips or smudges! Just be patient, take your time with each layer, and cure properly under the light. Let your creativity shine with endless gel polish colors and designs from Sally Hansen.
Gel Polish Removal and Repair
Removing Gel Polish at Home
Removing gel polish at home can be challenging, but with the right products and techniques, you can safely take it off without damaging your nails. Here are some tips for DIY gel removal:
- Use pure acetone – Make sure you have 100% pure acetone, as this works best to break down the gel polish. Avoid acetone with added moisturizers.
- Soak cotton pads – Soak cotton pads or balls in the acetone, then place them on top of each nail. Wrap nails in foil or use plastic nail caps to hold pads in place.
- Leave on for 15-20 minutes – Keep the acetone-soaked pads on for 15-20 minutes to allow product to fully dissolve gel polish. Check often and re-soak pads if needed.
- Gently scrub – After soak time is up, gently scrub nails with a wooden cuticle pusher or old toothbrush to exfoliate off remaining gel polish.
- Clean nails – Use a nail brush with a small amount of acetone to remove any remaining residue. Then wash hands with soap and water.
- Moisturize – Apply cuticle oil or hand cream after to combat dryness from acetone exposure.
Removing gel at home takes time and patience. Go slowly and avoid scraping at nails to prevent damage. If you have trouble getting all the product off, visit a salon for professional removal.
Refilling When Polish Grows Out
As gel manicures grow out, you’ll notice a gap between your free edge and the polish. Rather than completely removing the gel, you can get a “fill” to refresh your mani.
- File and prep – Gently file natural nail growth at free edge. Remove any shine and dehydrate nails.
- Apply new gel – Brush on a thin layer of base coat over full nail. Apply fresh coats of color and top coat, focusing application on new growth area.
- Cure – Cure each layer under an LED or UV lamp for manufacturer’s recommended time.
- Shape tips – Shape and refine extended free edge. Buff shine if needed.
Fills allow you to go 2-3 weeks between full gel removals. Try to catch fills early, before there is a wide gap. Be careful not to file or damage cured gel layers still on the nail.
Repairing Minor Chips and Cracks
Day-to-day wear and tear can cause small chips and cracks in your gel manicure. Before removing entirely, try these tips to fix minor gel damage:
- Prep nails – Gently file any cracked or jagged edges. Use acetone and alcohol to remove oils and ensure a clean surface.
- Apply gel – Use a detailing brush to place a thin layer of gel base coat over damaged area. Follow with a fresh layer of color.
- Cure and shape – Cure add-on layers under UV/LED light. Gently shape and blend repairs.
- Seal – Finish by applying 1-2 thin coats of gel top coat over entire nail to smooth and seal.
Targeted gel repairs allow you to revive a manicure for an extra week or more. However, extensive chipping and lifting requires full removal. Be sure to avoid picking at nails, which can worsen cracks.
How Sally Hansen Compares to Other Gel Brands
OPI GelColor
Sally Hansen gel polish provides a similar high-shine, chip-resistant manicure compared to OPI GelColor at nearly half the price. According to cosmetics analysis website Temptalia, the Sally Hansen gel polish kit costs around $25 while an OPI GelColor kit runs about $50.
Both gel polishes require LED or UV lamps to cure. An average manicure may last up to 2 weeks with either Sally Hansen or OPI gels.
However, OPI offers a wider range of over 100+ GelColor shades compared to the 70+ shades currently available from Sally Hansen. OPI also includes a base coat and top coat formulated specifically for their GelColor system, while Sally Hansen gel polishes can be layered with regular Sally Hansen base and top coats sold separately.
Shellac by CND
Sally Hansen gel nail polish provides a DIY gel manicure alternative to professional Shellac services costing $25-$50 per manicure at nail salons. Both polishes deliver extended wear for up to 14 days without chipping or smudging.
The key difference is Shellac requires professional application and removal by a trained nail technician using a special foil wrap technique.
On the other hand, Sally Hansen gel polish kits come with an LED lamp allowing users to apply gel manicures easily at home. While Shellac may be more durable lasting 2-3 weeks on average, Sally Hansen gel polish is more beginner-friendly for anyone to use and removes with acetone just like regular nail polish.
Gelish
The Sally Hansen gel polish system produces comparable shine and longevity to professional gel brands like Gelish. According to nail care statistics from Nailservices.com, the average DIY gel manicure lasts 8-14 days while salon Gelish manicures may last 14-21 days with proper application and care.
For best results, apply thin coats of Sally Hansen gel color and always use the included LED or UV lamp to cure layers fully. Using the complementary base and top coat is also recommended to help the manicure better adhere to nails.
In the end, Sally Hansen gels offer easier removal than Gelish and cost a fraction of the price for an equally glossy, long-lasting manicure.
Conclusion
In conclusion, Sally Hansen offers a wide variety of high-quality gel nail polish options perfect for at-home manicures that rival the salon. Their Miracle Gel line provides chip-free wear for up to 14 days in over 100 trendy shades.
With proper prep, application, and UV/LED curing, you can achieve stunning, long-lasting gel manicures without leaving home. While brands like OPI and CND Shellac have competitive offerings, the affordability, breadth of shades and effects, and easy removal of Sally Hansen gel polishes make it a top choice for DIY gel manis.