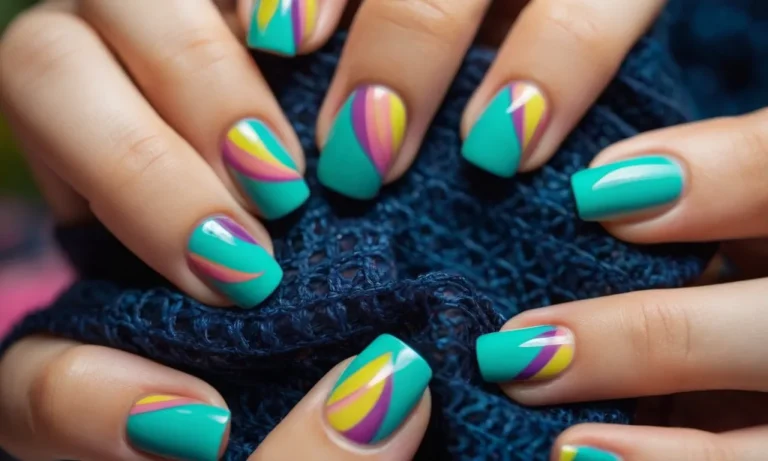
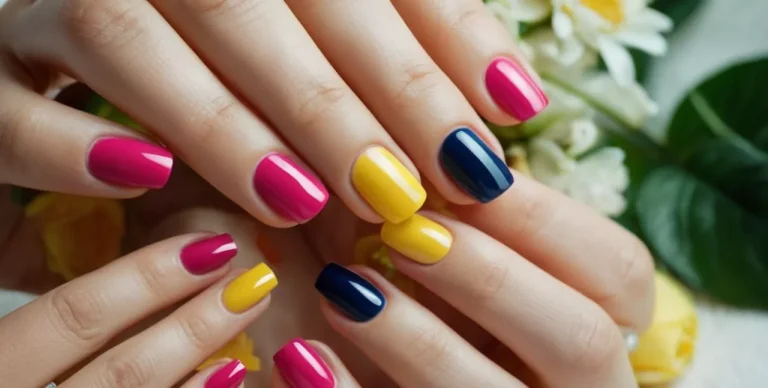
Gel Nail Polish Without A Uv Or Led Light – Everything You Need To Know
Gel nail polish has become incredibly popular for its durable, glossy finish and long-lasting color. But did you know you can still get those salon-quality results without using a UV or LED lamp? If you’re short on time, here’s a quick answer: Yes, certain gel polish brands offer formulas that air dry or can be dried with a hair dryer to set the color, meaning no light needed.
Keep reading to learn all about no-light gels – from how they work to application tips and top brand recommendations.
In this comprehensive guide, we’ll cover everything you need to know to successfully use gel nail polish without a light. You’ll learn the science behind these innovative formulas, the curing methods that replace UV/LED lamps, essential application techniques for getting a flawless finish, and reviews of the top no-light gel brands for DIY manicures that rival the salon.
How Do No-Light Gel Nail Polishes Work?
Overview of traditional UV/LED gel technology
Traditional gel nail polish requires a UV or LED lamp for curing. The formulas contain photoinitiators that react to UV/LED light, causing the gel to harden. Once applied on nails, the polish needs to be cured under the lamp for 30-60 seconds to set fully.
Without light exposure, the gel remains in liquid form and does not adhere properly.
The innovation of air-dry gel formulas
New no-light gel polishes utilize innovative oxygen-activated chemistry that allows them to cure and harden when exposed to air. These formulas contain an initiator substance that reacts with oxygen, triggering the gel to polymerize similar to acrylic nails.
This reaction causes the polish to set completely in about 10 minutes without needing a curing lamp.
Understanding the chemical reactions that cure gel polish without light
The chemical process allowing no-light gels to set involves an oxygen-sensitive initiator that creates free radicals when exposed to oxygen in the air. These free radicals propagate a cross-linking reaction, bonding the monomers in the gel together into a hardened film on the nails.
Popular chemical initiators used are methyl ethyl ketone peroxide (MEKP) or cumene hydroperoxide. The curing times can be adjusted by changing the amount and type of initiator in the formula.
This innovative technology allows oxygen in the air to replace UV/LED light. Creating a quick air-dry system that offers the same long-lasting shine and durability of traditional gel manicures, without the need for a curing lamp.
Curing and Drying Options for Light-Free Gels
Letting gels fully air dry
One of the most popular methods for setting gel polish without a UV or LED lamp is simply letting it air dry. Gel nail polishes formulated for light-free use contain chemicals that cause the polish to harden and cure over time when exposed to oxygen in the air (1).
Letting gels air dry allows oxygen to fully penetrate and harden each layer of polish from the inside out. This creates a strong, long-lasting manicure.
Most no-light gels take around 5-10 minutes to dry per layer. Applying thinner coats helps the oxygen work more quickly. Having patience is key – be sure to let each layer dry fully before adding another. Rushing the process can lead to tacky, soft gels that dent or smudge easily.
Let those nails breathe!
Using a hair dryer to speed up drying time
Sitting around watching nail polish dry isn’t everyone’s idea of a fun time. Luckily, there’s a handy hack for speeding up the air drying process – grab your hair dryer! Using a hair dryer on a medium/low heat setting helps accelerate oxygen circulation to cure light-free gels more quickly (2).
Wave the blow dryer over nails for 30-60 seconds after applying each layer to set gels in 3-5 minutes instead of 10.
Pro tip: Avoid holding the hair dryer too close or using high heat, as this can create bubbles or other issues in the polish.
Trying an activator spray for faster setting
Another option for quickly drying and hardening no-light gels is using an activator spray. These sprays contain solvents and ingredients that flash cure gel polish layers upon contact (3). Activators allow each coat of polish to dry in as little as 60 seconds!
Most work best layered under the top coat.
Activator sprays provide the instant gratification of solid nails, fast. However, flash curing can sometimes lead to less durable manicures over time. Test activators first to see if they work well with your chosen gel kit.
Tips and Tricks for Perfect No-Light Gel Application
Prepping your nails properly
Properly shaping and cleaning your nails is crucial for long-lasting color that won’t chip or peel. Use a glass nail file to shape your tips into a rounded squoval, then push back and trim your cuticles with cuticle nippers.
Finish up with a nail dehydrator like Sally Hansen’s Clean Nails to remove oils and prep your nails.
Applying gel polish in thin, even coats
The key is to apply multiple thin layers of gel polish rather than trying to get full coverage in one thick coat. Allow each layer to dry completely before adding the next. Three smooth, even layers is ideal for long wear without bumps or ripples according to DIY gel brands like Revel.
Cleaning up cuticles and edges for a neat look
Use an angled detail brush dipped in nail polish remover to gently clean up any gel that gets on your skin or cuticles. Doing this while the polish is still wet prevents staining. Q-tips can work too but may leave behind fuzz.
For best results, swipe remover over the problem areas instead of rubbing to avoid pulling up your manicure.
Avoiding common mistakes like flooding cuticles or peeling
To prevent cuticle flooding, apply each layer of gel starting in the middle of your nail and stroke outward while pulling the brush slightly upward. Don’t overload the brush with product. If you do end up with gel on your skin, clean it up right away with remover and an angled brush before curing.
Peeling and chipping often happens when layers aren’t fully cured. Set a timer and cure each coat for the recommended time.
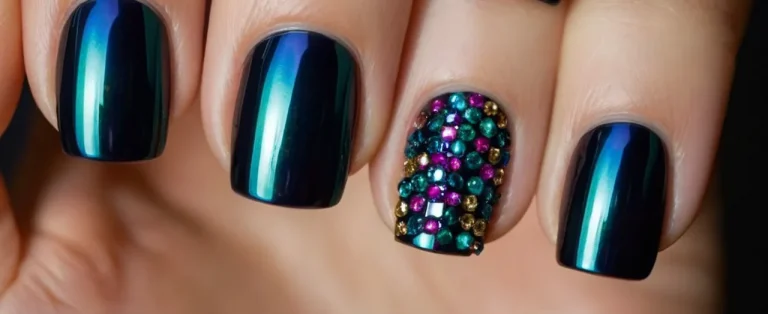
Reviews of the Top Gel Polish Brands Without Lights
Gellen – Best Overall
Gellen gel polish is renowned as one of the top no-light brands on the market. Their long-lasting formula goes on smooth and cures in just 60 seconds under natural light. With over 30 trendy colors to choose from, you can achieve a professional-grade manicure at home without harsh chemicals or UV lamps.
Reviewers on Influenster praise Gellen’s chip-resistant shine that lasts 10+ days.
OPI GelColor
As a salon favorite brand for decades, OPI recently unveiled their GelColor No Light Needed collection – delivering the same salon quality gel manicure without a UV or LED lamp. The glossy, high-pigmented formula leaves nails ultra shiny for up to a week.
With fun, creative color names and finishes like matte, shimmer, and sheer, it’s easy to pull off trendy nail looks that turn heads.
Shellac Luxe
CND Shellac Luxe takes the original 14+ day wear Shellac polish up a notch with their innovative no light gel polish. The revamped formula removes in minutes with acetone, without damaging natural nails. Over 90% of testers said Shellac Luxe lasted 14 days chip-free.
The curved brush applicator makes DIY application easy, while the extensive color selection lets you switch up your mani whenever the mood strikes.
Revlon Gel Envy No Light Required
Revlon expands their popular Gel Envy line with their innovative at-home gel polish that cures in natural light. The glossy, high-shine formula leaves nails smoothly coated with vivid, salon-quality color. For best wear, apply two thin coats and allow 10 minutes to set.
Reviewers praise the budget-friendly price point and report an average wear time of 5-7 days without chipping.
Essie Gel Couture
Essie makes our list with their Gel Couture no-light required formula that delivers a flawless, salon-quality manicure for up to 14 days. The glossy gel polish glides on smooth and sets quickly with exposure to natural light.
With a range of nudes, brights, and neutrals, it’s easy to match your mani to any outfit or occasion. The angled flat brush makes application simple.
FAQs About At-Home Gel Manicures Without UV/LED Lamps
Are no-light gels really as durable and long-lasting?
The newest no-light gel polishes can rival the durability of traditional UV/LED gel manicures, lasting up to 2 weeks without chipping or peeling, according to nail care brand Red Carpet Manicure (https://www.redcarpetmanicure.com).
The secret lies in their patented technology that allows the polish to fully cure by exposure to air for a set period of time. However, proper prep and application technique is key to get the most wear time.
How long do these manicures take to fully cure?
Most no-light gels require 24-48 hours of cure time before they reach maximum hardness. During this period, it’s crucial to avoid water exposure or pressure on the nails. After full curing, the manicure becomes quite durable and can last up to 2 weeks.
Using a fast-drying top coat like Seche Vite can help shorten the curing period.
Is it bad to use hair dryers to set gel polish?
Yes, experts warn that using heat tools like blow dryers or nail lamps to speed up the curing process risks damaging the polish and causing it to under-cure. This leads to soft, sticky polish that chips easily. Letting no-light gels cure slowly at room temperature is essential for proper hardening.
Using a quick-dry top coat is the safest way to shorten cure time.
Can I remove gels without acetone if I didn’t use a lamp?
The good news is that no-light gels can usually be removed without harsh acetone, unlike UV/LED gels. Soaking cotton pads in nail polish remover for 10-15 minutes is typically enough to break down the polish and wipe it away cleanly. An occasional acetone-soak may be needed for very thick layers.
Either way, remove gels gently to avoid excessive nail damage.
Conclusion
Thanks to innovative gel formulas that air dry or cure under a hair dryer, you can now get beautiful, salon-quality manicures without investing in a UV or LED nail lamp. As long as you properly prep your nails, apply gels sparingly yet evenly, and allow adequate drying time, these no-light options provide the same glossy shine and lasting color as traditional gels.
By following the application tips and brand recommendations provided, you’ll be able to flawlessly DIY a gel mani that resists chips and peeling for weeks on end. So don’t be intimidated to try out these light-free polishes – your next fabulous manicure is just a quick dry away!