A Complete Guide To Gel Art Paint For Nails
If you’re looking to give your nails a creative, eye-catching look that lasts, gel art paint could be just what you need. With its intense pigments and glossy finish, gel art polish lets you transform your nails into mini canvases for intricate designs.
In this comprehensive guide, we’ll tell you everything you need to know about using this long-lasting lacquer to create stunning nail art.
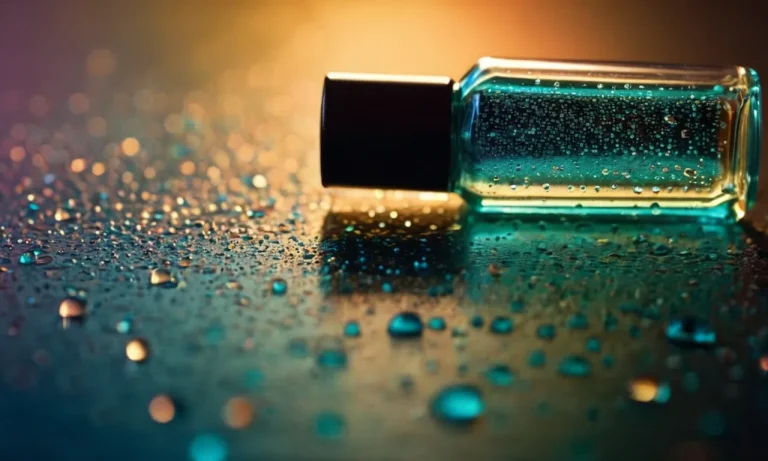
Here’s the quick answer: gel art polish, sometimes called gel lacquer, is a high pigment, UV light-cured alternative to regular nail polish that allows you to paint vibrant and glossy designs directly onto the nails.
It requires some special supplies and techniques but lasts 2-4 weeks without chipping or fading.
What Exactly Is Gel Art Polish?
Definition and key characteristics
Gel art polish, also sometimes called gel polish, is a special type of nail polish that is applied similar to regular nail polish but then cured under an LED or UV nail lamp. It creates an ultra-shiny and durable manicure that can last up to 3 weeks without chipping or peeling.
Key characteristics of gel art polish include:
- Applied on natural nails or acrylic/gel nail extensions
- Cures under a nail lamp for 30-60 seconds per coat
- Long-lasting – provides a chip-free manicure for up to 3 weeks
- Available in endless colors and effects like glitters, shimmers, and chromes
- Requires soaking removal with acetone
Unlike regular polish, the cured gel formula is flexible, strong, and resists scratches and damage. It also resists fading or dulling over time. The finished manicure has an ultra-glossy, glass-like finish.
Difference from regular polish and gel manicures
While gel art polish may sound similar to a gel manicure or regular polish, there are a few key differences:
| Gel Art Polish | Gel Manicure | Regular Nail Polish | |
|---|---|---|---|
| Application | Applied like polish | Applied on gel base coat | Applied like polish |
| Curing method | LED/UV lamp 30-60 secs per coat | LED/UV lamp 30-60 secs per coat | Air dry |
| Durability | Up to 3 weeks chip-free | Up to 3 weeks chip-free | 3-5 days max |
| Removal | Soak off with acetone | Soak off with acetone | Regular nail polish remover |
While a gel manicure involves applying a gel base on the natural nail first, gel polish can be used alone on bare nails or on top of acrylic or gel extensions. Gel polish also provides a longer lasting, glossier manicure compared to regular nail enamel.
Pros and cons
Like most nail products and enhancements, gel art polish isn’t necessarily better or worse than other options – it comes down to personal preference! However, there are some notable pros and cons:
Pros:
- Long lasting (up to 3 weeks chip-free)
- Intensely glossy, glass-like finish
- Endless color and effect options
- Can be used alone or with enhancements
- Dry quickly under LED/UV lamp
- Less damaging to nails than acrylics or gels
Cons:
- Can damage nails if removed improperly
- More expensive than regular polish
- Requires more supplies (lamp, remover, etc.)
- Removal process can be more damaging to nails than regular polish
At the end of the day, it comes down to your individual nail care preferences. Gel art polish delivers an incredibly durable, chip-resistant manicure unmatched by regular nail polish. However, improper application and removal can damage the natural nails underneath.
Weighing the pros against the cons allows you to decide if it’s right for your nails!
Supplies You’ll Need for Gel Art Manicures
LED or UV lamp
The most essential supply for any gel manicure is a LED or UV lamp. These lamps cure the gel polish layers through exposure to UV light. Traditionally, UV lamps were used, but many nail techs now prefer LED lamps.
LED lamps cure gel polish faster, last longer, and don’t emit the damaging UV rays that traditional UV lamps do. When shopping for a lamp, look for one with a timer and auto sensor shut-off for safety.
Most professional nail salons use 36-watt or 48-watt LED lamps to ensure a thorough cure. At home, you can get by with a smaller 18-watt or 24-watt lamp. Popular brands like SUNUV and Makartt make affordable, compact LED lamps perfect for home use.
Base and top coat
You’ll need a gel-specific base coat and top coat to sandwich your colored gel polishes. The base coat helps the polish adhere properly to the nail. It also prevents staining. Top coat is essential for gloss and protection. Look for long-lasting top coats that help extend the manicure.
Gelish, OPI, and CND make excellent base and top coat systems designed to work with their gel polishes.
Gel art polishes
The fun part of any gel manicure is choosing the gel polish colors. There are hundreds of options for every color and finish imaginable. Gel nail polish lasts longer without chipping or smudging compared to regular nail polish. Popular gel polish brands include Gelish, OPI GelColor, and CND Shellac.
For gel nail art, look for polishes designed for drawing and details. These have a thicker, gel-like consistency that makes it easy to paint fine lines and shapes. Some gel brands like Ugly Duckling and Bio Seaweed Gel specialize in vibrant gel art shades.
Other tools
Here are some other handy supplies to have on hand:
- Nail cleanser, primer, and dehydrator – Gel manicures require a clean surface. These remove oils and prep nails.
- Nail forms or tips – For sculpting length or fix broken nails.
- Nail files and buffers – For shaping nails before gel application.
- Nail clippers – For trimming long nails.
- Cuticle remover – To gently push back cuticles before manicuring.
- Brushes and dotting tools – For gel paint designs and details.
- Foil glue – If using foil transfer technique.
- Glitter, rhinestones, charms etc – For 3D embellishments.
- Nail glue – For affixing add-ons.
- Nail oil – For hydrating nails after gels are removed.
With quality gel polish, a proper LED lamp, and the right accessories – you’ll be set to create stunning gel art manicures at home!
Applying Gel Art Polish Step-By-Step
Prep Your Nails Properly
Prepping your nails is a crucial first step before applying any gel polish. Start by filing and shaping your nails into your desired length and shape. Use a nail file to gently buff the surface of each nail to remove any shine and ensure max adherence.
Next, use a dehydrator prep liquid (found at beauty supply stores) to remove any moisturizing oils. Follow with an alcohol pad for further cleansing. Your nails should look and feel gritty before polish application. Prepped nails allow gel polish to properly bond for long-lasting wear.
Apply The Base Layer And Cure
After proper nail prep, apply a thin layer of gel base coat evenly over each nail and wrap tips to protect from chipping. Cure the base layer under an LED or UV lamp for 30-60 seconds until tacky. Using a base coat forms a solid foundation that gel polish layers can securely bond to.
Skipping this step risks poor adherence and early peeling or chipping. The best gel base coats in 2022 according to nail artists on Byrdie and InStyle prevent lifting and promote long wear.
Paint Your Design And Cure In Sections
The creative fun begins! Using gel art polishes in your desired shades, paint nail art onto each nail. Try trending abstract water marble, geometric, nature themes, or colorful ombre fade designs. Work on 1-2 nails at a time, curing completed sections under LED/UV light before moving to avoid smearing.
This “section curing” allows time to perfect designs without rushed or messy overlapping. When doing advanced techniques like gradients, light curing in between color layers also prevents oversaturation and color blooms for a flawless finished appearance.
Finish With A Glossy Top Coat
Once nail artwork is complete, evenly apply a layer of non-wipe gel top coat over the painted design and wrap tips. Cure for final hardening protection. The top coat seals and smooths the gel art polish underneath for a professional glossy salon finish.
It also acts as a shield against chips and scratches during wear. Consider Artistic’s Gel Top Gloss praised by over 1,400 Amazon reviewers for its chip-free crystal shine that “lasts for weeks.”
Remove Safely After 2-4 Weeks
Soak cotton pads in pure acetone nail polish remover and place over each nail to dissolve artwork and gel layers for easy removal. Never rip or peel gels off, as this can damage natural nails. With regular application and proper removal, gel art manicures can safely last 2-4 weeks on natural nails.
Give nails a rest with nourishing cuticle oil before starting the artistic process again!
Gel Art Design Ideas and Techniques
Freehand brushwork
Freehand gel nail art allows you to unleash your creativity using brushes and gel paints. With practice, you can create any design directly on the nail. Start with simple strokes, lines, and dots. Working with just one color first can help develop control.
Once comfortable, graduate to multi-colored floral motifs, animals, landscapes – anything you can imagine! Having a steady hand helps, but the beauty of gel is you can just wipe it off and start over if you make a mistake.
Nail art brushes and tools
Specialized brushes are key for intricate freehand gel art. Fine liner brushes allow you to paint super-slim lines and details. Larger flat brushes work well for filling in larger areas with color. Fan brushes can create wispy strokes for blending and textures.
Dotting tools in various sizes help apply uniform dots or other shapes. Beyond brushes, you may want to try silicone guides for lined effects, striping tape for perfect parallel lines, or rhinestone pick-up tools for easier gem placement.
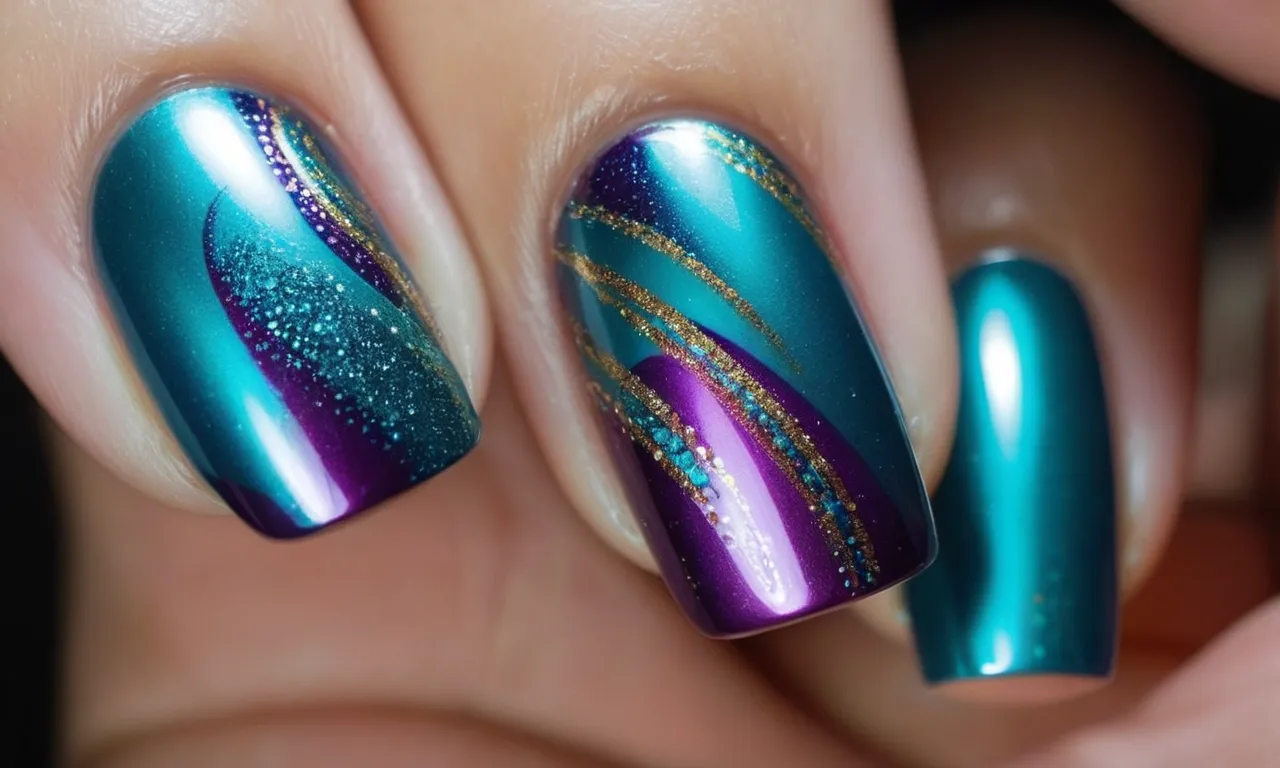
Gradient
The gradient nail look blends one color into another for a fade effect. Gradients work best on natural or French tip nails. Apply your base gel colors, one on each side of the nail. Before curing, use a makeup sponge, eyeshadow applicator, or brush to blend the two colors together.
You can blend as minimally or extensively as desired. Add stripes, dots, or glitter on top once cured for more dimension.
Marble
Marbling creates a stone-like look by layering different colored gels. Apply a clear or neutral base gel color first. Add drops of different colors in various areas of the wet gel and use a brush or skewer to swirl them gently. As the colors blend, they will create marble-like veins.
For extra dimension, top with a shimmery gel top coat after curing.
Stamping
Nail stamping transfers intricate designs using etched plates and polish. Apply the gel polish color you want to transfer onto the stamper. Firmly press the stamper over the design on the plate to pick it up. Then, transfer and roll the stamper onto your nail.
You can find plates with endless words, textures, florals, etc. Combine stamping with other techniques like ombre or glitter for unique designs.
Glitter ombre
This fun look fades glitter density from concentrated at the cuticle to sparse at the tip. Apply your base color gel. Dip a makeup sponge into glitter gel polish and press onto the nail, starting closest to the cuticle and lightening pressure as you move towards the tip.
Repeat until reaching the desired glitter gradient. Top coat to smooth and seal in the sparkle.
Encapsulation
Encapsulation suspends items inside a clear gel for a 3D effect. First apply a base coat gel and cure. Place your item (glitter, flowers, studs, charms, etc) onto the nail and brush over it with clear builder gel. Cure once more. File and shape as needed.
Finally, apply gel top coat to seal the encapsulated object in place.
Foil
Foil nail art adds eye-catching metallic shine. Brush on a layer of clear gel where you want the foil applied. Immediately place a foil piece atop the gel and smooth to adhere. Use tweezers to remove the foil backing. Top coat over the foil design to seal it in.
Ensure foils are designed specifically for nail use for best results.
Dotting
Adding dots creates delicate nail art or makes for fun polka dot designs. Dip a toothpick or dotting tool into gel polish and gently press onto the nail to deposit color. Let dots overlap or use multiple sizes for interest. Place randomly or in precise patterns.
Pair with other techniques like ombre or stamping by dotting on top.
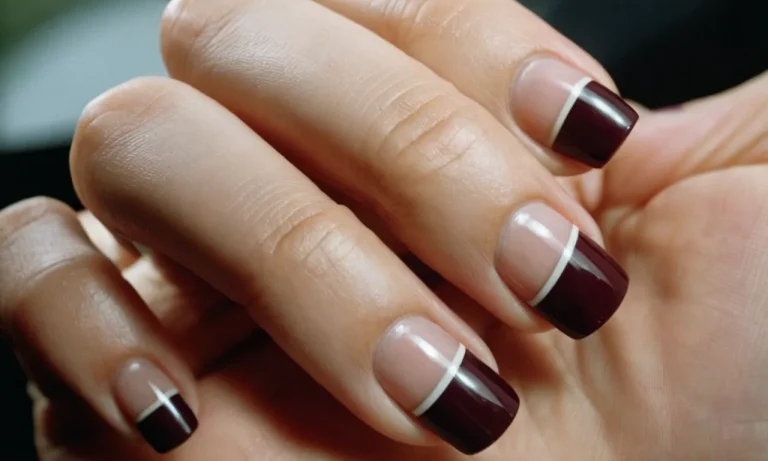
Striping tape lines
Striping tape allows you to paint perfectly straight lines in different colors. Simply apply strips of tape where you want your lines to go, paint over with gel polish, and remove the tape before curing.
You can find striping tapes in various widths to create colorful borders, chevrons, grids, and more.
Rhinestones and charms
Add sparkle and dimension to any gel manicure with rhinestones and charms. Using a small dab of gel glue or cured clear gel, affix your embellishments onto the nail where desired. For maximum hold, encapsulate the item fully in clear gel.
Choose from crystal rhinestones, pearls, bows, chains, studs or anything else that strikes your fancy.
Choosing the Best Gel Art Polish Brands and Colors
When it comes to gel nail polish, you’ll want to choose brands and colors that pop while holding up to daily wear and tear. Here’s what to look for when selecting the best gel art polishes for stunning, long-lasting manicures.
Popular Brands for Quality and Intensity
Some of the top gel polish brands beloved by professional nail artists and savvy DIYers include:
- CND Shellac – With over 100 colors to choose from, CND Shellac is a salon favorite thanks to its two-week wear and glossy, mirror-like shine.
- OPI GelColor – Renowned for its wide array of trendy shades and chip-resistant formula lasting up to three weeks, OPI constantly releases new, must-have colors.
- Bio Seaweed Gel – This vegan and toxin-free brand offers a healthy alternative with ocean-inspired hues that last.
- China Glaze – Fun, creative colors like neon brights, shimmers, and glitters make this affordable drugstore brand a top choice for nail art.
Gel polish enthusiasts agree – when searching for vivid, intense color payoff that truly lasts, these brands consistently deliver.
Finding Versatile Color Collections
Rather than choosing random polishes, look for versatile collections with coordinated hues that allow for creative mix-and-match manicures. Some examples include:
- Neutrals – Gel polish ranges like Essie Gel Couture Simplicitea offer an array of nudes from pale beige to deep chocolate.
- Pastels – Collections like OPI Nature Strong feature soft pink, blue, yellow, and lavender shades.
- Neons – Vibrant summer brights like Sally Hansen Miracle Gel Electric Summer let you switch up vivid corals, greens, oranges, and pinks.
- Metallics – Mirrored chromes and shimmers like Bluesky Bio Seaweed Galaxy Chrome lend edgy iridescence.
Choosing within color families allows you to design varied manicures that transition smoothly between seasons and occasions.
Special Effects Polishes
For showstopping nail art, look for special effect gel polishes that instantly add wow factor. Some dazzling finishes include:
- Glitter gels – Dense particles of holographic glitter in Barbicide Glitter Bomb create sparkling dimension.
- Crackle gels – Bubble up shattered patterns over color like Beauty Secrets Crackle Polish.
- Cat-eye gels – Flip your nails to reveal a flash of unexpected color as in Red Carpet Manicure Cat Eye Collection.
- Chameleon gels – Shift shades based on temperature and angle like Orly Glosser Chameleon Effect.
Let your creativity run wild with these transformative top coats and polishes!
Consider Your Skin Tone for Colors
The right gel polish colors can make your skin glow. Follow these tips when picking shades:
- Fair skin – Pastels, cherry reds, and rose gold complement without being too harsh.
- Medium skin – Go for richer wines, vibrant oranges, and true reds.
- Darker skin – Try deeper plums, emerald greens, and bright corals that pop.
Test out swatches across your whole hand to see undertones and find shades that make your skin shine. With so many gel options, you’re sure to discover new go-to polish colors!
How to Remove Gel Art Polish Safely
Removing gel art polish can be tricky because it’s formulated to last 2-3 weeks without chipping or peeling. Improper removal can damage the natural nail bed. Follow these safe DIY gel removal steps to avoid irritation or damage.
Soak Cotton Pads in Pure Acetone
Acetone-based nail polish remover is the most effective way to break down the gel polish layers. Pick up 100% pure acetone and skip removers mixed with oils, which will leave residue. Soak cotton balls or pads fully in acetone to soften the gel layers.
Wrap Each Nail to Dissolve Polish
After soaking the cotton, wrap each finger using foil or small squares of aluminum. Tightly seal the tip and base around the nail bed. Let it sit for 15-20 minutes so the acetone can fully penetrate. The gel layers will bubble up as it dissolves.
Gently Push Off Polish Remnants
Once the time is up, gently press and rub the cotton wrap on each nail to push off gel remnants. Stubborn glitter or color pigments may remain, so re-soak and re-wrap those spots if needed. Avoid scraping tools which can damage the nail bed. The gel should slide off easily if fully soaked.
Finish by Buffing Nails Lightly
After removing gel layers, wash hands with soap and water. Use a soft nail file or buffer to smooth down rough edges or shine the nail plate. Apply cuticle oil or moisturizer to condition the nails and cuticles. Gel removal can cause dryness so it’s important to nourish afterward.
Avoid buffing too harshly, which can thin natural nails over time.
Following proper gel removal steps keeps nails healthy and avoids irritation of the surrounding skin. Be patient during the soaking process and the gel will lift off without hassle or damage. Then pamper nails with moisturizing products to counteract the drying effects of acetone soak-off.
Conclusion
With the right supplies and techniques, you can unleash your creativity with gel art polish to achieve dazzling, long-lasting nail designs. It does involve some investment and practice, but the vivid results are well worth it.
So explore imaginative ideas, experiment boldly with colors and effects, and transform your nails into mini art canvases that will have everyone gazing in admiration.