A Guide To French Tip Designs On Square Nails
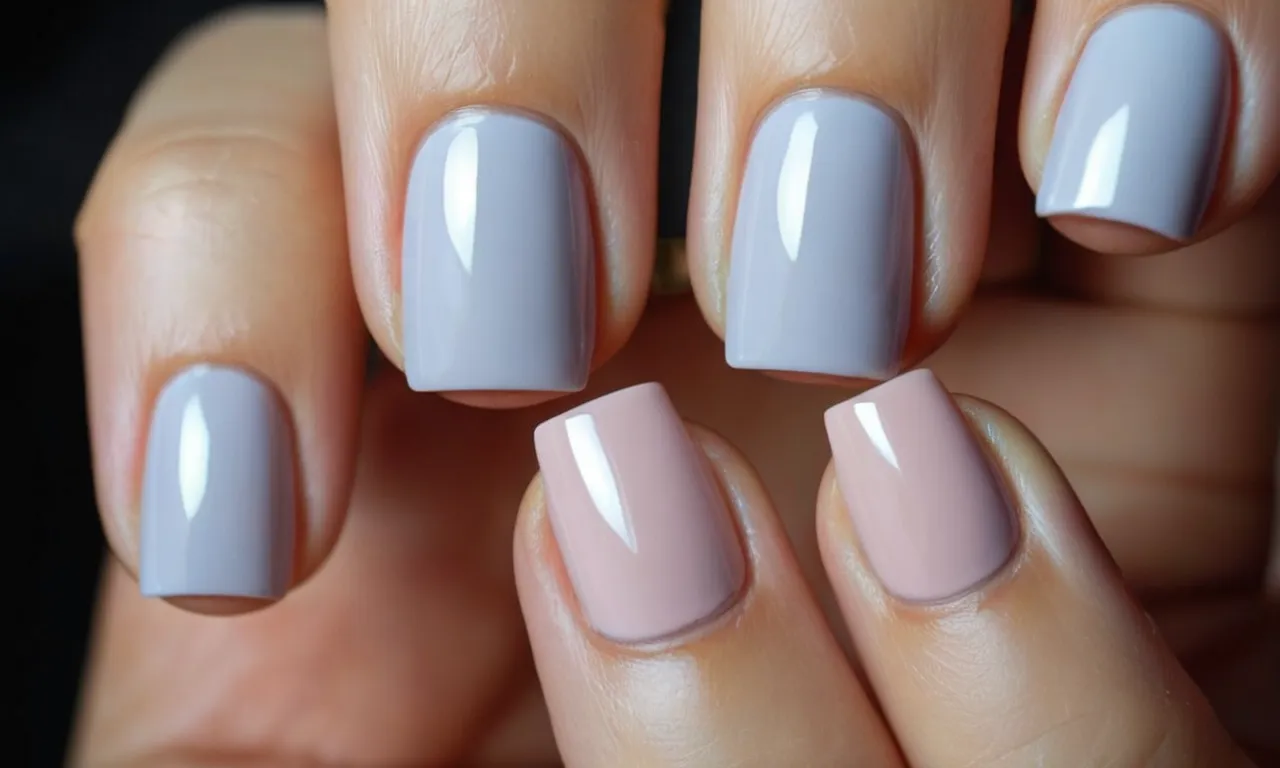
If you love a classic, elegant nail look but also want something modern and on-trend, French tips on square nails are the perfect choice. Traditionally, French manicures feature a nude base color with white tips on the ends of oval-shaped nails.
But oval isn’t your only option – square nail shapes lend themselves beautifully to stylish French tip designs.
Here’s a quick answer if you’re short on time: French tips look chic and sophisticated on square-shaped nails. Focus the white tip on the free edge rather than the corners for a balanced, proportional look.
Go for a thicker tip for graphic impact or try creative variations like nude & white checks, white half-moons, or even black tips instead of white.
In this comprehensive guide, we’ll cover everything you need to know about achieving stunning French tip manicures on square nails. You’ll learn about figuring out the right tip thickness and placement, cleaning up the shape for precision, and fun twists like multi-color or negative space tips.
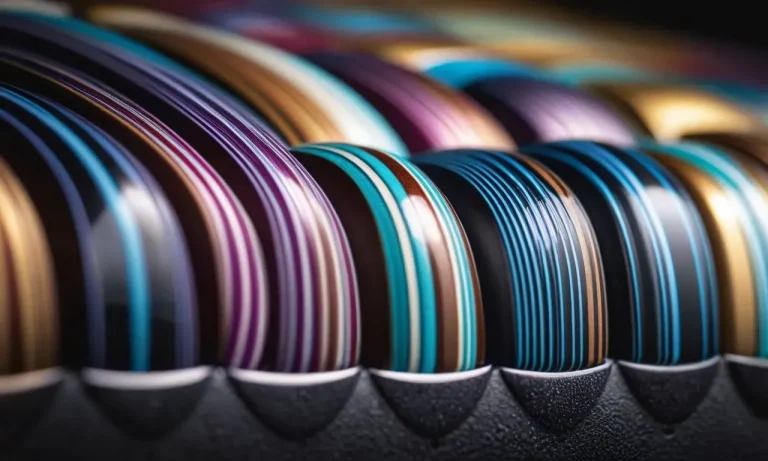
Choosing the Right White Tip Thickness for Square Nails
The Proportional Rule
When selecting the perfect french tip thickness for square nails, most manicurists recommend following the “proportional rule.” This design guideline suggests the white polish at the tip should take up approximately one-third of your total nail length.
Going with this proportion creates a classy, balanced look on any nail shape or length.
For example, if your square nail beds measure 9mm long, your french tips should be around 3mm thick. The clean delineation between the white tip and pink base is what makes square french manicures so striking.
Thin Tips for Minimalism
While the proportional guideline generally works well, some people opt for more subtle, skinny french tips on their square nails. Thinner white bands spanning just 1-2mm create an understated, minimalist style.
If you want the focus to remain on your actual nail length and shape, choose bare-there french tips. Go even thinner on very short nails to elongate the fingers.
Thick Tips for Drama
On the other side of the spectrum, square nails can really pull off ultra-bold, wide french tips. Expanding the white polish to cover half the nail creates major drama and elongation.
Increasing the thickness of your tips also helps balance out shorter nail beds. The contrast makes your fingers appear longer. Just be wary of going overboard on undersized nails, which can look unbalanced.
Tip Placement That Flatters Square Nails
Focus on the Free Edge
When applying French tips to square nails, it’s important to focus the design on the free edge of the nail. The free edge is the part of the nail that extends past the finger, beyond where the nail bed ends.
This is usually the best area to place the white tip, as it helps make the nail appear longer and more squared off. Placing the white too far down on the nail bed can make square nails appear more rounded or squoval shaped. Here are some great tips for perfect placement:
- Start the white tip right at the very edge of the free edge. Continue it straight across the nail, keeping the line crisp and clean. This instantly makes the nail look more squared.
- Only extend the white tip down the nail about 1-2mm from the free edge for a subtle, classic look. Going too far down takes away from the angular shape.
- Make sure to apply the tip evenly across all nails. Consistent placement is key for a cohesive, professional look.
- Consider slightly angling or arching the tip as it moves from the edges to the center of the nail. This helps flatter the natural curve of the nail bed.
Avoid Placing Tips on Corners
Though French tips on square nails often focus on creating straight, sharp lines, it’s actually best to avoid placing the white polish precisely on the corners of the nails. This is because the corners are prone to chipping and can end up looking messy very quickly.
Here are some tips for avoiding the corners:
- Angle the tip slightly inward from the actual 90-degree corner of the nail. This helps protect the integrity of the manicure.
- Apply top coat generously along the tips to reinforce them against potential chips and cracks.
- Consider rounding the square corners of the nail slightly when shaping, for a softer but still squared look.
- Use gel or acrylic tips instead of regular polish. The thicker product will be more durable on the corners.
By taking care with the tip placement on square shaped nails, you can create a stunning, well-balanced French manicure look. Focus the white coloring right on the free edge for sharp definition, and keep it slightly back from the weak corners.
With precision and practice, square-shaped nails can look oh-so-chic in classic French tips.
Shaping Crisp, Defined Lines
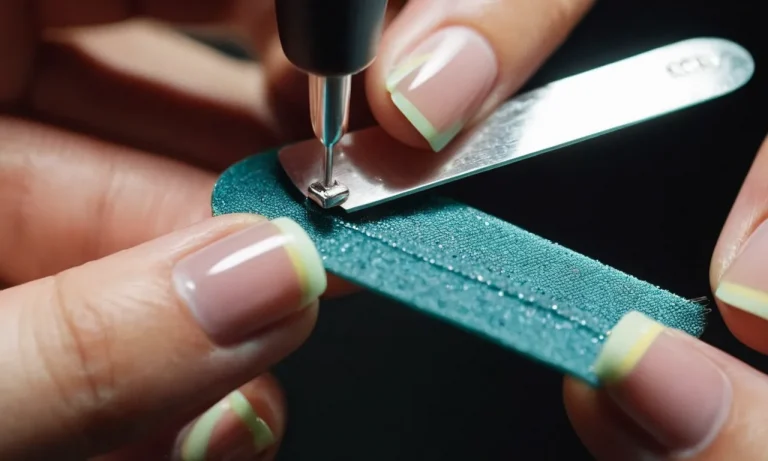
Use Striping Tape for Guidance
One of the keys to achieving a perfect French tip is ensuring you have crisp, straight lines along the nail edges. This is where using striping tape comes in handy. Apply a strip of tape just below the smile line on each nail before painting on the white polish for your tips.
The tape acts as a guide, allowing you to shape straight edges with your nail file. Once the white polish has dried, simply peel off the tape to reveal a flawless smile line!This clever trick takes the guesswork out of freehanding straight French tips.
File the Tip at an Angle
When shaping the white tip on your square nails, be sure to file the edges at an angle rather than straight across horizontally. Filing at approximately 45 degrees creates a beveled edge that helps define and accentuate the French manicure style.
It also prevents the dreaded “shelf tip” look, where the white polish meets the nail bed in a blunt, harsh line. Whether using a traditional emery board or an electric nail file, keeping your tool turned slightly downward as you file produces a softer, yet still crisp tip.
Clean Up with a Detail Brush
Even with the help of striping tape, you may end up with a bit of will polish overlapping onto your nail bed. Not to worry! An angular detail brush is the perfect tool for precision clean up. Dip just the fine tip of the brush into nail polish remover and gently wipe away any stray polish along the smile line.
The tapered shape gives you control to nip away imperfections while keeping your beautifully filed French tip intact. A steady hand and delicate touch are key when wielding the detail brush. Take your time and inspect from multiple angles to ensure your lines are perfect.
Voilà – crisp, camera-ready nail tips!
With some helpful tools and the right techniques, crafting stunning French tips on your square nails is easy. Striping tape lays down a flawless guide, filing at an angle defines and shapes the white polish, and a detail brush neatly cleans up any imperfect edges.
In just a few simple steps, you can achieve salon-worthy tips and take your nail art to the next level. So grab your supplies and get ready to flaunt those fab French manicures!
| Tip Shaping Tool | Purpose | Technique |
|---|---|---|
| Striping Tape | Creates straight guide lines | Apply below smile line before painting |
| Nail File | Shapes and defines tip edge | File at 45 degree angle |
| Detail Brush | Precision clean up of polish | Gently wipe away excess with remover |
Creative Twists for Square French Nails
Two-Toned Tips
A hot trend with square French tips is playing with two-toned ombré colors to create a faded effect. For example, try a classic white French tip that graduates into a soft pink closer to the cuticle. Or go bold with a white tip that ombrés into a deep burgundy.
The possibilities are endless for chic, stylish color combinations!
Another idea is to do a two-toned rainbow or pastel color effect. Start with white near the tip and blend the colors in towards the cuticle area. Not only does it look amazing, but it shows off your creativity and skill in nail art!
Negative Space Designs
Negative space manicures are super eye-catching on square nails. The basic idea is to leave some areas empty to create a pattern or design with the bare nail showing through. For French tips, start with a white base and painter’s tape to block off sections, then apply your top color.
Carefully remove the tape to reveal a stunning linear look.
You can also play with shapes like squares, triangles and diagonal lines. Geometric patterns like chevron stripes look especially cool on square nails. And negative space French tips open up lots of possibilities for abstract art or minimalist styles.
Abstract Checks and Shapes
One of the hottest square French manicure trends is incorporating different shapes and line work. For instance, try square French tips with modern black checkerboard prints. It’s graphic and glam!
Some other ideas include:
- French tips with triangular shapes towards the cuticle
- Curved abstract line designs
- Artsy squiggles and dots
- Minimalist shapes like circles and squares
Anything goes with abstract nail art, so don’t be afraid to get creative.
Use striping tape for clean lines, nail vinyls for shapes or free-hand it for an artistic look.
Conclusion
With the right techniques for application and shaping, square nails serve as the perfect canvas for showcasing pretty French tip designs. Not only do they look utterly elegant, but they’re also easy to achieve at home with some patience and the right tools.
So don’t reserve French manicures just for oval nails – embrace the geometric possibilities of square nail shapes. With crisp lines and creative variations, your square French tips will turn heads.