Fingernail Glue For Split Nails: A Complete Guide For Repairing And Preventing Nail Splits
Do you cringe every time you spot a new painful nail split? If you’re tired of dealing with constantly splitting fingernails, this guide is here to help. Quick answer: Use fingernail glue specifically designed to fix splits.
It dries fast and forms a hard resin that keeps your nail intact as it grows out. Read on for tips on selecting the best glue and properly applying it for long-lasting results.
In this comprehensive 3000 word guide, you’ll learn what causes nails to split down the middle or at the edges, see fingernail glue product recommendations, get step-by-step application directions, plus discover natural split nail repair options and tips to prevent future breaks.
What Causes Fingernails to Split
Dryness and Brittleness
One of the most common causes of split fingernails is dryness and brittleness. When nails become very dry, they lose elasticity and become prone to cracking and peeling. Some factors that can lead to dry, brittle nails include:
- Frequent exposure to water – Excessive handwashing, dish washing, swimming etc. can strip nails of moisture.
- Harsh chemicals – Nail polish remover, cleaning solutions, etc. can dehydrate nails over time.
- Certain medical conditions – Thyroid disorders, eczema, and iron deficiency can all contribute to brittle nails.
- Aging – Nails tend to become drier and more fragile with age.
- Insufficient moisturizing – Not using enough hand cream or nail oil daily.
Keeping nails well-moisturized is key to preventing brittleness and splits. Applying a hydrating nail oil like jojoba or vitamin E daily can dramatically improve nail health.
Injury and Trauma
Direct injury to the nail plate can also cause splits and cracks. Fingernails are vulnerable to trauma like catching on surfaces, getting smashed in doors, sports injuries, etc. Even minor impacts can cause the nail plate to partially separate from the nail bed, resulting in splits or white spots on the nails.
Injuries that only affect the top layers of the nail can lead to peeling and splits, while deeper trauma can cause the nail plate to separate completely. Keeping nails filed into a rounded shape can help reduce the risk of traumatic splits and cracks.
Fungal Infections
Fungal infections like onychomycosis can lead to nail damage and splitting. The infection causes the nail to become brittle and distorted as the fungus spreads through the nail tissue. The affected part of the nail can detach completely from the nail bed, or it may split down the middle.
Topical antifungal medications are required to treat the fungal infection. Keeping nails clean and dry can help prevent fungal infections that lead to splitting.
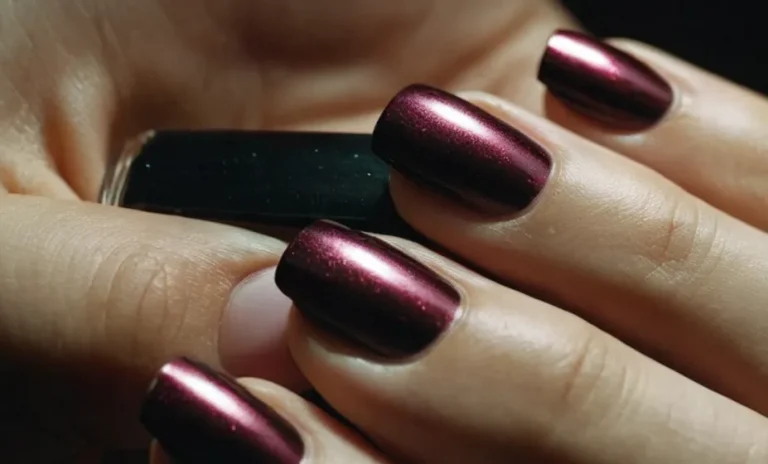
Choosing the Best Glue for Split Nails
Brush-On Formulas
Brush-on nail glues are a great option for repairing split nails. They allow you to easily apply a thin layer of glue directly onto the nail where it is needed. Many brush-on formulas dry quickly in just 60 seconds or less.
Some popular brush-on nail glue brands include Sally Hansen Insta-Dri and Kiss Maximum Speed Nail Glue. These glues go on smoothly and provide a strong, long-lasting bond.
Brush-on nail glues often contain ingredients like ethyl cyanoacrylate which helps the glue stick strongly to the nail. Some also contain added vitamins and proteins which help condition nails. When using a brush-on glue, be sure to apply it sparingly just along the split part of the nail.
Too much glue can leave nails feeling thick and hard.
Super Glue
Regular super glue or cyanoacrylate glue can also work well for minor nail splits and cracks. Brands like Loctite or Krazy Glue are inexpensive options you may already have at home. Super glue forms bonds quickly and dries transparent on natural nails.
This type of glue may be a good choice for quick, temporary split nail repairs.
However, super glue tends to be more brittle than nail-specific glues. It may be more likely to peel off nails over time. Super glue can also damage nails if too much is applied or it leaks into the side of the nail bed. Use super glue sparingly and with caution to avoid irritation.
UV-Curing Glues
UV or UV-LED curing nail glues offer another excellent choice for fixing split nails. These glues cure under ultraviolet light, allowing them to set completely hard in about 30-60 seconds. Some popular options are Gelish ProBond and Light Elegance Liquid Forward nail glues.
The quick cure time helps the glue bond tightly to nails. UV-curing glues tend to be more flexible and less prone to peeling than super glue. They also form a smooth surface over the nail. The only downside is you must have a UV or LED nail lamp for these glues to set.
| Glue Type | Pros | Cons |
|---|---|---|
| Brush-on | – Easy, precise application – Strong bond |
– Can be thick if applied too heavily |
| Super Glue | – Convenient and fast – Inexpensive |
– Brittle hold |
| UV-Curing | – Quick cure time – Flexible bond |
– Requires UV/LED lamp |
When choosing a nail glue for splits, consider if you want just a temporary fix or longer-lasting repair. Brush-on and UV-curing glues tend to provide the most durable mends. Pick a glue designed specifically for nails whenever possible. Apply glue thinly just to the split area.
Let the glue fully cure before rinsing hands or applying polish. With the right glue and technique, you can safely and effectively fix split nails at home!
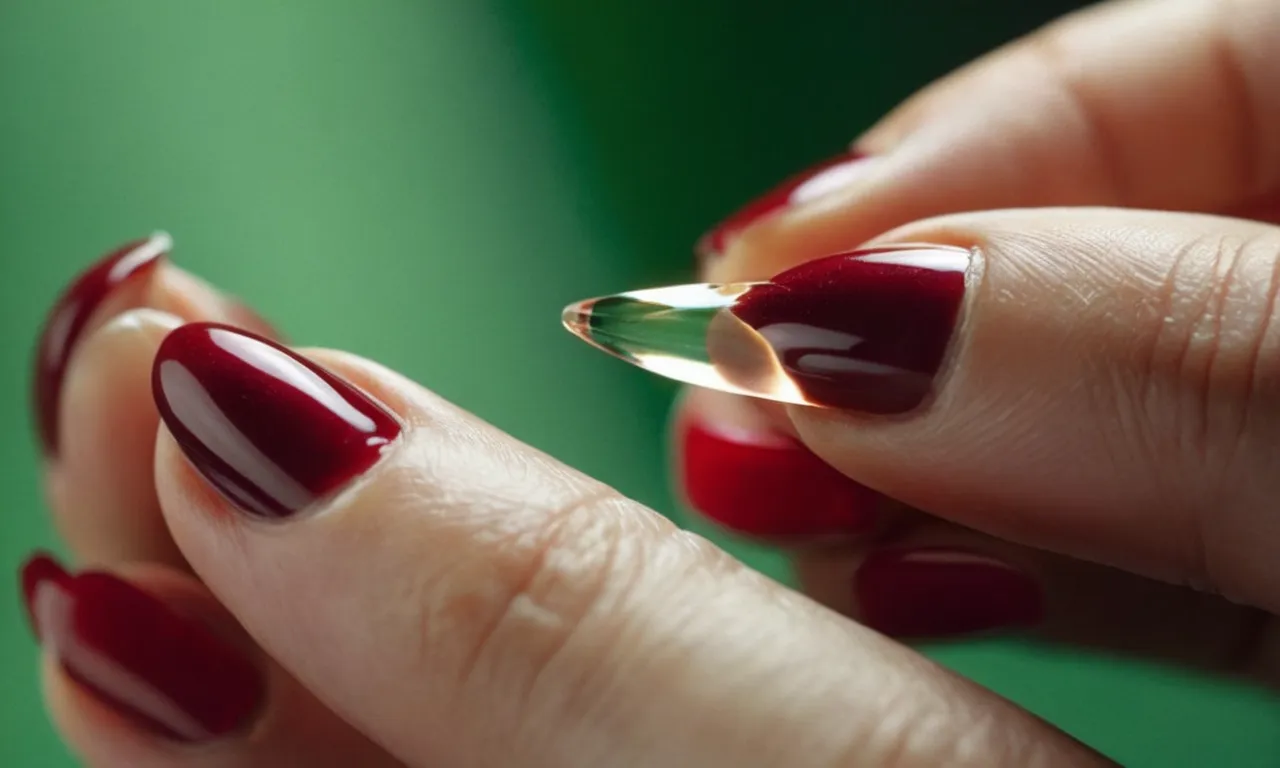
How to Properly Apply Fingernail Glue for Splits
Prep the Nail
Before applying fingernail glue, it’s important to properly prepare the split nail. Here are some tips for prepping your nail:
- Clean the nail thoroughly with soap and water to remove any dirt, oil or debris. Make sure the nail is completely dry.
- Gently file and buff the surface of the nail using a fine-grit nail file or buffer. This helps the glue adhere better.
- Trim off any ragged or sharp edges around the split area using nail clippers or scissors.
- Apply a small amount of cuticle remover cream around the nail edges to soften cuticles, then gently push them back with an orangewood stick.
Properly prepping the nail ensures the glue will bond tightly for a long-lasting nail split repair.
Glue Application Tips
When applying fingernail glue, use these tips for best results:
- Choose a fast-drying nail glue formulated for splits, such as Brush-On Nail Rescue Glue. Avoid super glue or school glues.
- Only apply a thin layer of glue over the split nail using the brush applicator. Too much glue can cause lumps or weak adhesion.
- Let the glue set for 30-60 seconds before closing the split seam. This allows it to get slightly tacky.
- Gently press the split nail edges together with your fingers. Hold for 30 seconds.
- Apply 1-2 additional thin layers of glue over the entire nail surface to reinforce and seal the repair.
Applying glue properly ensures it sets up strong while avoiding a messy application.
Drying and Curing
It’s crucial to let the nail glue dry and cure completely to ensure a durable split nail repair:
- Let the glue dry for 2-3 minutes between coats. Drying times may vary based on glue type.
- Allow the nail glue to fully cure for at least 24 hours before getting the nails wet. Water can weaken the bond before it’s set.
- Avoid picking, peeling or hitting the glued nail during the curing period. This can cause the glue to detach.
- The nail glue reaches maximum strength in 48-72 hours. Avoid heavy activities on the nails during this time.
Letting the nail glue properly dry and cure helps create a strong, long-lasting split nail repair.
When to Reapply
Depending on your nail growth rate, you may need to reapply fingernail glue 1-2 weeks after the initial application. Here are some signs it’s time to re-glue:
- The split starts separating again as the nail grows out.
- The bonded nail feels weaker or more flexible.
- You notice gaps or bubbles forming along the glued edge.
- The glue layer feels thicker or bumpy suggesting shrinking or chipping.
Reapply a fresh layer of nail glue over the old glue to reinforce the nail. Limit glue layers to 2-3 total to prevent excessive thickness. Consistently re-gluing as needed helps keep split nails repaired until fully grown out.
Natural DIY Split Nail Repair Options
Tea Bag Patch
Applying a tea bag patch is a quick, easy way to help repair a split nail using items you likely already have at home. Black or green tea bags work best thanks to the tannins they contain, which help strengthen nails.
Simply cut a small piece of a tea bag to fit over your split nail, then seal it in place using a thin layer of clear nail polish. The tea’s natural oils and nutrients can help reinforce your nail. This temporary fix protects the split while allowing your nail time to grow out.
Just reapply a fresh tea patch every few days until the split grows away. Easy peasy! 👍
Silk Wrap
Wrapping your split nail in a thin strip of silk fabric is an all-natural DIY trick used by nail techs. The smooth silk acts as a gentle binding to bring together the separated layers of your cracked nail plate while also preventing snags.
Simply cut a 1/4 inch wide piece of silk fabric to fit over your nail split, then seal it on with a layer of nail glue or clear polish. Silk is breathable and comfortable while helping reinforce your nail. As your nail grows out, reapply a new silk wrap patch every 4-5 days.
Choose colored silk for a cute look! This nourishing support treatment helps prevent further cracking while your nail mends itself. 😊👏
Nail Hardener Polish
Using an all-natural nail hardening polish or treatment is a safe, non-toxic way to repair split nails. Many DIY recipes combine strengthening ingredients like vitamin E oil, lemon juice, coconut oil, olive oil, and essential oils.
For example, one recipe suggests mixing 1 teaspoon each of coconut oil, vitamin E oil, and lemon juice. Apply it as a nourishing oil directly to your cracked nails and cuticles twice per day. The oils moisturize while the acid from lemon juice gently exfoliates away dead cells.
Or try a pre-made product like Priti NYC Soy Nail Polish which contains wheat protein to reinforce weak, brittle nails prone to splitting. Its water-based formula is free of toxic chemicals. Over time, diligently applying a natural strengthener can improve nail health and resilience against cracks. 💅
Preventing Future Nail Splits
Moisturize Frequently
Keeping your nails properly moisturized is one of the best ways to prevent future splits and cracks. Apply a rich moisturizing cream or oil to your nails and cuticles at least twice per day. Look for moisturizers that contain ingredients like vitamin E, coconut oil, and shea butter.
Gently massage the moisturizer into your nails and cuticles until fully absorbed. This helps keep your nails flexible and resilient.
Avoid Damage
It’s also important to avoid sources of damage to your nails that can cause splits and cracks. Try to minimize exposure to water, harsh chemicals, and nail tools that can weaken nails. Wear gloves when washing dishes, cleaning, or using harsh products.
Be gentle when pushing back cuticles and filing nails – don’t force or tear. Avoid very short nail lengths, acrylics, and frequent polish changes. Let your nails “breathe” between manicures. The less trauma your nails endure, the less likely they are to split.
Consider Supplements
Making sure you get enough key nutrients can also help fortify your nails. Some supplements that may help prevent splits and cracks include:
- Biotin – This B vitamin helps stimulate keratin production for stronger nails.
- Calcium – This mineral is essential for nail health and strength.
- Silica – This helps improve nail flexibility and resilience.
- Vitamin E – An antioxidant that protects nails.
- Zinc – Supports nail growth and repair.
Ask your doctor if adding 2,500 mcg of biotin or a broad-spectrum nail health supplement makes sense for you. But supplements work best paired with a healthy diet and lifestyle habits.
By keeping your nails moisturized, avoiding damage, and getting key nutrients, you can help prevent those annoying nail splits moving forward. Paying a little extra attention to your nails now means you’ll have to do fewer frustrating glue repairs down the road! 😊👍
Conclusion
By understanding what causes split nails and learning the proper fingernail split repair process using glue or natural options, you can finally have attractive, long-lasting manicures. Be diligent with moisturizing and protecting your nails from damage to prevent future breaks.
With some TLC for your tips, you’ll have beautiful, healthy nails that make you proud to flash your fingers.