Do You Need Uv Light For Acrylic Nails?
When deciding on your next set of fabulous nails, you may be wondering: do you need UV light for acrylic nails? The quick answer is yes – UV light is crucial for properly curing and hardening acrylic nails.
Throughout this comprehensive guide, we’ll explore why UV light is essential for acrylics, examine the curing process step-by-step, compare UV with LED lamps, and provide acrylic nail care tips to help your manicure last.
We’ll cover topics like:
– The role of UV light in curing acrylic powder
– Step-by-step overview of the acrylic application and curing process
– Differences between UV and LED nail lamps for curing acrylics
– Proper lamp wattage and exposure time
– Caring for acrylics to maximize wear
The Role of UV Light in Curing Acrylic Nails
What Happens During UV Curing
When getting an acrylic manicure, the acrylic powder and liquid are mixed and applied to the natural nails as a gel-like substance. This acrylic mixture is initially loose and moldable, allowing the technician to sculpt and shape the acrylic overlay on each nail.
Once the desired shape is achieved, the nails are placed under a UV lamp, where ultraviolet light activates a photoinitator in the acrylic mixture and starts a chemical curing reaction. This reaction causes the acrylic molecules to link together and form rigid, durable polymer chains.
Under the UV light, the acrylic hardens and transforms from a gel-like state into a hardened plastic within minutes.
UV Light Creates Strong Polymer Bonds
The unique physical properties of cured acrylics are a result of how the molecules connect during polymerization. As the photoinitators interact with UV rays, free radicals are generated in the acrylic mixture.
These unstable free radicals bond readily with neighboring acrylic molecules, linking them together into chains and networks. The UV light facilitates extremely strong bonds between the acrylic polymers, resulting in a sturdy, resilient plastic overlay. Artificial UV nails cured in this fashion can last several weeks without chipping, cracking or lifting.
Choosing the Right UV Lamp for Acrylics
Not all UV nail lamps are created equal when it comes to acrylic nail application. Ideally, techs should use a high-powered LED lamp made specifically for curing gels and acrylics. LED lamps provide more focused and consistent light through the UV range compared to older bulb models.
The power level of the device determines the exposure time needed. Most quality LED units designed for pro use provide 30-60 second exposure times to fully cure acrylics. Weaker consumer models take much longer.
Using the wrong UV lamp can result in under-cured acrylics that don’t fully harden and lack durability.
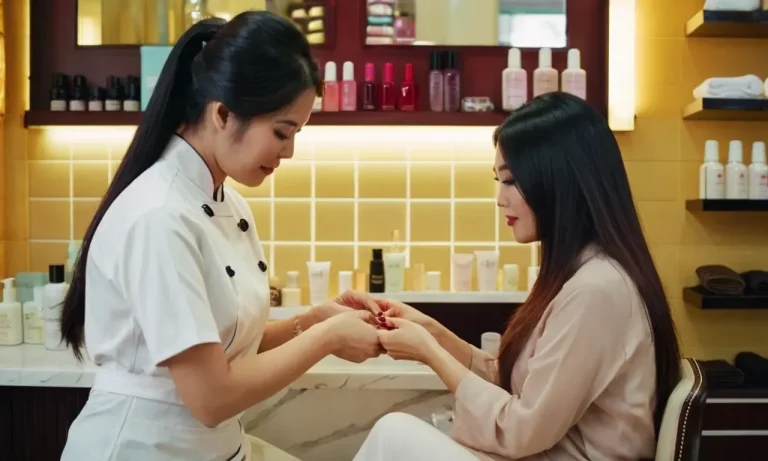
Step-By-Step: Applying and Curing Acrylics
Prep the Natural Nail
Properly preparing the natural nail is crucial for successful acrylic application. Here are the key steps:
- Remove any existing nail polish with acetone-free remover. Buff away shine for better acrylic adhesion.
- Use a nail dehydrator to remove moisture and oils from the nail plate. This allows acrylic to stick better.
- Gently push back and trim cuticles if needed with an orangewood stick. Don’t cut cuticles as this can lead to infection.
- Use a nail primer to further prep and create bonding between the natural nail and acrylic.
Apply Acrylic Powder and Liquid
Once prepped, it’s time to apply the acrylic mixture:
- Apply acrylic liquid to the natural nail using a brush.
- Dip the brush into finely ground acrylic powder and mix well to form a ball of acrylic.
- Place the ball on the nail and use the brush to gently push it towards the cuticle area.
- Continue layering the acrylic, allowing it to self-level after each ball application.
- Build the acrylic out to your desired extension length and shape.
- Repeat on all nails until your ideal nail structure is achieved.
Shape the Acrylic Nail
Once built up, shape and refine the acrylic nails:
- Use an acrylic nail file to shape the nails into your desired length and shape (oval, square, etc.).
- Smooth and even out any lumps, ridges or imperfections.
- Use a nail buffer to refine the surface for an ultra smooth finish.
- Clean away all dust particles with a disinfecting wipe.
Cure the Acrylics Under UV Light
The final step is properly curing the acrylics to harden them:
- Place hands under a UV nail lamp for 2-3 minutes.
- Turn hands over and cure again for 2-3 minutes.
- Check that the acrylics have fully hardened and cured. If not, do additional curing.
Once fully cured, your acrylic nails are ready to go! Be sure to avoid excessive water exposure and gently file off any lifted edges to help acrylics last. Proper application and curing are key for long-lasting, damage-free acrylics. 💅
UV Lamps vs. LED Lamps for Acrylic Nails
UV Lamps: The Acrylic Curing Staple
UV lamps have been the go-to for curing acrylic nails for decades. They use ultraviolet light to harden the acrylic polymer powder to form the nail enhancement. Most salon UV lamps are high-wattage, between 36 to 54W, to quickly cure a full set of nails in just a few minutes.
UV rays have that unique ability to set acrylic monomers through polymerization. This creates very strong, durable artificial nails that last 2-3 weeks on average. UV lamps also tend to be more affordable for nail salons to purchase upfront.
LED Lamps: The Newer Technology
LED nail lamps utilize visible light wavelengths instead of UV to cure gel polishes and acrylics. Many tech-savvy nail artists have started switching to LED for the upgrade in tech. Though they take slightly longer to cure nails, LEDs use less energy, run cooler, and last longer overall.
Most LED lamps today also include some level of UV light as well to ensure proper curing. Going full LED allows for more consistent exposure during the curing process. This helps prevent undercured acrylic and potential lifting or damage later on.
Comparing Lamp Types
| Factor | UV Lamp | LED Lamp |
| Curing Process | 3-5 mins per hand | 5-8 mins per hand |
| Bulb Longevity | 2-4 months | 50,000+ hours |
| Heat Output | High | Low |
| Energy Use | 36-54 watts | 6-30 watts |
| Upfront Cost | Lower | Higher |
As you can see, LED lamps take a bit longer but offer more efficient, versatile curing ability. More than 93% of nail techs still rely on traditional UV lamps according to NAILS Magazine. However, many predict LED adoption to grow up to 10% annually over the next 5+ years.
Choosing the Right Lamp Strength and Exposure
Recommended Watts and Curing Times
When using UV lamps to cure acrylic nails, it’s important to use the appropriate wattage bulb and exposure times. Most professional nail technicians recommend using a 36-54 watt UV lamp. Lamps with lower wattages around 9 watts are not sufficient for properly curing acrylics.
Here are some general guidelines for cure times based on bulb wattage:
- 9 watt bulb: 60-120 seconds
- 36 watt bulb: 30-60 seconds
- 54 watt bulb: 15-30 seconds
As you can see, the higher the wattage, the less time needed to properly cure the acrylic. However, don’t go above 54 watts, as it could overexpose the acrylic and cause it to yellow over time.
Avoid Under and Overexposure
Getting the cure time right is crucial for long-lasting, natural-looking acrylic nails. Underexposed acrylic can feel tacky and flexible, leading to lifting and breakage. Overexposed acrylic becomes rigid and inflexible, causing cracks and chips down the road.
Here are some tips to avoid under or over-curing:
- Replace UV bulbs every 2,000 hours of use, as output declines over time.
- Use a UV lamp timer to track precise exposure times.
- Listen for audible cues – a cracking sound means it’s ready.
- Look for a shiny, glossy finish when done curing.
- Wipe the tacky layer off after curing to remove uncured resin.
- Don’t over-file, as too much friction can overheat and damage cured acrylic.
Additionally, apply acrylic in thin, even layers and cap free edges to prevent undercuring. Give each layer its full recommended cure time. With some diligence and the right UV lamp, achieving a strong, long-lasting acrylic manicure is totally possible!
Caring for Your Acrylics: Upkeep Tips
Protect Nails From Direct Sunlight
Exposing your acrylic nails to too much sunlight can cause them to become dry and brittle. Here are some tips to keep your acrylics looking their best:
- Apply sunscreen to your hands before going outside – choose one specifically formulated for hands and nails
- Wear gloves while doing household chores like washing dishes and cleaning
- Sit in the shade instead of direct sunlight when possible
Limiting sunlight exposure will help retain moisture and prevent cracking or peeling. Be vigilant about protecting your acrylic nails from those harmful UV rays!
Use Cuticle Oil for Hydration
Keeping the skin around your nails properly hydrated is key for healthy-looking acrylics. Using cuticle oil daily provides moisture to prevent cracking and lifting near the nail bed.
Look for cuticle oils that contain nourishing ingredients like vitamin E, aloe vera, and essential oils. Gently massage just a drop or two into each nail and cuticle 1-2 times per day. This helps lock in moisture and condition the skin.
Some professional technicians even recommend applying oil underneath your acrylic nails with a thin brush! This ensures the nail bed stays supple underneath the enhancement.
Filing for Shape Maintenance
Natural nails grow an average of 3 millimeters per month, but the acrylic or gel enhancement doesn’t grow with it. Filing down the free edge is necessary to keep the length and shape consistent.
Use a 100/180 grit nail file every 1-2 weeks to lightly buff away any roughness and maintain an even tip. File gently in one direction instead of sawing back and forth to prevent weakness or cracking.
Don’t file too aggressively near the cuticle area, as this can damage the natural nail underneath. Focus on filing the free edge and use a light touch on the surface. Proper shaping maintenance helps acrylic nails last longer!
Conclusion
In summary, properly cured acrylic nails depend on UV light exposure to create robust, lasting enhancements. While new LED lamp alternatives exist, UV lamps remain the gold standard acrylic curing method in salons.
To get long-lasting acrylic nail results, be sure to choose an appropriate strength UV or LED lamp for complete curing and minimize direct sunlight exposure after your service. Proper nail prep, gentle filing for upkeep, and hydrating oils will also help your fabulous acrylic manicure last and last!
We unpacked the chemistry behind acrylic curing science, the essential curing steps, the ideal lamp wattage and timing, plus aftercare methods. With this comprehensive acrylic nail guide, you can better understand the key role UV light plays in durable, envy-worthy acrylic manicure results.