Do I Need Uv Light For Gel Nails?
Gel nail extensions have become an increasingly popular alternative to traditional acrylics. With their damage-free removal process and long-lasting shine, it’s easy to see the appeal. But to get the perfect gel manicure, you need more than just the gel polish itself.
Using a UV or LED lamp is crucial for properly curing and hardening the gel polish. In this comprehensive guide, we’ll take an in-depth look at gel nail technology and when UV lamps are necessary for stunning results.
If you’re short on time, here’s a quick answer: Yes, you need a UV or LED lamp to properly cure gel nail polish and achieve maximum wear and shine.
How Do Gel Nails Work?
Gel nails have become an extremely popular nail service in recent years. But how exactly do they work? What is the science behind what makes them last so long without chipping or peeling?
Chemistry of Gel Nails
Gel nail polish contains ingredients that allow it to harden and set under ultraviolet (UV) light. The main ingredients are:
- Methacrylate monomers – These molecules can link together to form polymers when exposed to UV light, allowing the gel to harden.
- Photoinitiators – These react to the UV light, initiating the polymerization process.
- Pigments – These provide color to gel polishes.
Additionally, gel nail polish often contains thickeners for adjusting viscosity and flexibility agents for chip resistance. Unlike regular nail polish which simply dries and can peel off, the process of molecules linking together under UV light allows gel polish to adhere very strongly to the natural nail.
Role of UV Light
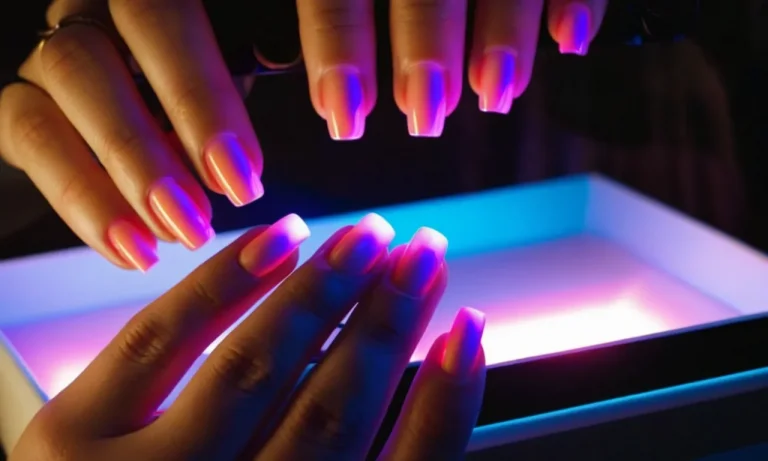
So where does the ultraviolet light come in? As mentioned above, it triggers the polymerization process. Most nail salons use LED lamps which emit UV light at the optimum wavelength of 365 nm to cure gel polish. Typical cure times are 30-90 seconds.
The UV light causes the photoinitiators in the gel formula to form free radicals. These free radicals drive the cross-linking of methacrylate monomers into chains and networks, transforming the gel into a strong, rigid polymer on the nail.
Without exposure to UV light, gel nail polish would simply stay in liquid form and never harden. The UV light is absolutely vital to setting and curing gel manicures. Once fully cured under the light, the polish is locked into place on nails for up to three weeks with no chipping or peeling!
| UV Light Wavelength for Gel Nails | 365 nm |
| Typical Cure Time Under Lamp | 30-90 seconds |
As you can see, UV light plays a critical role in how gel manicures work. The cross-linking polymers formed under the lamps are what give gel nails their legendary longevity compared to regular polish. While regular polish dries out over time, cured gel continues hugging the nails tightly!
To learn more on the chemistry behind gel nails, check out this informative video: https://www.youtube.com/watch?v=Bmf_n-FtAac
Do I Need a UV Lamp for Gel Polish?
Using a UV or LED lamp is crucial for properly curing gel nail polish and achieving the desired hard, glossy finish. Here’s a look at why a special lamp is needed and what results you can expect with and without one:
Curing Gel Polish
Gel nail polish contains ingredients like methacrylates that require exposure to UV or LED light to initiate the curing process. Without a lamp, the gel polish will remain wet and sticky on the nails. It will never harden or become scratch-resistant.
Proper curing under a UV/LED lamp transforms gel polish into a durable, chip-resistant finish that can last up to 2-3 weeks without chipping or peeling. The curing process can take as little as 30 seconds under the lamp.
Skipping the curing step leaves your manicure susceptible to dents, smudges, and quick wear. The gel also risks transferring to clothing, skin, or other surfaces until it’s fully set.
Achieving Desired Results
Using a quality UV or LED lamp is essential for getting the high-shine, long-lasting gel manicure results you want. The light catalyzes the ingredients in gel polish to create strong, flexible bonds between layers.
Trying to air dry gel polish will not achieve the same hardened finish. And the polish will fail to bond properly to itself or the natural nail. This can lead to quick chipping, peeling, and breaking.
Curing each layer under the lamp allows gel manicures to last for several weeks with minimal tip wear or damage. Skipping the light means you miss out on gel’s protective benefits.
So if you want a super glossy, chip-free manicure that resists nicks and smudges, be sure to use a UV or LED nail lamp during application. It is the essential tool for activating gel polish ingredients and taking your mani to the next level.
Choosing the Right UV Lamp
UV vs LED Lamps
When shopping for a UV lamp for gel nails, you’ll come across two main types: UV lamps and LED lamps. Here’s a quick comparison:
- UV lamps use ultraviolet light bulbs to cure gel polish. They’ve been around the longest and tend to be less expensive than LED lamps.
- LED lamps use LED light technology and can cure gel polish faster, usually in 30 seconds or less. LED lamps also last longer than UV bulbs.
Both UV and LED lamps are effective for curing gel manicures. LED lamps offer faster curing times and longer bulb life, but can cost more initially. UV lamps take a bit longer to cure gels but tend to be more budget-friendly.
Key Features to Look For
Here are some key factors to consider when selecting a UV or LED nail lamp:
- Wattage – Higher wattage lamps cure gel polish faster. Look for 36W or higher.
- Timer settings – Adjustable timers allow you to customize curing times.
- Size – Choose a lamp sized to fit your hands comfortably.
- Bulb life – LED bulb life is typically 30,000+ hours. UV bulbs last around 1,000 hours.
- Reviews – Check reviews on sites like Amazon for real user feedback.
- Brands – Popular brands include SUNUV, MelodySusie, Makartt, and more.
Make sure to use the gel polish brand’s recommended curing time when starting out. With the right UV or LED lamp, you’ll be able to cure stunning gel manicures in the comfort of your home!
Using Your UV Lamp for Beautiful Gel Nails
Sanitizing and Prepping Nails
Before applying gel polish, it’s important to properly sanitize and prep the natural nails. First, wash hands thoroughly with soap and water to remove dirt, oil, and bacteria. Next, use a nail prep solution or acetone-based cleanser to remove any residual oils and enhance adhesion of the gel polish.
Gently push back and trim cuticles with a cuticle pusher and nipper to expose more of the natural nail surface area. Then, use a fine grit nail file to lightly buff the shine off the nails so the gel polish can better cling to the nail plate.
Finish prepping by using a nail dehydrator primer to seal moisture and PH balance the nails for long-lasting polish wear.
Applying Gel Polish
With clean nails ready for gel application, first apply a thin layer of gel base coat to help the polish better adhere to the nail. Cure the base gel in the UV or LED lamp per manufacturer instructions, usually 30-60 seconds.
Next, apply a layer of colored gel polish, and again cure in the light for 30-90 seconds until no longer tacky. For extra depth and shine, apply a second coat of color, curing after each layer. Finally, finish with a glossy gel top coat cured for another full minute.
Using the proper curing times between layers helps ensure a durable, long-lasting manicure.
Curing Instructions
When curing gel polish under UV or LED lamps, be sure to follow manufacturer instructions for full cure times. Rushing the light exposure can result in tacky, incompletely cured polish that can stain, smudge, and lift off prematurely.
Most gel base coats require 30-60 seconds of curing time per layer. Colored gel polishes need 30-90 seconds of light exposure per layer to adequately harden. Finally, seal everything in with a top coat cured for 60 seconds or more.
Insufficient light exposure leaves residues that prevent layers from fully fusing together over time. Investing in a quality UV lamp and adhering to proper gel polish curing times is key to achieving a glossy, durable gel manicure that can last 2-3 weeks with no chipping or peeling.
Removing Gel Polish
Removing gel polish requires breaking down the cured layers with pure acetone nail polish remover. Apply enough remover to saturate cotton balls or nail foils, then wrap the digits to allow 10-15 minutes for the acetone to penetrate through the layers of color.
Never try to peel off gel polish by force or use metal tools which can damage the natural nails. Once ready, the gel color and top coat should lift off easily without too much filing needed to fully remove all residue.
Then use a nail prep solution again to remove leftover adhesive oils and condition the nails, finishing with cuticle oil to rehydrate for a smooth natural nail surface.
Maintaining Your Gel Manicure
Proper UV Lamp Care
Taking good care of your UV lamp is crucial for getting the most out of your gel manicures. Here are some tips for prolonging the life of your lamp:
- Clean the bulbs regularly with rubbing alcohol to remove any residue buildup.
- Replace old or worn out bulbs to ensure you’re getting adequate curing time.
- Store your lamp upside down when not in use to prevent dust from settling on the bulbs.
- Run empty curing cycles periodically to burn off any leftover chemical residue.
With proper maintenance, a quality UV lamp should provide effective curing for 1,000 hours or more before needing replacement.
Safety Tips
While gel manicures are generally safe, it’s important to follow some basic precautions:
- Use goggles or other eye protection when curing under the UV lamp.
- Avoid over-filing the natural nail during removal.
- Give nails an occasional break from gels by using regular nail polish.
- Look for gels labeled “3-free” or “5-free” to avoid harsh chemicals.
- Apply cuticle oil daily to condition the nail bed.
Following safe application and removal techniques will help prevent damage and allow the natural nails to grow healthily under the gels.
Troubleshooting Problems
Some common gel manicure problems and their solutions include:
| Problem | Solution |
| Lifting/peeling | Ensure proper prep and curing time. Avoid water exposure immediately after application. |
| Brittle/thin nails | Use nourishing treatments like cuticle oil. Avoid over-filing natural nail. |
| Discoloration | Soak nails in 1 part white vinegar 4 parts warm water. Gently file stained layer off. |
| Green nail syndrome | Caused by pseudomonas bacteria. Treat with antibiotic ointment. Keep nails dry. |
Pay attention to any issues that develop and adjust your gel routine as needed. Seek professional help for persistent problems.
Conclusion
While gel manicures offer longevity and a chip-free finish, they require UV lamps for optimal results. Properly curing each layer of gel polish under UV lights allows the polish to harden completely and last 2-3 weeks without chipping or smudging.
Investing in a quality UV or LED lamp suitable for gel polish is essential for achieving salon-quality gel manicures at home. With the right techniques and by following all safety precautions, you can use UV lamps to get stunning, long-lasting gel nails.