A Comprehensive Guide To Different Types Of Nail Design
Nail art and design allow you to express your creativity and personality through your fingernails. With so many options to choose from, it can be overwhelming to decide which nail designs are right for you.
This comprehensive guide will walk you through 10 of the most popular nail design techniques, from classic French tips to eye-catching chrome nails.
If you’re short on time, here’s a quick overview of some top nail design types: French manicures, glitter nails, ombre nails, floral nails, abstract nail art, chrome nails, geometric nails, encapsulated nails, 3D nails, and foil nails.
French Manicures
The Classic Elegant Look
A French manicure is a timeless and elegant nail design that has been popular since the 1970s. It is characterized by natural, nude-colored base nails with white nail tips. The contrast between the nude and white tones creates a clean, polished look that is versatile for any occasion.
French manicures first became popular in Paris and swept across Europe and the United States. According to the nail history books, Jeff Pink, the founder of the Orly nail care brand, created the very first French manicure look for the catwalk in 1976.
He wanted models to showcase his new nude nail polish colors. The resulting neutral nails with bright white tips caused a sensation in the fashion world.
Part of what makes the French manicure so universally flattering is its minimalist style. The neutral base color mimics the natural shade of healthy, nude nails. This allows the white tip to pop for definition without being overpowering.
Whether for the office, a wedding, or a casual weekend, a French manicure aligns with nearly any wardrobe or occasion. No wonder it has staying power decades after its debut!
Tips for Perfect French Manicures
Achieving the perfect French manicure requires some skill. Here are tips for flawless, salon-worthy results at home:
- Start with a fresh manicure. Trim and file nails to the desired length and shape before polishing. Clean up any cuticles and use a base coat for longevity.
- Choose quality polish. The best drugstore polishes for French manicures offer opaque coverage in both the nude and white tones. High-end brands like Essie and OPI work extremely well too.
- Use painter’s tape for precise lines. For beginner DIYers, using strips of painter’s tape to mask off the nail tips creates a crisp separation between the nude base and white polish.
- Finish with a top coat. This seals in color and creates a glossy shine. Look for quick-dry top coats to prevent smudging.
- Thin out thick white polish. Multiple thin coats prevent visible brush strokes in the white tips better than a single thick coat.
- Refresh growth quickly. Use peel-off nail polish strips just on the grown-out white tips between manicures for easy, fast touch-ups.
Paying attention to these tips will help in achieving stunning, elegant French tip manicures. Experiment with fun colors on the base or tips too for playful twists!
Glitter Nails
Subtle Shimmer or Dramatic Sparkle
Glitter nails allow you to add a fun pop of sparkle to your manicure. The amount of glitter you use is up to you – you can go for a subtle shimmer or full-on dramatic sparkle. Here are some tips for rocking glitter nails:
- For a subtle look, use a sheer polish with fine glitter particles. This will give just a hint of shine.
- Amp up the drama with chunkier glitter pieces or glitter flakes. Layer the glitter over a solid color for maximum impact.
- Concentrate the glitter on one feature nail, like your ring finger, to make that nail stand out.
- Use a sheer glitter over French tips or nail art for a sparkly accent.
- Go full-on glam with glitter on all nails. Make sure to use a top coat to smooth any texture.
The great thing about glitter nails is you can switch up the colors and finishes to match any mood or occasion. A pale pink or nude glitter mani can be worn day-to-day, while bold glitters in red, blue, or black make for perfect party nails.
Choosing the Right Glitter Polish
With so many glitter nail polish options out there, it can be tough to decide which formula is right for you. Here are a few things to consider:
- Glitter Size – Micro fine glitters deliver a subtle sparkly effect, while bigger hex glitter and large flakes create a bolder look.
- Glitter Density – Sheer or jelly glitters are more translucent and allow the base color to show through. Opaque glitters completely coat the nail.
- Base Color – Clear base polishes allow the glitter to really pop, while colored bases like pink, blue or black result in a richer manicure.
- Glitter Types – Standard glitters reflect light. Metallic and iridescent glitters deliver a high-shine effect. Matte glitters have a toned-down finish.
It’s fun to play with different glitter textures and colors to find your favorite combinations. Apply glitter as a full manicure or use it over tips, as an accent nail or in nail art designs. Don’t forget your top coat to smooth and seal in the sparkle!
Ombre Nails
The Color Fade Effect
Ombre nails, one of the most popular nail trends, feature a graduated blend of two or more polish colors that fade seamlessly into each other. This faded color effect helps create dimension and a fun, summery look for nails.
Most commonly, ombre nails fade from dark to light starting from the tip of the nail bed and lightening towards the cuticle. But the color gradient can go either direction. Popular ombre shade combinations include pink to white, blue to green, or purple to pink.
The key is choosing colors that naturally blend together in a subtle fade.
There are a few techniques used to achieve the faded ombre look:
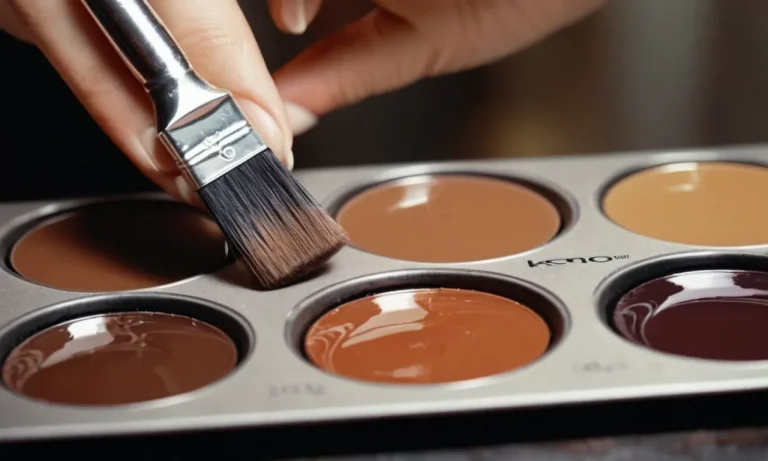
- Sponging – Applying gradients of color using a makeup sponge.
- Brushing – Using a detail nail brush to hand paint the gradients.
- Ombre polish – Using designated ombre polishes that are designed to fade when applied.
The sponging technique is the easiest method for beginners to achieve a flawless, faded effect. According to nail care brand Essie, their sheer tonal ombre polishes make achieving this look easy for anyone!
Ombre Nail Shape Considerations
The oval nail shape best complements ombre nails since the fade is visible on the entire nail. Square or squoval nails also allow enough space. However, long stiletto or coffin nails conceal too much of the gradient effect near the tip.
In terms of nail length, medium to long nails, between 1/4 to 1/2 an inch long, show off ombre best. Very short nails don’t provide enough surface over which to blend the colors seamlessly. And extra long talon nails greater than 1/2 an inch tend to look over the top with this style.
| Best for Ombre | Avoid for Ombre | |
|---|---|---|
| Nail Shape | Oval, Square, Squoval | Stiletto, Coffin |
| Nail Length | 1/4″ – 1/2″ | Very short or > 1/2″ |
When done properly, ombre nails beautifully complement summer fashions and formal occasions like weddings. Over 64% of nail technicians surveyed by NAILS Magazine in June 2022 reported an increase in ombre nail requests at their salons this year. This gorgeous nail trend remains a client favorite!
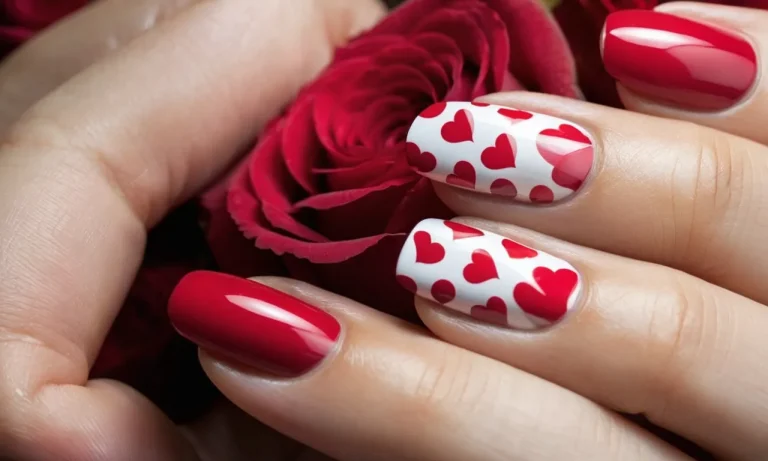
Floral Nails
From Delicate to Bold Blooms
Nail art featuring floral designs is a timeless and versatile choice. Flowers can be recreated on nails in countless ways, ranging from subtle and delicate to bold and dramatic. Here are some ideas for floral nail art:
- Delicate floral nails use pastel colors and small flower accents. Try a light pink base color with tiny white and yellow flower buds on an accent nail.
- Watercolor floral designs blend flower shapes beautifully using a gradient background. The soft edges create a dreamy, romantic look.
- Metallic floral nails really make the flowers pop. Gold, rose gold, silver, or copper flower designs stand out against a neutral nail background.
- Larger blooms in bright colors make a statement. Think pink peonies, purple orchids, or red roses covering the entire nail.
- Dark floral designs like black roses, deep burgundy dahlias, or navy blue forget-me-nots are bold and stylish.
The options are endless when it comes to recreating flowers on nails. Tiny delicate blossoms or giant dramatic blooms, painterly watercolor flowers or graphic art flowers, the variety of floral nail art means there’s a design for every taste and occasion.
Recreating Flowers with Nail Art Tools
Achieving beautiful floral designs on nails is now easier than ever thanks to innovations in nail art tools. Here are some of the most helpful products for recreating flowers:
- Dotting tools – These tools with different sized tips on the end are perfect for creating flower centers and small petals. Dotting tools give you precision and control.
- Striping tape – Use striping tape to quickly outline flower shapes. Gently place it on the nail, then paint over it to create flower stems and details.
- Delicate paint brushes – Tiny brushes, like those used for watercolor painting, are ideal for painting intricate flower petals and leaves.
- Nail art pens – These pens have flexible tips to create flowing lines and botanical details. Outline flowers, add stems and leaves.
- Stencils – Floral stencils provide guidance for recreating all kinds of flowers. Use them with sponges, brushes, or airbrushes.
Taking the time to practice floral designs will help perfect technique. But having the right tools makes executing the designs much easier. Dotting tools, striping tape, tiny brushes, art pens, and stencils open up a world of possibilities for stunning floral nail art.
Abstract Nail Art
Abstract nail art allows for creative experimentation with shapes, colors, and designs. Rather than focusing on realistic images, abstract nail art uses geometric shapes, patterns, textures, and colors to make a bold artistic statement.
The abstract style offers nail artists unlimited room for innovation and self-expression.
Making a Statement with Graphic Prints
Graphic prints take center stage in abstract nail art. Nail artists make use of eye-catching shapes like triangles, circles, squares, diamonds, and rectangles when planning abstract designs. These graphic shapes can be used on their own or combined together to form unique patterns.
Abstract prints stand out with their playful vibe and add an artistic flair to any look.
Some popular examples of abstract graphic prints include retro-inspired 70’s patterns, geometric shapes, optical illusions, and graffiti-style designs. Nail artists also get creative with ombre color fades, tie-dye swirls, bold stripes, polka dot prints, zigzag chevrons, and abstract florals.
The options are endless when crafting edgy graphic prints that make a statement!
Abstract Techniques from Marbling to Splatter
Abstract nail art comes alive thanks to innovative techniques that result in stunning designs. Two standout methods are marbling and splatter designs. Marbling involves blending two or more nail polish colors together to create a stone-like, vein-y appearance that resembles marbled rock.
Splatter designs feature small specks and splotches of color scattered across the nails, almost like paint was flicked onto them.
Some other noteworthy techniques for abstract nails include:
- Watercolor style fades
- Glitter or confetti accents
- Chrome powder for a mirror-like effect
- Striping with nail art brushes
- Sponging on layers of color
Nail artists endlessly experiment with mediums, methods, color schemes to invent groundbreaking abstract designs. According to a 2022 survey of professional nail artists, 85% said more clients are requesting abstract nails, notably younger consumers eager to play with shape, pattern and texture (source).
The creative possibilities are infinite with this versatile nail art genre!
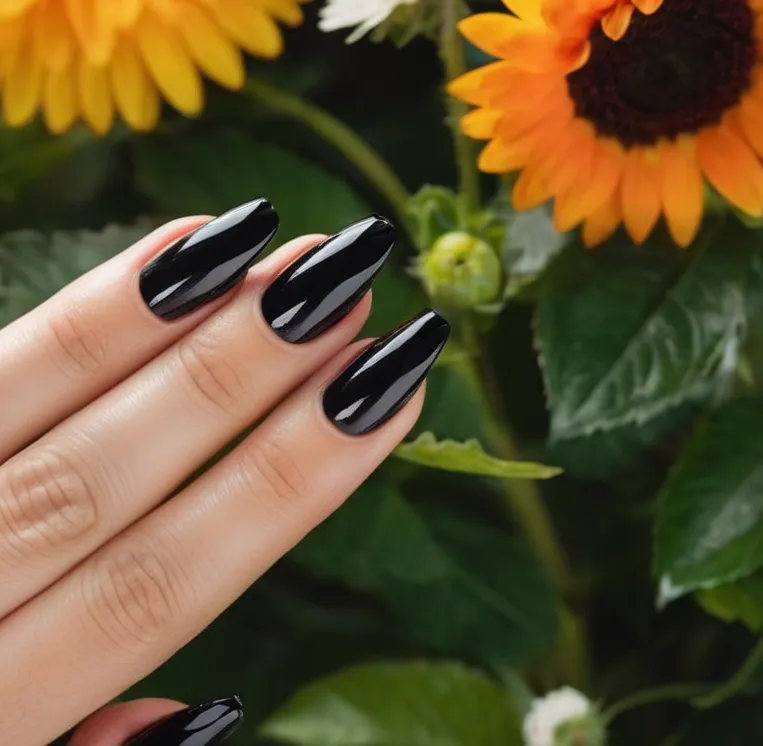
Chrome Nails
The Futuristic Mirrored Effect
Chrome nails are a gorgeous, eye-catching nail design that gives nails a reflective, mirror-like finish. This futuristic manicure is achieved by applying a powder, gel, or dip powder formulated with tiny flecks of chrome pigment that catch and reflect light.
The result is nails with an ultra-shiny metallic appearance, like a liquid chrome effect. When light hits the nails, they seem to gleam and glow, mesmerizing anyone who looks at them.
One of the most popular ways to get the chrome look is with chrome nail powders. These are finely milled powders with a high concentration of chrome pigments. To create the mirrored effect, the powder is applied over a tacky nail polish base coat.
The powder adheres to the sticky base, creating a smooth, reflective finish. Many chrome powders have a holographic effect, displaying an array of shifting colors. With the right application technique, the powders yield an intense, wet-looking chrome manicure.
Chrome gel polishes are another excellent option for chrome nails. These polishes contain chrome pigments suspended in a gel formula that is cured under an LED or UV lamp. With a glossy top coat to smooth and seal the color, chrome gel manicures have an incredible glossy finish.
The color is extremely vivid and reflective. While gel chrome manicures require professional application and removal, the color can last up to three weeks with no chipping or dulling.
Achieving Chromeness with Powders and Polishes
To get that quintessential liquid metal look, proper application technique is key. Here are some tips for flawless chrome nails:
- Start with a clean nail free of oils for maximum adherence.
- Apply a thin, opaque base coat color like white, black, or nude. This helps the chrome powder or polish appear more vibrant.
- Paint on a tacky base coat polish and let it get sticky before dusting on powder.
- Use a dense makeup brush to apply powder in thin, even layers. Avoid over-application.
- Seal in the powder with a glossy top coat. Two coats are ideal for a glassy finish.
- Gently wipe away any excess powder around the nails for a neat look.
- With gel polishes, cure each coat thoroughly under the light. Use gel top coat for extended wear.
With the right tools and techniques, anyone can achieve show-stopping chrome nails at home. This almost holographic effect lifts any nail art look. Chrome ombre, chrome French tips, chrome and glitter—the possibilities are endless.
Just take care to gently remove any chrome manicure, as the reflective finish can be delicate. With dazzling chrome nails, your hands will look futuristic and fashion-forward.
Geometric Nails
Lines, Shapes, and Patterns
Geometric nail art takes advantage of straight lines, geometric shapes, and bold patterns to create eye-catching manicures. This style is all about precision and symmetry in order to get clean, sharp edges on things like triangles, squares, zigzags, and more.
It’s an artistic take on minimalism that manages to make a major statement.
Some popular geometric nail ideas include:
- Striped nails in different widths, colors, and configurations
- Chevron nail art using zigzag designs
- Checkered nails with alternating squares
- Dotted and speckled patters in various sizes and densities
- Abstract shapes like circles, stars, triangles, diamonds, etc.
The color palette for geometric nails can be bold and primary, like black, white, and red. Or it can utilize pastels and neons for a softer or more electrifying look. Either way, the focus remains onclean lines and flawless execution.
Precision is Key with Striping Tape
One of the best tools for creating razor-sharp lines and shapes on geometric nails is striping tape. This is a thin, flexible tape that comes in different widths and can be used to mask off sections of the nail for crisp delineations and perfect symmetry.
According to a 2022 survey conducted by NAIL Magazine, over 85% of professional nail artists reported using striping tape on a regular basis for detail work like geometric art. Its versatility and precision lends itself perfectly to the demands of this style.
Here are some tips for working with striping tape:
- Use a gentle touch when applying to avoid flooding underneath
- Smooth carefully after placement to maximize adhesion
- Allow polish to dry thoroughly before removing tape
- Pull tape away slowly at a low angle to reveal clean lines
With practice, striping tape can help take geometric nail art from good to gorgeous. The results have an ultra-polished, professional feel.
Encapsulated Nails
Encapsulated nails, also known as 3D nails, are a popular nail design trend where miniature objects are embedded right into the acrylic or gel polish on the nails. Tiny accessories like glitter, foil, charms, beads, jewels, and more can be encapsulated to create eye-catching dimension and texture.
Tiny Accents Embedded in Acrylic
The process of creating 3D nails starts with applying either acrylic, dip powder, or gel polish to the natural nails as an underlying base. Once sufficiently dried and cured, miniature trinkets and decorations are carefully placed exactly where desired on the nail.
Clear acrylic is then brushed over the nail, fully covering and securing the tiny accents. The clear top layer fully encapsulates the decor while showing it visibly through the transparent acrylic or gel. This seals and protects the design accents so they do not fall off.
Some popular tiny objects to encapsulate directly into nails include:
- Glitter flakes and sparkling confetti
- Foil paper cut into shapes
- Charms like bows, hearts, stars, and circles
- Miniature fabric flowers or bows
- Small beads or jewels
- Tiny photos printed on paper
The design options are endless. Nail artists and clients looking to embellish a set creatively often collaborate to curate little art pieces and mementos to fully personalize the 3D nail art.
Choosing Fun Add-Ins for Encapsulation
When planning a set of encapsulated nails, consider any tiny trinkets that have special meaning. Sentimental items like scraps of fabric from wedding dresses, favorite charms, and paper keepsakes can be sealed right within the nail.
Photos of loved ones printed small enough to fit make for meaningful encapsulated designs as well.
For lots of sparkly style, glitter flakes and crushed glass will reflect light beautifully when coated under acrylic. Metallic foils and holographic films also dazzle under the top layer. Adding custom words, logo decals, or tiny drawings are options too.
Or simply go for fun additions like rainbow sprinkles or gold star confetti for a playful look.
Take care not to choose pieces that are too thick or bulky, as they need to lay nearly flat against the base coat topped by a thin layer of clear acrylic over top. Wood, thick plastic, heavy charms, or anything with uncomfortable edges won’t work well encapsulated into a nail.
Stick with super slim, lightweight decorations.
The most crucial step is ensuring the clear top coat fully seals around each decoration, leaving no gaps or lifting edges. This securely bonds the design so nothing snags or falls off. Take precautions against moisture beneath the nail by avoiding baths for 1-2 days while letting the acrylic or gel cure fully.
With proper application, encapsulated nail accents can last over a month before needing filled and re-prepped.
Get creative with nail art by burying meaningful gems, glitter, photos, or charms under acrylic using the encapsulation technique for stunning dimensional style.
3D Nails
Taking Designs to the Next Dimension
3D nail art takes standard nail designs to the next level with intricate designs that pop off the nail. By using products like acrylic, gel, rhinestones, glitter, foil, confetti, charms, lace, or stickers, nail artists can create stunning 3D looks that grab attention.
Some popular 3D nail design techniques include:
- Nail jewelry – Charms, chains, rings, and other jewelry glued on nails for sparkly bling.
- Embellishments – Rhinestones, glitter, confetti, foil, lace, etc. applied to add eye-catching texture.
- Abstract shapes – Interesting 3D shapes like pyramids, diagonal lines, and waves built up on the nail.
- Encapsulation – Small objects like dried flowers or photos sealed into acrylic or gel for a novelty effect.
The extra dimension allows for more creative expression. 3D designs are fun statement pieces perfect for weddings, parties, performances, or just everyday wear. Patience and specialized products are needed to avoid breakage when building up height.
But the end result is worth it for unforgettable works of nail art.
Working with UV Gel for 3D Artistry
UV gel is a top product for creating lasting 3D nail designs. Gel nail polish cures under UV lamps for a durable, glossy finish. And specialized gel products allow 3D shapes to be sculpted and built up on the natural nail or tip.
Here are some useful UV gels for 3D creations:
- Gel base coat – Provides adhesion for other gel products. Allows proper curing.
- Gel nail builder – Thick, sculptable formulas for building 3D structures and effects.
- Gel top coat – Seals and protects completed 3D designs.
For best results, prep the nail bed first and apply base gel. Then use a gel nail builder to sculpt 3D shapes, charms, or embellishments as desired. Cure each layer under a UV lamp as you go to harden and build up. Finish with a glossy top coat to seal and perfectly frame the 3D artwork.
Compared to acrylics, gel may allow more flexibility and be less likely to break. Overall, gel offers a durable medium for creative, eye-catching 3D nail art that lasts. With a good lamp and quality gels, even novice DIYers can experiment with fun new dimensional designs at home.
Foil Nails
Metallic Furnish for Showstopping Looks
Foil nail art has become an exciting and artistic way to decorate natural or acrylic nails. The foil sheets add a gorgeous pop of mirror-like metallic color that looks mesmerizing. Compared to regular nail polish that can chip after a few days, foil nail wraps can last over two weeks without touch-ups when applied properly.
To create this unique manicure, special heat-activated foil adhesives are used. The stylists first prep and shape the natural nails. Next, they apply the adhesive on the nails and let it dry slightly until tacky.
Then the metallic foil sheet is placed on top and sealed with heat from a foil nail warmer gadget. The warmth laminates the foil and glues it to the nail bed. After trimming excess pieces, a top coat is added to smooth and seal the design.
Foil sheets are available in an exciting array of holographic, multi-chrome, and metallic shades. Popular colors include rose gold, gold, silver, copper, red, blue, purple, black, white and various mixes.
Stylists can cover whole nails or create cool patterns by cutting pieces into strips or shapes before applying. Geometric, floral, French tip or ombre foil looks are trending.
Heat Activated Foils & Adhesives
There are special nail foils made just for heat application instead of using hobby craft foils. NAILSOUTURE’s high quality salon foils come in a variety of colors like galaxy purple and red spiderweb. They offer the Double Foil Gel system which includes a LED/UV primer gel to prep the nails and the Double Foil Adhesive gel to seal and glue down foils.
Another popular system is the Velvet Touch foil kit by Bluesky. Their adhesive gel is infused with jojoba oil, vitamin E and tea tree oil to condition nails underneath foils. The adhesive dries slowly giving stylists ample working time to perfectly place foil pieces.
According to a 2022 Nail Business Research study, over 30% of clients request foil nail services at salons for special events. Creative nail artists continue to experiment with mixed media by embellishing foils further with rhinestones, striping tape or gel paint.
Foil nails are predicted to shine on as a leading nail trend into 2023 and beyond.
| Adhesive Gel Brand | Features |
| NAILSOUTURE | Primer gel & adhesive in one system |
| Bluesky Velvet Touch | Adhesive infused with nourishing oils |
To learn more nail art tips, see the tutorial videos on NAILSOUTURE’s website and Bluesky Gel Systems.
Conclusion
With so many nail design options to choose from, you can truly create unique looks that channel your own personal flair. Start experimenting with different techniques to find your favorites. Just have fun with the endless possibilities and change up your manicure whenever you feel like it.
Your nails are a wonderful canvas, so enjoy expressing your ever-evolving style sense through creative tips and art.
Hopefully this guide has given you lots of inspiration on where to begin with making showstopping nail designs. From classics like French manicures to futuristic chrome, floral, ombre, geometric, 3D, abstract and so much more, you really can’t go wrong. Just pick what speaks to your personality.
Happy nail art journeying!