How To Safely And Effectively Remove Skin Tags At Home Using Nail Clippers
Skin tags are small, benign growths that can appear anywhere on the body. While harmless, they can be unsightly and irritating. If you want to remove a skin tag but don’t want to see a doctor, using nail clippers is a simple at-home method you can try.
If you’re short on time, here’s a quick answer to your question: Skin tags can be safely removed at home using sterilized nail clippers. Gently pinch the base of the tag and cut it off in one swift motion. Clean and disinfect the area afterwards. Only attempt removal if the tag has a narrow stalk.
In this comprehensive guide, we’ll cover everything you need to know about using nail clippers to remove skin tags. You’ll learn how to identify good candidates for DIY removal, what supplies you need, step-by-step instructions for the procedure, aftercare tips, and when you should see a doctor instead.
Identifying Skin Tags Appropriate for DIY Removal
Appearance of Skin Tags
Skin tags are small, soft, pedunculated (stalk-like) growths that typically appear on the neck, armpits, groin, and under the breasts. They range in color from flesh-toned to dark brown and can be smooth or irregularly shaped.
Skin tags are benign (noncancerous) and usually measure just a few millimeters across, though they can grow larger. They may develop a surface blood vessel, which makes them appear red or bluish.
Ideal Tags Have a Narrow Stalk
The ideal skin tags to remove at home using nail clippers are small or medium-sized ones with a narrow base or stalk. These tags have a pedunculated appearance and are firmly attached by a thin stalk of tissue. The stalk connects the tag to the top layer of skin.
Tags that fit this description can be easily and safely clipped off using sterilized nail clippers.
Avoid Tags with a Wide Base
You should not attempt to clip off skin tags that have a wide base or are broadly attached to the skin. Broadbased skin tags have a sessile appearance, meaning they do not have a narrow stalk and appear to blend with the surface of the skin.
Attempting to cut off sessile tags can result in pain, bleeding, infection, and scarring. It is safer to have these types of tags removed by a doctor.
Do not Remove Certain Types of Growths
While common flesh-colored or brown skin tags are benign, other types of growths or lesions can occasionally develop that may indicate an underlying medical condition. You should never try to remove anything that bleeds easily when bumped or touched, is multicolored, has an unusual texture (like a wart), or changes size or color over time.
These may be signs of a potentially serious condition like a melanoma. Consult a dermatologist to identify any unusual or suspicious lesions before attempting removal.
Gather the Right Supplies
When preparing to safely remove skin tags at home, having the proper supplies on hand is crucial for success and preventing infection. The key items you’ll need include:
Small, sharp nail clippers
Investing in a quality pair of small nail clippers with sharp, precise edges will make removing skin tags easier and faster. Look for nail clippers designed specifically for cutting cuticles, as these tend to provide better control and visibility than standard fingernail clippers.
Rubbing alcohol
Rubbing alcohol is essential for sterilizing the skin tag and tools both before and after you remove the skin tag. Be sure to use a 70% isopropyl alcohol solution. The CDC recommends alcohol concentrations between 60–90% for optimal disinfection.
Cotton balls or swabs
Cotton balls or swabs allow you to gently apply rubbing alcohol. Choose sterile, non-woven cotton products to reduce the chance of leaving fibers behind in the wound.
Antibiotic ointment
After removing a skin tag, apply a thin layer of antibiotic ointment like Bacitracin or Neosporin. This helps prevent infection and keeps the wound moist to accelerate healing. Look for ointments containing ingredients like bacitracin zinc, neomycin sulfate, and polymyxin B sulfate.
Bandage or bandaid
Protecting the skin tag removal site with a sterile adhesive bandage or bandaid prevents irritation from clothing and contamination. Waterproof bandages are ideal for tags removed from damp areas like the groin or underarms. Change the bandage daily while the wound heals.
With the right simple preparation, you can feel confident removing irritating skin tags without a trip to the dermatologist’s office. Just be sure to properly sterilize all tools and the skin beforehand, carefully follow removal directions, and keep the site clean while healing.
Contact your doctor if excessive bleeding, redness, swelling, or pus occurs after tag removal.
Step-by-Step Instructions
Clean the skin tag and tools with alcohol
Before removing a skin tag, it is crucial to properly clean and disinfect the skin around the tag and any tools you plan to use. This helps prevent infection and ensures a smooth removal process. Start by washing your hands thoroughly with antibacterial soap and warm water.
Then use a cotton ball or pad soaked in rubbing alcohol to clean the skin around the tag. Be sure to clean the entire surface area around the tag, not just right next to it. Allow the skin to air dry. Next, clean your tweezers, nail clippers or scissors with an alcohol wipe or dip the tips in rubbing alcohol.
This sterilizes the tools so you won’t transfer bacteria into the removal site.
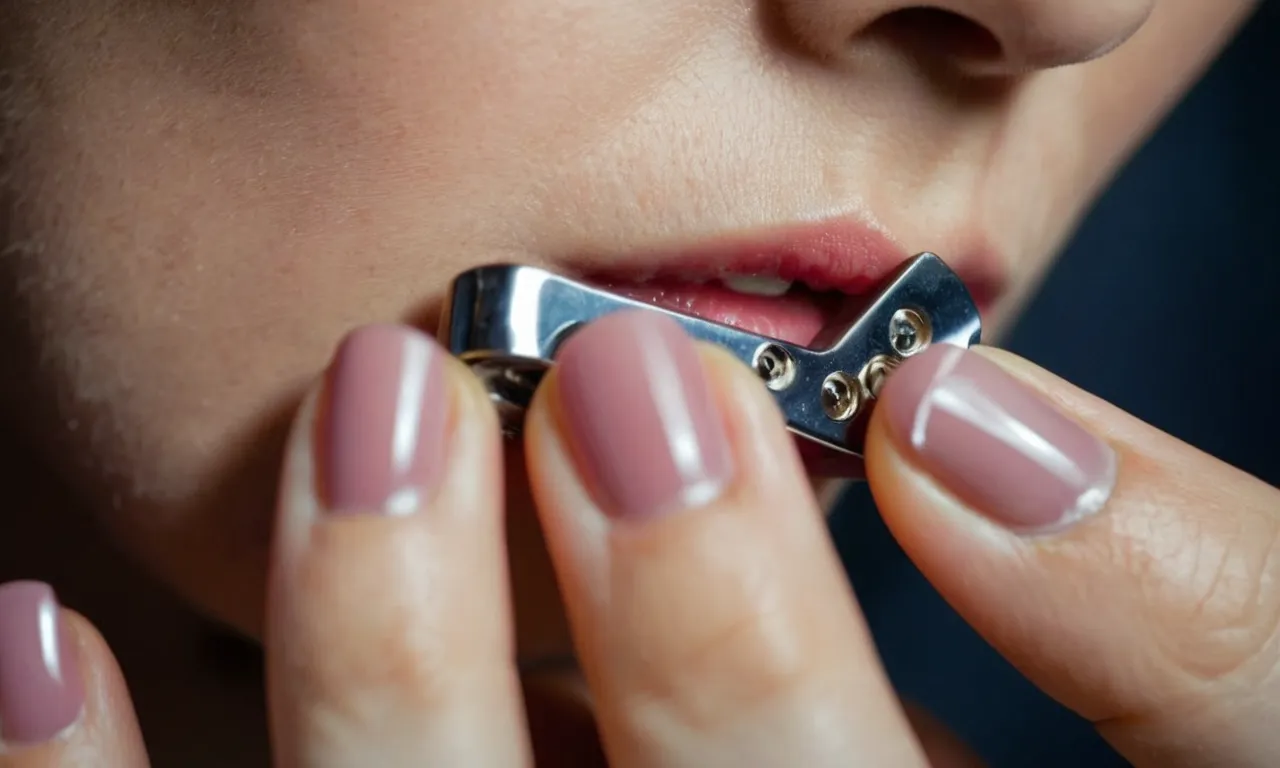
Gently pinch the tag stalk with fingers or tweezers
Once the area is cleaned, the next step is to gently grasp the stalk or peduncle of the skin tag with your fingers or tweezers. Try not to pinch the tag itself, just the small stalk connecting it to your skin.
Pinching the stalk helps lift and extend it away from the surface of the skin, making it easier to clip off. Be very careful not to pinch too hard or pull on the tag, as this can cause bleeding or pain. If using tweezers, grasp the stalk as close to the base as possible to get the best leverage.
The key is to gently hold and lift the stalk without causing trauma to the tag or surrounding skin.
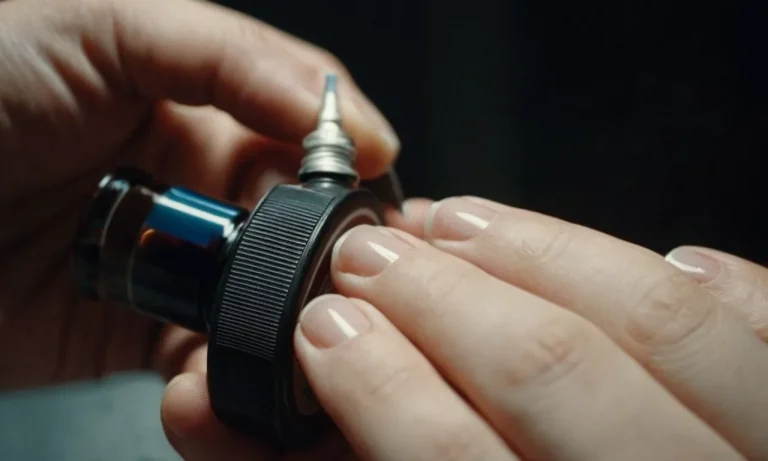
Position nail clippers at base of stalk
With the stalk gently pinched between your fingers or tweezers, position the sharp lower blade of nail clippers perpendicular to the base of the stalk. The clippers should be placed as close to your skin as possible, right at the point where the stalk meets the surface.
This ensures the stalk will be severed in one clean cut. Avoid having the clippers at an angle or too far away from the base. You want the jaws to be positioned to make a quick, straight snip through the stalk for optimal results and minimal pain.
Swiftly cut through the stalk in one motion
Once the clippers are positioned properly at the stalk base, swiftly cut straight through the stalk in one clean motion. Do not hesitate or squeeze gradually. For the most effective, painless cut, the blades should close fully in one quick snip.
The stalk may retract slightly after being cut, revealing a small, flat stub remaining on the surface of the skin. Avoid cutting this remaining piece of stalk – it will fall off naturally within a few days as the wound heals.
Clean the area with alcohol again
After removing the tag, clean the area once more with a cotton ball and rubbing alcohol. This helps remove any blood or body fluids and further disinfects the open wound. Allow the alcohol to dry fully.
You may feel a slight stinging or burning sensation when applying the alcohol, but this is normal and will subside quickly. Proper cleaning immediately after tag removal reduces the chance of infection while the small wound starts healing.
Apply antibiotic ointment and bandage
The final step is to apply a small amount of antibiotic ointment, like Neosporin, onto the wound site where the stalk was detached. The ointment helps prevent bacterial infection and speeds healing. Cover the area with a bandage or adhesive bandage to keep it clean while the underlying skin heals.
Change the bandage daily and reapply ointment until the wound has fully closed, typically within 7-10 days. Signs of infection include increasing pain, redness, warmth or pus, so see a dermatologist promptly if these occur.
Aftercare Tips
Keep the area clean and dry
Keeping the skin where the skin tag was removed clean and dry is crucial for proper healing. Gently clean the area with mild soap and water once a day, and be sure to pat it completely dry with a clean towel afterward. Allowing moisture to linger can invite bacteria and lead to infection.
It’s best to avoid soaking the wound in a bath or going swimming until the skin has fully closed up, usually within 7-10 days. Protect the site with gauze or a bandage if needed while showering.
Change bandages daily
If the skin tag removal site was bandaged, the dressing should be changed at least once daily. Carefully remove the old bandage, discard it, and replace it with a fresh, sterile piece of gauze or a bandage.
Frequent changing keeps the wound clean and allows you to monitor its progress. Signs to watch for include redness, swelling, oozing, and foul odor, which could indicate infection.
Watch for signs of infection
While infection is uncommon when proper aftercare steps are taken, keep an eye out for symptoms just in case. These include:
- Expanding redness around the wound
- Pus or foul-smelling discharge
- Swelling and warmth in the skin near the site
- Fever above 100°F
If any of these occur, promptly call your healthcare provider, as antibiotics may be needed. Some minor redness and clear drainage are normal in the first couple days after skin tag removal.
Allow time to heal
It’s crucial not to disturb or traumatize the skin tag site while it’s mending itself back together. This generally takes 7-14 days. During this time, avoid picking at scabs and don’t scratch or rub the area.
Skin glue and stitches may have been used to close the wound, depending on its size and location. These specialized products help facilitate faster healing:
| Skin glue | Naturally flakes off within 5-10 days as skin cells regenerate |
| Stitches/sutures | Dissolvable stitches disappear in 7-14 days; regular stitches need removing by a doctor |
Allow any glue or stitches to fall out on their own—don’t pull them off prematurely or you may reopen the wound. Once the skin tag site has fully closed up, gently apply antibiotic ointment 2-3 times a day for 3-5 days to prevent scarring.
When to See a Doctor
Removing skin tags at home with nail clippers can be an effective DIY solution. However, in some cases it’s important to see your doctor for safe and proper removal. This includes if:
If the tag bleeds excessively
Some bleeding when removing a skin tag is normal. But if the bleeding seems excessive and won’t stop even with pressure, see your doctor. They can properly cauterize the wound to stop bleeding and lower infection risk.
Signs of infection develop
Signs of infection after tag removal include pain, swelling, redness, heat, pus or foul odor. An infected wound needs medical treatment with antibiotics or other care to prevent complications. So see a doctor right away if you notice infection setting in.
Tag grows back quickly
It’s common for removed skin tags to grow back, especially if the stalk wasn’t fully removed. But if a growth rapidly reappears within days/weeks, make an appointment with your dermatologist. They can examine the area and use cautery, freezing or surgical excision to fully eliminate stubborn skin tags.
Multiple tags need removal
Some people develop clusters of skin tags in the same area like the neck, armpits or groin. Removing each yourself with nail clippers can be tedious and increase infection risk. So if you have a large group of tags, see a skin doctor who can swiftly and safely treat them all at once.
In most cases, using sterilized nail clippers lets you easily and economically remove skin tags at home. But it’s still smart to involve a doctor if any concerning issues come up before, during or after the DIY removal process.
Conclusion
Removing skin tags at home with sterilized nail clippers can be a safe, easy, and inexpensive alternative to visiting your doctor. Just be sure to only attempt removal on tags with a narrow stalk close to the surface of the skin.
Follow the proper sterilization, removal, and aftercare steps outlined above.
While DIY skin tag removal has its benefits, it’s always best to consult your physician if you have any concerns about a growth. They can confirm it is just a benign skin tag and not something more serious.
If home removal is not successful, they can also take care of it quickly and safely in the office.