Cute But Simple Nail Designs: How To Get The Perfect Manicure Without Spending Hours At The Salon
If you love having beautifully manicured nails but don’t have hours to spend at the salon, you’ve come to the right place. With some practice, cute and simple nail art is totally achievable at home.
Here’s the quick answer: Start with a neutral base color, use tape or stickers to make clean lines and shapes, and finish it off with some sparkle, bows, or flowers. The key is keeping the overall design minimalist while adding a few special touches.
In this comprehensive guide, we’ll cover everything you need to know to create stunning nail looks in 30 minutes or less. You’ll learn techniques for prep and base coats, easy nail art styles, must-have tools and supplies, and lots of inspiration for cute motifs and embellishments.
Nail Prep 101: Perfect Polish Starts With Proper Prep
Remove Old Nail Polish and Shape Nails
Getting that perfect, long-lasting manicure starts with proper nail prep. First things first, remove any old nail polish. Be sure to use nail polish remover (preferably acetone-free) to thoroughly take off previous color down to the natural nail.
This prevents chipping or peeling that can occur if you layer new polish over old. Next up, shape and file nails to your desired length and shape. Square, round, squoval or coffin – the choice is yours! Be sure edge are smooth and filed evenly across all 10 digits.
Buffing the nails lightly can also help the polish adhere better. Visit sites like OPI for nail shaping technique tips from the pros.
Use a Base Coat for Protection
Now that your nails are prepped, it’s time to layer on the lacquer! But first – don’t forget your base coat. This important first step helps protect nails from staining and damage. According to polish Experts like Essie, base coats also help color go on more evenly and last longer without chipping by filling in any ridges or imperfections.
Look for nourishing base formulas containing keratin or calcium to strengthen nails as you polish. Allow your base to dry before moving onto the next step for the best adhesion. Going base-free? At least prep nails with alcohol or gentle scrub to remove any residue or oils for better polish payoff.
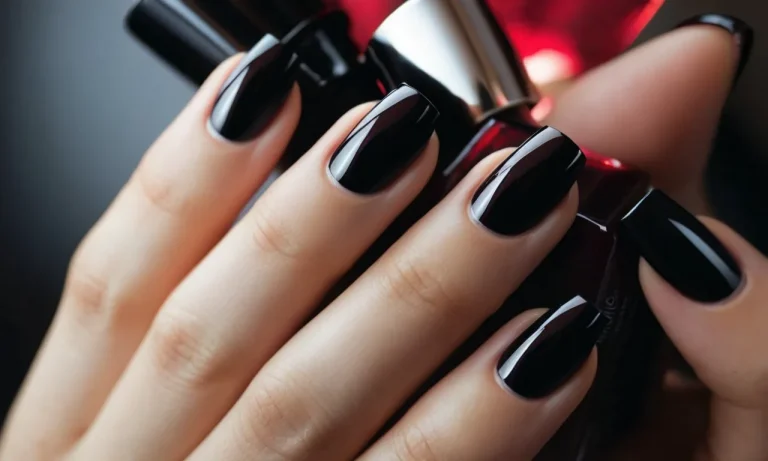
Choose a Neutral Base Color
After your protective base layer has fully dried, it’s time for color! For a basic, classic manicure that won’t require hours at the salon chair, go for neutral tones like nudes, pinks and corals. Essie’s popular shades like Topless & Barefoot offer that clean, French-inspired look with just a single swipe!
For a slightly more daring daytime office-appropriate color, try a pale rose or peach hue. Finish by sealing your manicure with a clear top coat to protect color and add extra shine. Top coats also help prevent chipping and wear for longer lasting lacquer time between polishes.
Brands like OPI even offer top coats with added benefits like quick-dry formulas or ridge fillers. And just like that, you’ll have a pretty, polished manicure that looks like you just stepped out of the nail salon!
5 Easy Nail Art Techniques for Beginners
Striping Tape
Using striping tape is one of the easiest ways to create fun nail art designs for beginners. Simply apply a base color to your nails first. Once dry, place small strips of tape diagonally, vertically, or horizontally onto your nails to act as a guide. Then paint over the tape with a contrasting color.
Let it dry completely before slowly peeling off the tape to reveal the cool stripe effect underneath. This technique takes minimal effort but offers a big visual impact. The designs you can create are endless!
Nail Vinyls and Decals
Nail vinyls and decals offer another effortless route to fabulous nails without an unsteady hand. After applying your base coat, simply place your vinyls or water decals onto your nails where desired. Paint over top with another polish color—the vinyls/decals will block and create pretty patterns.
Let dry fully, gently remove the vinyls/decals and finish with a quality top coat to seal the design. Both nail vinyls and decals come in varied shapes and designs like floral, chevron, polka dots, and more to give you loads of easy options.
Ombre
The soft, subtle ombre look remains a popular nail trend for its chic style. Luckily, it’s also easy to DIY at home without any special tools. First apply your base color—try something soft like a pale pink or beige that suits your skin tone.
Next dab the tip of a makeup wedge or sponge into a slightly darker polish shade. Lightly apply and blend up from your nail tips to create the faded ombre effect. Add multiple sheer layers to build the gradient. Finish with a glossy top coat for long-lasting nails.
The simplicity of ombre nails is what makes them so incredibly elegant.
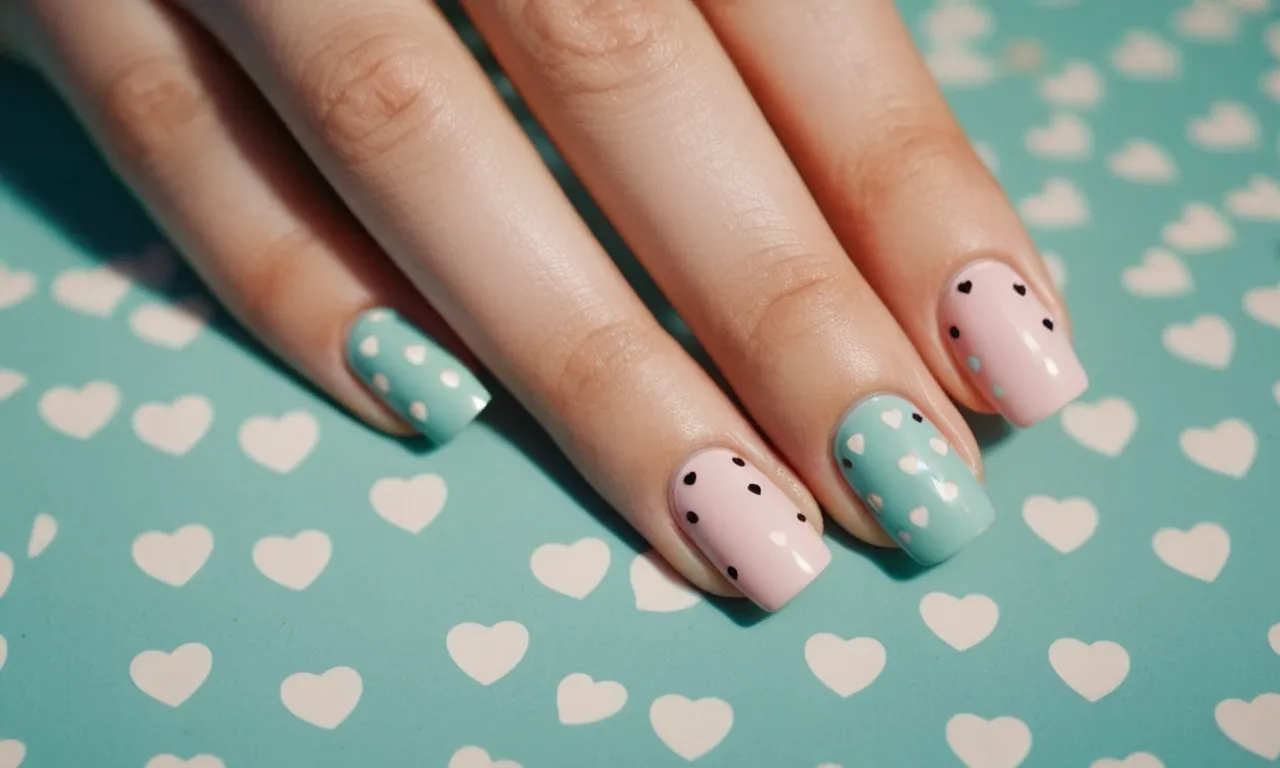
Dotticure
Also referred to as polka dots nails, dotticure offers that sweet pop of color so on-trend right now. Starting with a single base gel or regular polish color, let it dry first. Next use the blunt end of a bobby pin, toothpick, or dotting tool dipped in a contrasting shade to manually dot your nails.
Build up dots of different sizes for extra interest. You can keep them clustered together, connect them to form shapes, scatter them randomly, or place them in an alternating pattern—so many options! Seal your bespeckled nails with a quality top coat for extended wear.
Marble
Marble-inspired nails may seem fancy, but they’re actually another easy technique even for beginners. No airbrush machine or advanced tools required. Simply apply a base color first and let it dry. Next drop various sized dollops of contrasting polish randomly onto the base.
Before it dries, use a toothpick, skewer, or dotting tool to swirl and blend the polish together. This mixes the colors to mimic the look of marble stone. The more you swirl, the more visual depth and veins you create. Dip your tool in acetone to easily clean and reshape the design.
Top coat for smooth protection. Voila—beautiful marble nails in minutes!
Must-Have Tools and Essential Supplies
Base and Top Coats
A good base coat is crucial for protecting your natural nails and helping polish adhere properly. Top coats like Seche Vite Dry Fast (see on Amazon) seal everything in place and add extra shine. Using quality base and top coats ensures your cute nail art lasts over a week without chipping.
Variety of Neutral and Bright Polish Colors
Build up an arsenal of polish in various neutral nudes and pops of color. Neutrals like OPI Bubble Bath are perfect for easy French manicures or nail art accents. Brights like Essie’s vibrant red Big Spender allow you to make a bold statement.
Having a spectrum means you can mix and match for infinite design options.
Striping Tape
Striping tape, available from companies like Twinkled T (www.twinkledt.com), lets you create straight lines and geometric patterns with ease. Use it to section off your nails for ombré polishes, delicate stripes, or color blocking. The possibilities are endless with this versatile tool.
Dotting Tools
From simple polka dots to elaborate floral motifs, dotting tools give you precise control. DOTMAR Creations’ dotting tool set (see on Amazon) has multiple tip sizes for endless options. Use dots alone or pair them with other nail art techniques.
Striping Brush
A thin striping brush transforms regular polish into calligraphy for your nails. DELLA Striping Brush (see on Amazon) has a fine tip and ergonomic handle. Use it to hand letter inspirational words, sketch floral vines, or just add delicate details.
Embellishments like Rhinestones, Bows, Flowers
| Rhinestones | Add some sparkle with mini rhinestones or crystal nails. Use a few for an accent nail or cover a whole hand with shine. |
| Bows | Cute polka dot bows can transform a basic French tip into a present waiting to be unwrapped. |
| Flowers | Pressed flowers under clear gel polish encapsulate natural beauty. Buy faux blooms and play floral designer placing them just so. |
With the right basics, you can create salon-worthy nail art at home without needing hours of time. Used creatively, even the simplest tools open infinite possibilities for cute DIY manicures. Why not try out a new design idea this weekend?
30+ Cute and Simple Nail Art Ideas
Minimalist French Manicure
The classic French manicure is a timeless look that always looks polished. To make it more modern, use sheer neutrals or soft pinks instead of stark white tips. Keeping the majority of the nail naked except for the tip color creates a super chic and minimalist look.
Add a touch of high shine top coat for extra glam.
Polka Dots
Cute and playful polka dots are so easy to DIY at home! All you need is a toothpick and some nail polish. Start by painting your base color, then dip the toothpick in a contrasting polish and gently dot onto the nail. Build up dots to vary sizes. Finish with a top coat to smooth and seal.
Chevron Stripes
Chevron striped nails are bold and graphic. Paint stripes freehand or use tape for perfect lines. Use two highly contrasting colors like black and white for maximum impact. Or try softer shades like light pink and nude for a more subtle look.
Add silver or gold striping tape between colors to kick it up a notch!
Gradient Ombre
The ombre/gradient look is a big trend that creates a beautiful faded effect. Apply your base color first. Then use makeup sponges to lightly dab and blend the second shade from cuticle to tip. Make sure to apply thin coats and build up intensity slowly.
Seal with a glossy top coat for a salon-worthy mani!
Marbleized Tips
Marbling is a fun and artistic way to decorate your nail tips. Apply your base color first, then add a few drops of contrasting polishes onto a plastic sheet or foil. Run a toothpick through the polish to swirl and blend. Quickly run the toothpick along the tips to transfer the design before it dries.
Top coat to finish.
Geometric Shapes
Add some structure to your mani with geometric shapes like triangles, squares, diamonds or zig zags. Use striping tape to create perfect outlines, then fill in with your polish. Or try freehand for a hand-painted abstract look. Pair with neutral nails to really make the shapes pop!
Glitter Tips
A fun way to decorate your tips is with glitter! Choose chunkier glitter polishes that will add lots of sparkle and texture. Apply 1-2 coats to the nail tips and let dry fully. Finish with a top coat like Seche Vite to smooth and seal in glitter.
Be sure to cap the free edge so glitter doesn’t snag or pop off.
Florals
Pretty painted florals are totally on trend for spring and summer! Roses, daisies, and foliage look beautiful on the nails. Use a thin nail art brush and practice floral strokes. Add dimension by pairing pinks and corals together. Accent with studs or rhinestones for extra bling!
Holographic Accents
Holo polish adds a gorgeous shimmery shift of rainbow reflections to any mani. Paint 1-2 coats over nude nails, or use it to accent your tips, stripes or geometric shapes. Topping flat polish with a holo topper amps up the sparkle even more.
Just be sure to apply holo polishes carefully to avoid excess thickness and bumps.
Bows and Rhinestones
Cute little bows and blingy studs or rhinestones make any mani extra girly and glam. Attach studs with a small dot of clear polish or nail glue. Make bows by cutting a thin strip of tape and placing on the nail horizontally. Then add a small vertical strip in the center. So sweet!
Conclusion
With the right tools, techniques, and a little practice, you can give yourself a salon-worthy manicure without spending hours at the appointment. The key is keeping the overall design simple and letting small creative details shine.
Follow the prep work, base coats, and top coats we outlined so your polish will look flawless. Then have fun with easy nail art like striping tape, ombre, dots, and marbleizing. A few touches like glitter, florals, or bows add the perfect cute finishing touch.
Once you get the hang of these quick and easy nail design ideas, you’ll be able to switch up your manicure whenever you want. So go ahead and get creative with your at-home manicures – your nails will look oh-so-cute and stylish!