Using Clear Nail Polish On Earrings: A Comprehensive Guide
Earrings are a fun way to accessorize, but over time friction can cause discoloration. Using a clear coat of nail polish is an easy DIY trick to help your earrings retain their shine. If you’re short on time, here’s the quick answer: Applying a thin layer of clear nail polish to the posts and backs of earrings creates a protective barrier against tarnishing and skin oils.
In this comprehensive guide, we will cover everything you need to know about using clear nail polish on your earring collection. We’ll discuss the benefits of using nail polish, what types work best, tips for application and drying, how long it lasts, potential downsides, and care instructions once coated.
Benefits of Using Clear Nail Polish on Earrings
Protects Against Tarnish and Discoloration
Applying a thin coat of clear nail polish is an effective way to prevent earrings from tarnishing or discoloring over time. The clear lacquer forms a protective barrier that blocks out moisture, sweat, lotions, and other elements that can cause metal earrings to degrade.
This is especially useful for earrings made from silver, copper, and brass, which are all prone to tarnishing when exposed to air and skin oils. The nail polish seals the metal surface and preserves the original shiny finish.
It’s a simple, affordable way to extend the life of your favorite pairs of earrings.
Creates a Barrier Against Skin Oils and Lotions
Our skin naturally produces oils that get transferred onto jewelry when we wear it. These oils can build up on earring posts and backs over time, creating a gunky residue. Clear nail polish prevents this buildup by creating a smooth, non-stick coating.
It stops the posts from collecting dirt and skin cells. This helps keep earrings looking cleaner for longer. The polish also protects against lotions, perfumes, hair products and other toiletries that come in contact with your earrings throughout the day.
Everything glides off the surface instead of sticking.
Helps Prevent Allergic Reactions
Some people develop contact dermatitis from certain metal earrings. Nickel is one of the most common allergens found in cheap costume jewelry. The clear polish forms a barrier between the metal and your skin, which can prevent negative reactions.
If you know you have sensitive skin or metal allergies, using nail polish on your earrings is a smart precaution. It also protects against tarnish rubbing off onto the skin. Discoloration on jewelry is not just unsightly but can also cause skin irritation or rashes for those with sensitivities.
Extends Life of Earrings
By keeping your earrings looking pristine and preventing damage from exposure or skin contact, the clear nail polish allows you to wear them for many more years. Tarnish, flaking metal and built-up gunk means it’s time to retire an old pair.
But a protective top coat lets you hold onto your favorites for decades if you care for them properly. Simply reapply a fresh coat every few months or as needed. With quality lacquer, your earrings can outlive trends and become cherished heirlooms.
Plus, reducing the need to replace earrings is better for the environment and your wallet!
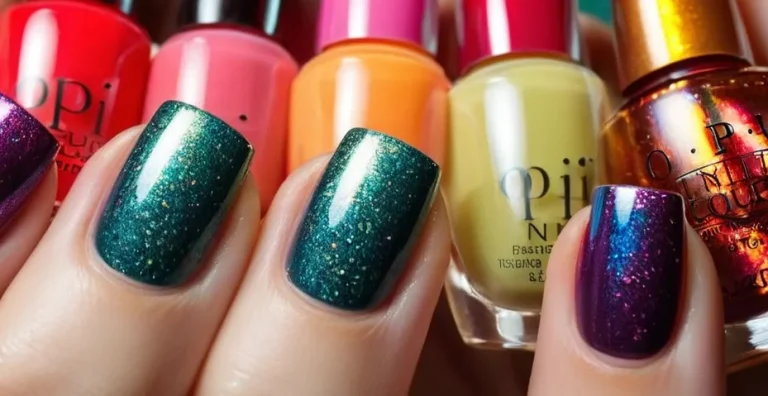
Choosing the Right Clear Nail Polish
Regular vs. Gel
When choosing a clear nail polish for earrings, you’ll first need to decide between a regular clear polish or a gel polish. Regular polish tends to be cheaper and easier to apply, while gel polish provides a super shiny, long-lasting finish. Here’s a quick comparison:
- Regular: Dries faster, more affordable, easier to remove. Lasts around 3-7 days.
- Gel: Provides a glassy, high-gloss finish, lasts 10-14 days without chipping.
If you want a glossy look that lasts over time, a gel clear coat is the way to go. But regular polish works great for quick touch-ups whenever needed. 😉
Glossy vs. Matte Finish
Another choice is between glossy or matte clear nail polish. Glossy gives your earrings a wet, shiny look that really makes metal, stones and gems sparkle beautifully. It acts like a top coat to smooth and seal the piece.
A matte finish has more of a frosted or velvety look. It gently softens the shine of earrings without removing it completely. This more subtle finish can allow certain details to stand out.
| Glossy | Matte |
| Shiny wet look | Muted velvet finish |
| Enhances sparkle | Tones down sparkle |
It’s about personal preference here! For vintage pieces, a matte finish can give a classy, antique appearance.
Ingredients to Avoid
Yes, even with clear polish you’ll want to check the ingredients! Steer clear of polishes with:
- Formaldehyde – toxic preservative
- Phthalates – endocrine disruptors
- Triphenyl phosphate – hormone imbalance risk
Instead, look for:
- Water-based formulas
- “3-free” or “5-free” on the label
This ensures a non-toxic product that won’t irritate skin or harm health. 👍 The safety standards have really improved today, with lots of clean nail polish options available.
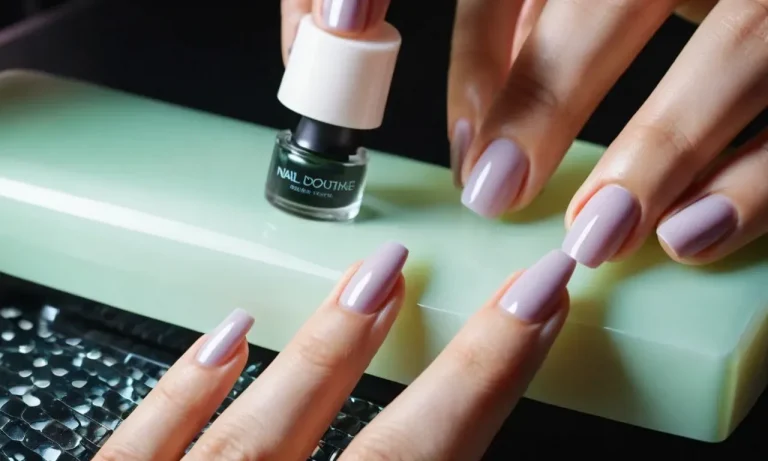
Application Tips and Tricks
Prepping Your Earrings
Before applying clear nail polish to your earrings, it’s important to clean them thoroughly. Gently wash them with warm water and mild soap, then pat dry with a soft cloth. This removes any dirt, oil or debris that could affect how the polish adheres.
You can use a small brush or cotton swab dipped in rubbing alcohol to wipe away any remaining residue. Allow the earrings to dry completely before moving to the next step.
Brushes vs. Dipping
You have two main options for applying the clear polish – using a small brush or dipping the earrings directly into the bottle. Small brushes allow you to carefully coat just the parts you want, while dipping is quicker and coats the entire surface.
If you want to only polish over stones or certain accents, a tiny brush is best. If you want an all-over glossy coat, dipping works well. Use a brush with soft, rounded bristles and gently dab it into the polish, then lightly brush onto the earrings.
For dipping, hold the earring with tweezers and swiftly dip the area to be polished into the bottle and back out.
Ensuring Full Coverage
To get a smooth, even layer of polish, apply two or three thin coats instead of one thick one. Thin coats help prevent unsightly drips or globs. Allow each coat to dry for at least 10 minutes before adding the next. Inspect the earrings closely between coats to make sure you haven’t missed any spots.
Apply extra polish to any area that looks dull or unfinished. The end result should be shiny earrings with a bubble-free, glossy polish cover.
Drying Time and Curing
It’s important to let the polish dry fully before wearing your earrings. Most clear polishes will air dry to the touch within 30-60 minutes. However, it takes a full 24 hours for the polish to completely cure and reach maximum hardness and durability.
Avoid getting the earrings wet or exposing them to friction during this curing time. Once fully cured, the polish will protect your earrings from everyday wear and add a beautiful glossy finish.
How Long Clear Nail Polish on Earrings Lasts
When used correctly, clear nail polish can extend the life of earrings significantly. Here’s a comprehensive look at how long you can expect clear nail polish on earrings to last:
On Nickel-Free Earrings
If applied to hypoallergenic earrings made without nickel, a thin layer of clear polish will typically last 3-6 months. The earrings won’t corrode or turn skin green in that timeframe. Reapply after 3 months for best results.
On Sterling Silver
Sterling silver earrings with a clear nail polish coating tend to last 4-8 months before requiring a reapplication. The polish prevents tarnish and oxidation quite well. Be sure to prep sterling silver properly before applying.
On Common Metal Earrings
On earrings made with inexpensive metals like nickel that oxidize quickly, a clear polish layer will last 1-3 months typically. The thin barrier helps slow down corrosion but doesn’t prevent it fully over time.
With a Top Coat
Adding a shiny top coat over the dried clear polish on earrings can extend its lifespan even longer – potentially up to 12 months on noble metals like sterling silver. The additional layer protects the base polish from wear.
Factors That Reduce Longevity
There are a few key factors that can decrease how long clear nail polish protects earrings:
- Frequent wear and handling of the earrings
- Exposure to hair products or perfume that can break down polish
- Swimming or showering with the earrings on
- Living in a humid climate
Avoiding these as much as possible allows the polish to last. Reapplying every 3-6 months regardless helps offset environmental factors.
Downsides to Be Aware Of
Can Discolor Over Time
One of the biggest downsides of using clear nail polish on earrings is that it can start to yellow or discolor over time. The ingredients in nail polish, like nitrocellulose and resin, can start to oxidize and break down when exposed to air and light.
This causes the polish to take on a yellowish or cloudy appearance that can be quite unappealing on jewelry. The discoloration may be more noticeable on silver or lighter colored metal earrings.
To avoid this, try not to use too many coats of nail polish on your earrings. Thick layers are more likely to yellow faster. Also, store your earrings in a cool, dark place when not wearing them to slow the oxidizing process.
Reapplying a fresh coat of polish every so often can also help keep the color clear.
Difficult to Remove
Another downside is that nail polish can be quite difficult to remove from earrings once applied. The polish is designed to adhere very well to surfaces, so it can be stubborn to take off metal jewelry.
Using nail polish remover or acetone will get the job done, but this is harsh on many earring materials. The chemicals can damage or discolor silver, gold, and natural stones over time with repeated exposure.
Rubbing alcohol is a gentler option, but still may require a lot of scrubbing and effort to fully remove the polish.
To make removal easier, consider putting a base coat of clear topcoat or acrylic paint on the earrings first before applying the nail polish. This will create a barrier so the polish won’t stick directly to the earring surface.
The base layer can then be more easily peeled or chipped off, taking the nail polish with it.
Can Interfere with Hypoallergenic Metals
Some people choose hypoallergenic earring materials like surgical steel or titanium to avoid skin irritation. However, applying nail polish to these metals can interfere with their hypoallergenic properties over time.
The ingredients in nail polish, especially on cheaper brands, may contain traces of nickel, formaldehyde, and other sensitizing agents. As the polish wears down, small amounts of these substances can leach out and come into contact with the skin. This negates the benefit of the hypoallergenic metal.
To avoid potential reactions, look for nail polish that is labeled “3-free” or “5-free” meaning it doesn’t contain harsh chemicals like toluene, formaldehyde, and dibutyl phthalate (DBP). Or consider using nail polish just on non-body piercing earrings made with sterling silver, gold, or other metals if you have very sensitive skin.
Caring for Earrings with Clear Nail Polish
Cleaning Instructions
Keeping your earrings clean is crucial for maintaining their shine and preventing damage. Here are some tips for properly caring for your earrings:
- Remove earrings and wipe them with a soft, dry cloth after each use. This removes oils, lotions, and dirt that can build up.
- For a deeper clean, dip a cotton swab in rubbing alcohol and gently wipe down the earring, removing any makeup, oils or dirt. Allow to fully dry before storing or re-wearing.
- Use an old, soft-bristle toothbrush and warm, soapy water to scrub stubborn dirt off bead or textured earrings. Rinse and dry completely.
- Store earrings properly in a well-organized jewelry box, with separators or padded slots to prevent scratches and tangling.
By regularly cleaning your earrings after wearing them, you’ll prevent grime buildup that can be harder to tackle later on. Proper storage is also key for keeping them looking their best.
When to Reapply
Over time, the protective clear nail polish layer on your earrings can start wearing off. Check the condition of the polish every few months and reapply as needed. Some signs it’s time for a fresh coat include:
- Visible scratches, scuffs or wearing on the earring’s surface
- Tarnished metal showing through
- Earrings feeling rough or uneven to the touch
- Polish layer wearing thin so metal underneath is visible
In addition to inspecting for wear and tear, we recommend reapplying a layer of clear nail polish every 6 months regardless of condition. This ensures continued protection and keeps the earrings looking like new! Reapply using thin, even coats allowing each to fully dry before adding another.
With this simple maintenance, your earrings will stay brilliantly shiny and protected for many years of stylish wear.
Conclusion
Applying a protective top coat of clear nail polish is an affordable and easy way to help your earrings retain their beauty. With the right polish and application technique, you can create a long-lasting barrier against tarnish, skin oils, and more.
Just be aware that nail polish can be difficult to remove, so take care when applying. Follow our tips to enjoy shine-free earrings for months to come!