Can You Refill Gel Nails? A Detailed Guide
If you enjoy having beautifully manicured nails but don’t want to keep paying for full gel manicures, you may be wondering: can you refill gel nails yourself at home between salon visits? The short answer is yes, with the right products and techniques, you can easily refill chipping or grown out gel polish between nail salon appointments.
Refilling gel nails, also called a gel fill, is an affordable way to maintain your manicure and avoid removing and reapplying gel polish every 2-3 weeks. It involves buffing the grown out section near the cuticle and reapplying gel color for a seamless, long-lasting manicure.
This helps the gel last 4+ weeks instead of 2-3 weeks between fills.
In this comprehensive guide, we’ll cover everything you need to know about safely and properly refilling gel polish at home, including:
What is a Gel Nail Refill?
A gel nail refill is the process of filling in the grown out portion of a gel manicure and reapplying a fresh layer of gel polish. It allows you to maintain the gel polish look without having to completely remove and reapply the gel every time it grows out.
Here’s a more detailed look at what’s involved in a gel refill:
Filing and Shaping
The first step is to file and shape the free edge of the nail to remove any overgrown gel or lifting. The nail tech will use a coarse file to gently buff away the top layer of gel, removing any imperfections or chips. This helps create a smooth, even surface for the new gel to adhere to.
Removing the Shine
After filing, the nail tech will wipe the entire nail with nail polish remover or cleanser. This removes any oil or residue and ensures the new gel will bond properly. They may also gently buff the surface of the existing gel to remove any shine or smoothness.
This etching of the surface helps the new layer of gel grip better.
Applying New Gel
Next, fresh gel (usually clear builder gel) will be applied to the new nail growth near the cuticle area. This gel extends the manicure and fills in the gap between the cuticle and existing polish. The gel is cured under an LED or UV lamp before applying the color.
Color Application
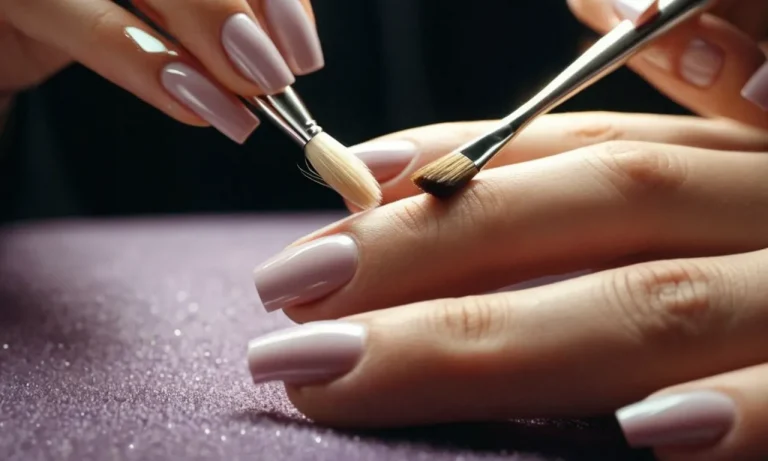
Once the new gel is set, your chosen gel polish color will be applied on top to refresh the manicure. The nail tech will use thin coats and cure each layer under the lamp. Two layers of color are typically applied to achieve an opaque, glossy finish.
Finishing Touches
To finish, the surface may be wiped with cleanser and the nails will be given a final shape. The nail tech may apply cuticle oil to hydrate the skin and nails. Your gel manicure is now refreshed and ready to go!
The whole gel refill process usually takes around 30-45 minutes. It’s a quick way to maintain your gel manicure compared to a full removal and new set. Refills can generally be done every 2-3 weeks as the nails grow out.
Doing regular refills is the best way to care for your natural nails under gel polish. Frequent removals and reapplications can damage the nails over time. Refills allow the existing gel to stay on as a base while replacing the grown out section, minimizing trauma to the natural nail.
Can You Refill Gel Nails Yourself at Home?
With some practice, skill, and the right supplies, it is possible to refill gel nails at home. However, DIY gel refills come with both pros and cons that are important to weigh before deciding if it’s the right choice for your nail care routine.
The Pros of DIY Gel Refills
Doing gel refills yourself at home can save quite a bit of money compared to going to a salon every 2-3 weeks. The startup costs of purchasing gel polishes and a UV/LED lamp can pay for themselves after just a few DIY manicures.
Refilling gel at home also gives you more flexibility instead of booking appointments. You’re able to redo your nails on your own time when it’s most convenient. This makes it helpful if you ever chip or break a nail and need a quick fix.
The Cons of DIY Gel Refills
While convenient and budget-friendly, DIY gel refills pose some downsides. Achieving a perfect, professional-quality finish can be tricky without proper training and technique. Errors like uneven application, air bubbles in the gel polish, or premature lifting can occur.
Refilling gel at home also poses a higher risk of nail damage if done repeatedly over time without allowing nails to breathe in between. Overexposure to UV lamps can potentially cause burns or other safety hazards if proper precautions aren’t taken as well.
How to Refill Gel Nails Step-By-Step
Prep Your Nails
The first step in refilling gel nails is to properly prep the natural nails. Start by removing any old gel polish with pure acetone and a foil wrap. Once the old gel is removed, use a nail file to gently buff away the shine from the natural nail. This helps the new gel adhere properly.
Next, use a nail dehydrator and pH bonder to remove any oils from the nail plate and create a tacky surface that gel can grab onto. Your nails are now prepped and ready for fresh gel!
File and Shape Your Nails
Now it’s time to shape and file the nails to your desired length and shape. Use a 100/180 grit nail file to refine the shape and edges, being careful not to overly thin the nails. Filing in one direction helps preventWeakening the nails. Shape the nails uniformly for a balanced look.
Remove dust with a brush before moving on.
Buff Away Shine Near Cuticles
Use a fine grit buffer or file to gently buff away any shine or smoothness near the cuticles. Avoid over-buffing, as this can damage the nails. Just a light buff is needed to allow the gel product to properly adhere to the nail plate near the cuticles. Cleanse away any dust after buffing.
Cleanse Nails and Remove Dust
Before applying gel, it’s important to completely cleanse the natural nails and remove any dust or oil that may still be present. Use acetone, alcohol, or a nail dehydrator to wipe nails clean. Follow with a lint-free wipe or brush to remove every speck of dust.
This prevents air bubbles or lifting in the gel polish. Your nails are now squeaky clean and ready for fresh gel color!
Apply Gel Base and Cure
The base coat provides an even surface for gel polish application and helps it adhere properly. Apply a thin layer of gel base coat, keeping it off the skin. Make sure to seal the free edge and get near cuticles without flooding them.
Cure for 30-60 seconds in an LED lamp according to manufacturer’s instructions until completely set.
Apply Color Gel Layers and Cure
Apply at least 2 thin layers of gel polish color, curing each layer in the lamp for 30-60 seconds. Allow sufficient time between coats for better adhesion. Using thin coats prevents heat spikes. Finish with a smooth, even application of color. Remember to cap the free edge for longer wear.
Cure the final layer until fully set.
Finish with Top Coat and Cure
The top coat is the finishing touch that gives the gel manicure a glossy shine and helps it last. Apply a thin layer across the entire nail, continuing off the free edge. Cure for the full recommended time until completely hardened.
Avoid wiping nails or getting them wet immediately after curing to allow full setting without smearing.
Clean Up Your Work
Finish by using an orangewood stick dipped in acetone or alcohol to gently remove any gel from the skin or cuticles. Be careful not to pull or wipe the gel against the manicure. Then use nail oil around the nails to condition the skin. And you’re done!
With proper prep and application, your refilled gel manicure will look freshly done and last just as long!
Aftercare Tips for Your Gel Refill
Taking good care of your nails after getting a gel refill is crucial to help them last longer and stay strong and healthy. Here are some of the top aftercare tips to follow.
Avoid Chipping Edges
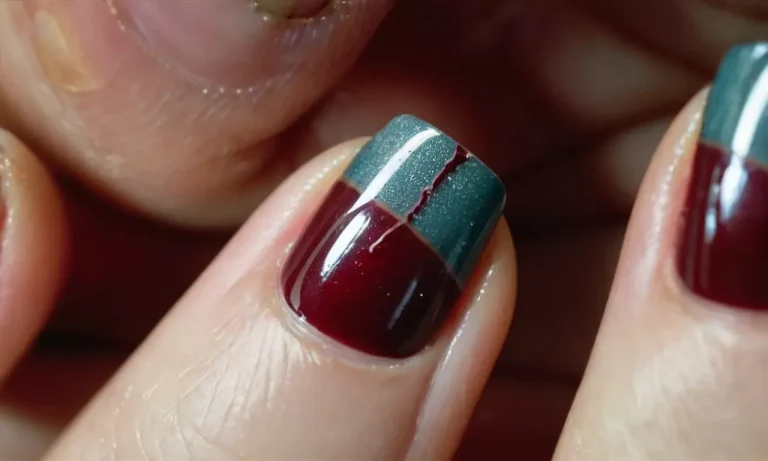
One of the most common issues with gel manicures is chipping around the edges and tips of the nails. This can happen more easily right after a fill since the product is freshly applied. Here are some handy ways to avoid chipping:
- Use your hands gently and avoid hard impacts for the first 24 hours until the gel has fully cured.
- Wear gloves when doing household chores that involve chemicals or water.
- Apply a quality top coat like Seche Vite top coat gel to add extra protection.
- File and buff gently if you notice any lifting or cracking to smooth it down.
Moisturize Your Nails and Cuticles
The gel manicure process, as well as frequent nail polish removal, can cause dryness and irritation around the nails and cuticles. Properly moisturizing helps protect nail health.
- Apply cuticle oil daily focusing on the nail beds and cuticles. Jojoba and vitamin E oils are great options.
- Use a hydrating hand cream regularly throughout the day.
- Avoid very hot water when washing hands to prevent moisture loss.
- Exfoliate gently with a soft brush to increase blood circulation.
Keeping the skin around the nails supple and healthy will help prevent issues like hangnails and painful cracking.
Be Gentle on Your Hands
Treating your hands and nails with care is key for maximizing the longevity of your manicure in between fills. Here are some handy tips:
- Wear gloves when cleaning and doing household chores.
- Try to use tools instead of fingers when possible to avoid direct impact and pressure.
- File and buff gently if you notice lifting or cracks.
- Avoid picking, pulling, or biting nails and cuticles.
It can also help to plan fills before major events like vacations or big occasions where you want your nails looking their best. Getting them filled every 2-3 weeks is ideal.
Following a good gel nail aftercare routine helps maintain strength, shine, and longevity. Pay special attention right after a fill while the product cures and seals to the nail.
How Often to Refill Gel Nails
When it comes to refilling gel nails, there are a few factors to consider to determine the ideal timeframe. Here is an overview of how often you should plan to get a refill:
Every 2-3 Weeks
Getting a gel refill every 2-3 weeks is recommended for most people. This allows your natural nail to grow out without excessive lifting or damage to the nail bed. As your natural nail grows, the gel on top can start to separate and crack. Refilling them every 2-3 weeks prevents this from happening.
Every 3-4 Weeks
If your nails grow slowly, you may be able to stretch your refills to every 3-4 weeks. But for most people, waiting longer than 3 weeks means you risk damaging the nail bed when removing the lifted gel.
Every 1-2 Weeks
Some people with very fast nail growth may need to refill as often as every 1-2 weeks. If you notice lifting or cracking within two weeks, your nails are growing too fast for the standard refill schedule. Get them redone more frequently for the healthiest nails.
Schedule Around Life Events
Also consider any big events or vacations when scheduling refills. For instance, get a fresh refill within a day or two before a wedding or photo shoot. Plan your refill appointments around any trips planned, scheduling one right before you leave so your nails look fab on your vacation.
Seasonal Changes
Your nails can grow faster or slower depending on the season. In summer for example, more frequent swimming can mean your manicure lifts earlier. Cold dry weather in winter may also cause nails to grow more slowly. Adjust your refill schedule accordingly.
Damages or Repairs
If you damage a nail, don’t try to wait until your next refill appointment. Schedule a repair as soon as possible to prevent cracking or breaking. Putting off repairs can damage the nail bed. It’s also a good idea to get minor lifting repaired instead of waiting for your next refill.
This prevents lifting from getting worse or debris getting trapped under the gel polish.
Nail Health Considerations
Those with very weak, peeling or damaged nails may need refills every 1-2 weeks to keep them protected while improving nail health. Schedule refills according to what your nails need and discuss any issues with your nail tech.
In general, aim for gel refills every 2-3 weeks for most people. Adjust this timeframe based on your individual nail growth, lifestyle factors and seasonal changes. Stay on top of any repairs needed between refills. With proper scheduling, your gel manicure will stay chip-free and beautiful!
Conclusion
With the right gel nail products and some practice, you can easily extend the life of your salon gel manicure by refilling at home between appointments. Properly prepping your nails and applying thin, even layers of gel polish is key for a long-lasting, chip resistant DIY refill that matches your original manicure.
Refilling every 2-3 weeks saves money compared to removing gel and getting a full new set each time. Be sure to properly care for your nails and know the limits of safely refilling at home vs. needing professional removal/reapplication periodically to avoid damage over time.