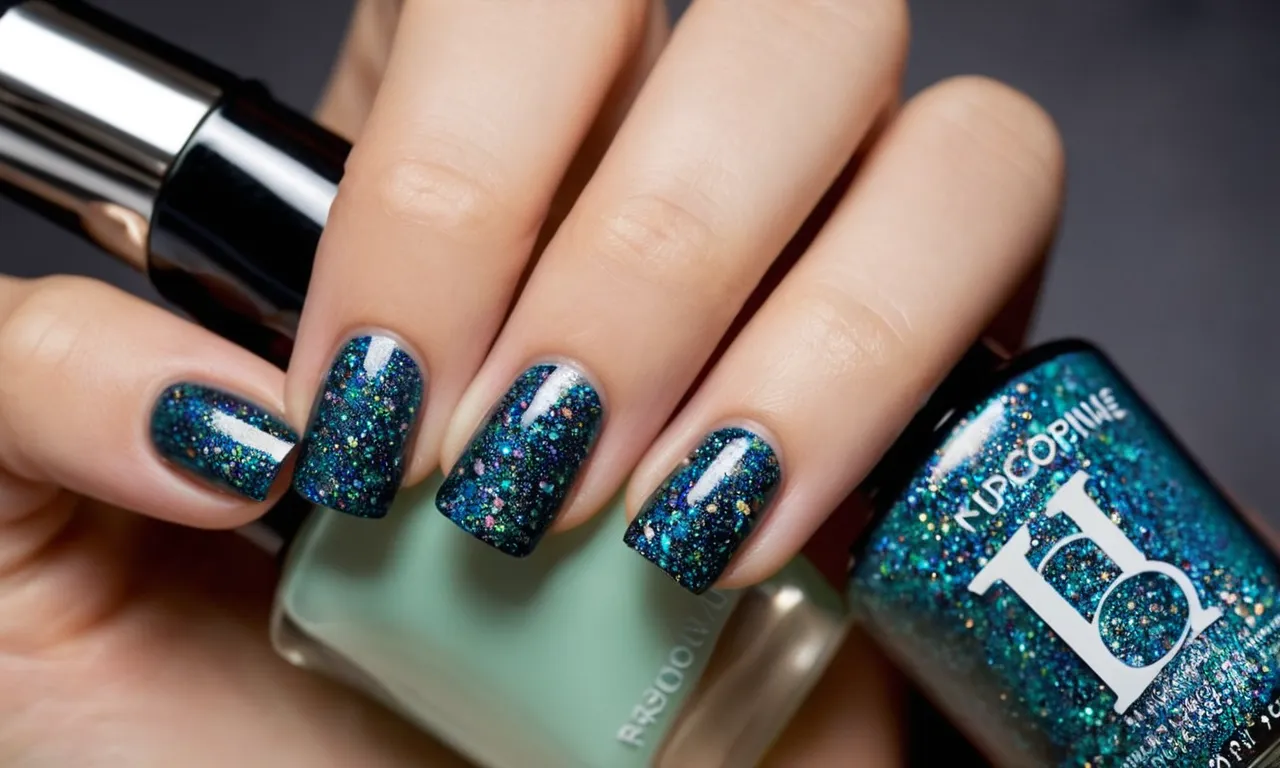
Can You Put Gel Top Coat Over Nail Wraps?
If you love getting nail wraps but want them to last longer, you may be wondering if you can apply a gel top coat over them. Nail wraps offer fun designs and patterns that can spice up your nails, but they aren’t very durable on their own.
A gel top coat creates a hard, protective layer over your manicure that can help nail wraps last 2-3 weeks without chipping or peeling. In this comprehensive guide, we’ll explore everything you need to know about using gel top coats with nail wraps for maximum wear.
If you’re short on time, here’s a quick answer: Yes, you can and should apply a gel top coat over nail wraps if you want them to be more long-lasting. The top coat forms a hard shell to protect the wraps underneath. Just make sure to prep and cure properly.
Can You Use Gel Top Coat Over Nail Wraps?
Yes, you absolutely can use gel top coat over nail wraps! In fact, it’s highly recommended to help protect the nail wraps and make them last longer.
Yes, you can use gel top coat over nail wraps for longer wear
Applying a gel top coat over nail wraps creates a protective barrier that helps prevent chipping, scratching, and peeling. The smooth, glossy finish of a gel top coat helps seal the edges of the nail wraps so they don’t catch on things and start to lift up.
Gel top coats are more durable and long-lasting than regular nail polish top coats. The UV light used to cure gel polish creates strong polymer bonds that adhere well to nail wraps. This helps the nail wraps and gel top coat essentially become one unit for maximum staying power.
Using a gel top coat can potentially double the wear time of nail wraps. It prevents the small damages that cause wraps to fail prematurely. This is great news if you want your nail art to last as long as possible!
Helps prevent chipping, scratching and peeling
One of the biggest reasons nail wraps can start to fail is that the edges and tips become damaged. Regular activities like typing, cleaning, and grabbing objects can cause small chips, scratches, and peeling.
A gel top coat acts as a shield to protect the nail wraps underneath. The flexible and durable gel layer absorbs small impacts rather than transferring them directly to the thin nail wrap material. This significantly reduces the chances of nail wraps becoming damaged at the edges where they are most vulnerable.
Gel top coats also create a smooth surface over any small ridges or bumps in the nail wraps. This prevents the wraps from getting caught on fabrics and other materials which could cause peeling and lifting.
Applying a fresh layer of gel top coat every 2-3 weeks will maintain maximum protection. Look for top coats designed specifically for use with nail wraps to ensure the best adhesion and wear.
Using a gel top coat is a great way to safeguard your nail wrap manicure investment. The extra durability helps you get the most wear time possible out of your nail wraps. Give it a try next time for wraps that last!
Benefits of Using Gel Top Coat on Nail Wraps
Extends the life of nail wraps
Applying a gel top coat over nail wraps can significantly extend their longevity. The hard gel layer acts as a protective barrier against chipping, scratching, and peeling. This allows the stylish nail wraps to stay intact for 1-2 weeks longer than they would without a top coat.
So if you want your fun nail art to last, a gel top coat is a must!
Creates a hard, protective barrier
The main benefit of using gel top coat on wraps is that it seals everything in place with an ultra-hard, glossy layer. This shields the thin nail wraps from daily wear and tear. Gel polish is more chip resistant than regular polish.
So the top coat will prevent the edges of the wraps from lifting or peeling up as the nails grow out.
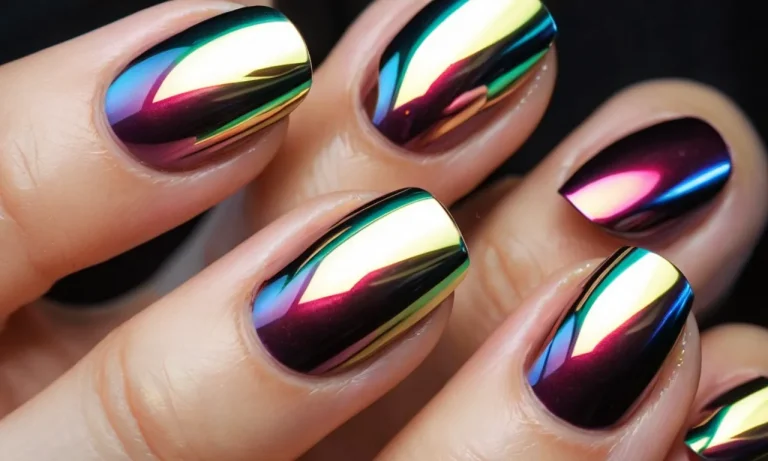
Adds shine and gloss
A major bonus of gel top coat is that it leaves an incredibly glossy, light-reflecting finish. It enhances the depth of color underneath and makes the wraps look vibrant and salon-perfect. The slick top coat really maximizes the graphic effects and makes the patterns pop.
Gel gives a glass-like coating that regular polish just can’t achieve.
Allows for easy removal later
While gel top coat protects nail wraps and prolongs their wear, it also allows for easy soak-off removal later. When you’re ready to change up your nail art, the gel layer peels off intact rather than damaging the wraps underneath.
This leaves the wraps fully intact so they can be reused again and again. So you can experiment with different wrap looks without worrying about waste.
How to Apply Gel Top Coat to Nail Wraps
Prep nails properly
Before applying nail wraps and gel top coat, start by properly preparing the natural nails. File and shape the nails into the desired shape, then buff the surface gently to remove oils and create texture for better adhesion.
After buffing, use a nail dehydrator and primer to further prep the nails and enable the wraps and gel to bond securely.
Apply nail wraps as normal
Once prepped, go ahead and apply the nail wraps as you normally would, following the package directions. Make sure to file and trim the wraps to properly fit each nail, leaving no gaps near the cuticles or sides that could allow lifting.
Take your time when apply the wraps to get a smooth application.
Cure wraps under LED or UV lamp
After the nail wrap application, cure the wraps under an LED or UV nail lamp according to the manufacturer’s instructions, usually 30-60 seconds. Properly curing ensures full hardness and adhesion. Avoid any sunlight exposure at this step.
Apply thin layer of gel top coat
Next, apply a thin, even layer of gel top coat over the cured wraps, similar to how you would top coat a gel manicure. Make sure to cap the free edge so the gel seals around the tips. Avoid flooding the cuticles with too much gel.
Cure again under lamp
Finish by curing once more under the LED or UV lamp, usually another 30-60 seconds. The gel top coat helps smooth over any texture and fills in imperfections, while also adding extra protection and sheen. Over time, refresh the gel top as needed to maintain longevity.
Tips for Success When Top Coating Nail Wraps
Avoid flooding cuticles with gel
When applying gel top coat over nail wraps, it’s important to avoid getting too much product near the cuticles. Flooding the cuticles with gel can cause lifting and peeling. Here are some tips to get a clean application:
- Use a pointed brush and work in thin layers near the cuticles.
- Wipe away any excess gel pooling around the edges before curing.
- Be patient and allow each layer to cure fully before moving on.
- Use gel cleanser to neatly tidy up the cuticle area when done.
Cap free edge for protection
Capping the free edge, meaning applying top coat over the tip of the nail, is highly recommended when using wraps. This seals and protects the thin wrap material at the end of the nail, preventing peeling or breakdown.
- When top coating, extend each stroke just past the nail tip.
- Make sure to cure underneath the free edge too.
- Avoid filing or buffing the capped edge afterwards so the seal stays intact.
Use thinner top coat layers
Layering gel top coat too thick over nail wraps can cause wrinkling or bubbles in the wrap material. For a smooth, long-lasting finish:
- Apply gel top coat in 2-3 thin, even layers.
- Cure each layer fully before adding more.
- Thinner layers self-level better over the wraps.
- Build up shine and protection gradually.
Check for full cure
An under-cured gel top coat won’t adhere or harden properly. When top coating wraps, be sure to:
- Cure each layer for the full time recommended by the brand.
- Check that the gel is smooth and glossy, not sticky.
- If needed, wipe and re-cure any tacky areas for full hardness.
- A UV/LED lamp may need replacing if gels are not curing fully.
By following these tips, you can achieve a flawless, long-lasting gel top coat over nail wraps. Allowing proper cure time and using thin, precise application will help avoid liftig or damage. Your stylish wraps will last for weeks with a protective top coat seal.
Removing Gel Top Coat from Nail Wraps
Use foil method and acetone
One of the most effective ways to remove gel top coat from nail wraps is by using acetone and foil. This method helps protect the nail wraps while removing the gel top coat.
Start by getting a small bowl of 100% acetone and some foil. Cut the foil into small squares – you’ll need one for each nail. Then, saturate a cotton ball or pad with acetone and place it on top of each nail. Wrap each nail with a small piece of foil and leave on for 10-15 minutes.
The foil helps hold the acetone in place and accelerates the removal process. As the acetone dissolves the gel top coat, gently slide a wooden cuticle pusher or orangewood stick under the free edge of the gel to help lift it off.
The gel top coat should peel off easily without damaging the nail wrap underneath. Make sure to reapply acetone and foil if needed until all traces of gel are gone.
Try gentler e-file method
For those concerned about using acetone directly on the nail wraps, a gentler option is to use an e-file (electric nail file). Choose a coarse e-file band bit and set the speed to medium. Gently ‘buff’ the surface of the gel top coat to remove the shine – this exposes the layers underneath.
Take care not to over-file, as you don’t want to damage the nail wrap design. Once dull, wipe the nails with acetone to dissolve what’s left of the gel top coat. You may need to repeat the process if there are still patches remaining.
Finish by gently wiping the wraps with a soft cloth soaked in non-acetone nail polish remover to remove any residue.
An e-file requires a delicate touch, but is less harsh than soaking in acetone. For best results, move the e-file continuously over the nail in light, sweeping motions. Work slowly and cautiously to prevent friction burns on the nail bed.
Be sure to avoid filing over the edges or sides of the nail, as this risks lifting the wrap. Take breaks as needed if the bit feels hot on your nails. This gentle filing technique minimizes the risk of damaging the wraps underneath.
Removing gel top coat from nail wraps takes some patience and care. But with the right acetone and foil method or gentle e-file buffing, you can successfully eliminate the gel while keeping your wraps intact.
Taking the proper precautions helps extend the life of your nail wraps so you can enjoy the design for many weeks.
Conclusion
Applying a gel top coat over nail wraps can help protect your design and gain 2-3 weeks of wear between manicures. Just remember to fully prep nails first, apply thin even layers of top coat, and properly cure each layer under an LED or UV lamp.
With the right technique, you can get durable, long-lasting nail wraps with gel polish shine.
Looking for more nail art tips? Subscribe to our blog for tutorials on the latest trends and tricks for eye-catching nails.