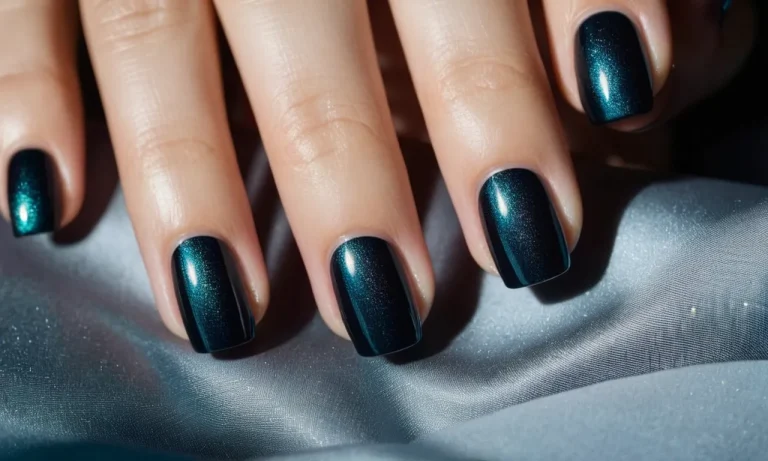
Can You Put Gel Polish On Acrylic Nails?
If you love getting your nails done but don’t want to spend hours at the salon between appointments, you may be wondering if you can put gel polish on acrylic nails yourself at home. The short answer is yes, you can apply gel polish over acrylic nails as long as you properly prep and cure it.
In this comprehensive guide, we’ll cover everything you need to know about using gel polish on top of acrylic nails. We’ll discuss the benefits of gel polish, what products work best, how to prep acrylics for polish, application tips, curing instructions, how long it lasts, removal process, and aftercare.
Benefits of Using Gel Polish on Acrylics
Longer lasting color
One of the best benefits of using gel polish on acrylic nails is that it lasts much longer than regular nail polish. Gel polish can last up to 2-3 weeks without chipping or fading, whereas regular polish may only last 3-5 days.
The gel formula is designed to bond to the natural nail and acrylic overlay, creating a super strong hold that resists chips and scratches.
Chip resistant finish
Gel manicures are known for their hard, chip-resistant finish. The LED or UV light used to cure the gel polish bonds each layer together to form a protective armor over the nail. This makes gel polish on acrylics extremely durable and difficult to chip.
Even with daily activities like typing, cleaning, and cooking, gel polish stays flawless for weeks.
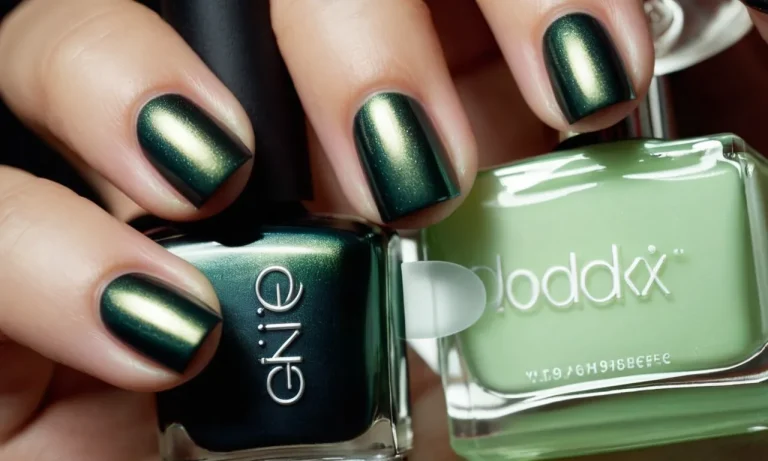
Wide variety of colors and effects
Gel polish comes in every color imaginable – from nudes and neutrals to bright neons and pastels. There are also dozens of unique gel polish textures and effects to choose from like glitter, shimmer, matte, chrome, and more.
Using gel polish allows you to get fun, creative manicures that aren’t possible with regular polish. It really lets your acrylic nails show off your personality!
Can be removed without damaging acrylics
While gel polish is extremely durable, it can be safely removed without damaging the underlying acrylic nails. Gel polish is soaked off using acetone just like regular polish. The process takes a bit longer than regular polish removal, but will gently break down the gel formula without affecting acrylic bonds.
This allows you to change your gel manicure whenever you want without having to get a full set of new acrylic nails.
Looks professionally done
Gel manicures have a smooth, glossy finish that looks like you just walked out of the salon. The layers of gel create a flawless, even application without streaks or bubbles. And unlike regular polish, the high-shine appearance lasts for weeks without fading or dulling.
Using gel polish on your acrylic nails gives you long-lasting, professional quality nails from the comfort of your own home.
Choosing the Right Gel Polish and Supplies
Gel polish brands made for natural or acrylic nails
When choosing a gel polish brand, it’s important to select one specifically formulated for use on natural or acrylic nails. Many popular gel polish lines like OPI GelColor, Gelish, CND Shellac, and Essie Gel Couture are safe for and tested on both natural and acrylic nails.
Avoid generic gel polishes found online or in discount stores, as they may not cure properly or last as long on acrylics. High-quality salon gel polish brands are the way to go for the best wear and results.
LED or UV gel polish
Gel polishes require curing under an LED or UV lamp. LED lamps are most common nowadays and cure gel polish in 30 seconds or less. UV lamps take 2-3 minutes. Both work fine for curing gel polish on acrylics, so choose whichever is most convenient for you. LED may be preferable if you’re in a hurry!
Nail primer
Using a nail primer before applying gel polish helps it adhere properly to natural or acrylic nails. Look for an acid-free nail primer designed for use with gel polish. Apply it to clean nails before your base coat. This simple step helps prevent lifting, peeling, and other wear issues.
Base and top coat
Always use a gel base coat and gel top coat formulated for the gel polish brand you choose. Base coat helps bond the polish to your nails, while top coat gives a glossy shine and seals in the color. Using the matching gel system ensures proper curing and long lasting wear.
Don’t mix and match gel polish with regular nail polish base or top coats.
Curing lamp
You’ll need an LED or UV curing lamp to properly set gel polish on acrylics. LED lamps are most common, curing gel polish in 30 seconds or less. Salon brands like Sensationail and Lumenesce make high quality LED lamps ideal for DIY use.
Look for one with a built-in timer so you don’t have to guess when to stop curing.
Nail prep solutions
Nail prep solutions like dehydrators and pH bonders help ensure proper gel polish application on acrylics. Brush on a dehydrator like Gelish Foundation Solvent before base coat to remove oils and prep nails. Using a pH bonder balances the pH between artificial and natural nails for better bonding.
These solutions prevent lifting, peeling, and other wear issues.
Cuticle pusher
Pushing back your cuticles helps give gel polish a neat finished look on acrylic nails. Use a metal cuticle pusher tool to gently push back and neaten cuticles before polish application. Having any product on your cuticles prevents proper curing and leads to lifting or peeling.
Nail file and buffer
Filing and lightly buffing your natural or acrylic nails before gel polish application helps with adhesion. Use a 100/180 grit file to shape nails and remove surface shine. Gentle buffing increases surface area for the gel polish to bond to.
Always dehydrate nails after filing and buffing to remove nail dust before base coat.
Preparing Acrylic Nails for Gel Polish
Applying gel polish to acrylic nails requires some preparatory steps to ensure proper adhesion and a long-lasting manicure. Follow these tips to get your acrylics ready for a shiny new layer of color.
Remove Any Existing Nail Polish
Before painting gel polish onto acrylic nails, remove any traces of old nail polish or gel residue. Use an acetone-based nail polish remover to thoroughly cleanse the nail surface. This eliminates any barriers between the acrylic and new polish for better adherence.
File and Shape Nails
Once bare, use a nail file to shape and smooth acrylic nails into your desired style. File the edges to prevent cracking or lifting. Then buff the nails lightly to remove any surface debris. This primes the acrylic surface for polish application.
Avoid over-filing as that could damage the acrylic material.
Push Back and Trim Cuticles
Neatly push back and trim any overgrown cuticles with a cuticle pusher and nipper. This keeps the eponymous area tidy for a refined finish. Take care not to cut the skin, just detach cuticles from the nail plate. Trim hanging tags of dead cuticle as well.
Use Nail Dehydrator and pH Bonder
Wipe nails with a dehydrator/cleanser to remove traces of oil and prep the surface. Apply a nail primer or pH bonder next. These provide a tacky base that allows gel polish to bond optimally with the acrylic underneath for long wear.
Apply Nail Primer
Finally, paint a thin layer of nail primer over the acrylic and let it dry. The nail primer fills in microscopic grooves on the acrylic surface to help the gel polish coat it smoothly and evenly. This prevents chipping and peeling.
Prepping your acrylics properly before gel polish allows it to adhere tightly for up to 2-3 weeks of flawless wear. Just be gentle with your nails and avoid picking or peeling. With acrylics prepped using these tips, you can enjoy stunning gel manicures that last!
Applying Gel Polish to Acrylic Nails
Base coat application tips
Applying a quality base coat is a crucial first step when putting gel polish on acrylic nails. The base coat helps the color gel polish adhere properly to the acrylic and prevents staining of the acrylic.
When shopping for a base coat, opt for one formulated specifically for use with gel manicures or acrylics. Avoid traditional nail polishes as a base coat under gel polish on acrylics.
Before applying the base coat, gently buff the surface of the acrylics with a nail file to remove any shine and create a slightly rough texture for the polish to bond to. Push back and clean underneath the free edge of the nail with a wooden stick.
Wash hands thoroughly and allow nails to dry completely. Apply a thin, even layer of base coat, taking care not to get any on the skin or cuticles. Let the base coat dry 2-3 minutes before moving on to color layers.
Apply color coats
Gel polish tends to apply thinner than regular nail polish. Most gel color polishes require 2-3 thin coats for full, even color coverage on acrylic nails. As with the base coat, avoid getting gel polish on the skin or cuticles. Cap the free edge of the nail with each stroke for maximum durability.
Allow each coat to dry for 30 seconds under an LED lamp or 2 minutes under UV before applying the next layer. Repeat until achieving your desired color depth.
Gel polish cures differently than air-dry lacquers, so resist the urge to apply thick coats. Thin applications that are properly cured between each layer deliver the most vibrant, long-lasting manicure. Apply coats patiently and avoid flooding the cuticles or nail sidewalls with product.
Finish with glossy top coat
The right top coat transforms an average gel manicure into a salon-quality one. It protects the color underneath, helps it cure properly, and leaves nails with a glossy finished look. Apply top coat to the nails beginning 1 mm away from the cuticles and stretch it down over the free edge.
Cure for 30-60 seconds. The longer cure time ensures thorough drying.
As a final touch once top coat is dry, wipe nails gently with a lint-free pad soaked in nail polish remover. This removes the tacky inhibition layer left behind by gel polish. The nails are instantly touch-dry.
Cure between each layer
Proper curing is essential for gel polish applied to acrylics. Insufficient drying time weakens the bond and causes chips, cracks, and peeling. Always cure under a lamp for 30-90 seconds after every layer depending on thickness.
Both LED and UV lamps work for gel polish, though LED tends to have a quicker cure time.
Here is a curing guide for gel polish on acrylic nails:
- Base coat: 60 seconds
- Color coats: 30 seconds
- Top coat: 60 seconds
If adding nail art or gems, cure between each addition to seal layers. When in doubt, err on the side of over-curing. This ensures every coat dries fully before moving on. With the right technique, caring for gel polish on acrylics is simple for a long-lasting manicure.
Curing Gel Polish on Acrylic Nails
Curing Times Based on Lamp Strength
When applying gel polish to acrylic nails, proper curing is crucial for ensuring the gel sets correctly and lasts. The curing time will vary depending on the strength of your UV/LED lamp:
- 36-watt UV lamp: Cure each coat for 2 minutes
- 48-watt UV lamp: Cure each coat for 1 minute
- 54-watt UV lamp: Cure each coat for 30 seconds
- LED lamps: Cure each coat for 30 seconds
Using a weaker UV/LED lamp can result in tacky polish that never fully cures. I highly recommend investing in a strong 48-watt or higher UV lamp or LED lamp to properly set gel polish on acrylics.
Ensure Proper Curing Between Layers
When applying multiple layers of gel polish, it’s important to fully cure each layer before applying the next. Insufficient curing can prevent proper adhesion between layers, causing the polish to peel or lift.
After applying base and color coats, cure each layer for the recommended time under the lamp. Use the “thumb test” before adding another layer – lightly touch the gel surface with your thumb to check that it’s smooth and tack-free. If you feel any stickiness, cure for an extra minute.
Watch for Tacky Layer
If gel hasn’t cured fully, a sticky inhibition layer will form on the surface. This tacky residue means the polish didn’t set completely. It may feel dry initially but can stay sticky hours later if not cured properly.
A tacky finish is a red flag that something went wrong during curing. This usually happens if you didn’t cure for long enough, if lamp bulbs need replacing, or if too thick a layer was applied. Fix tacky polish right away by scrubbing off the residue and thoroughly curing a fresh layer.
How Long Gel Polish Lasts on Acrylics
Gel polish can last 2-3 weeks or more on properly applied and cured acrylic nails with proper at-home care. The longevity depends on several factors:
Typically lasts 2-3 weeks
With proper application and home care, gel polish typically lasts 2-3 weeks on acrylic nails before starting to chip or lift at the tips. This lifespan is similar to gel polish on natural nails. The acrylic itself helps protect the gel polish underneath.
Proper application and curing maximizes wear
To get the most wear time, it’s important to properly prep, apply, and cure the gel polish according to manufacturer instructions. Proper prep removes oils and creates texture for adhesion. Using very thin coats and curing each layer fully hardens the polish.
Depends on nail care routine
How long gel polish lasts also depends on the wearer’s at-home care routine. Activities, chemicals, water exposure, and nail tools can all impact longevity. Here are some tips for maximizing wear:
- Avoid picking at polish
- Use gloves for cleaning and gardening
- Apply cuticle oil daily
- Use a gel-safe top coat
- Go easy with nail tools like clippers
With a gentle at-home routine, some people can go 4+ weeks before a fill is needed. Either way, it’s best to get fills before too much growth and lifting occurs to prevent damage to nails.
Removing Gel Polish from Acrylic Nails
Use gel polish remover wraps
The safest and most effective method for removing gel polish from acrylic nails is to use gel polish remover wraps (also called foil wraps). These are packets containing acetone-free gel polish remover and an inner foil lining that allow the remover to be trapped next to the nail.
Simply wrap each nail with a remover wrap, leaving on for 10-15 minutes. This allows the remover to soak into the gel polish and break down the bonds, without damaging the acrylic underneath. The gel polish can then be easily wiped or scraped off with an orangewood stick without filing the acrylic itself.
Avoid acetone-based removers
When working with acrylic nails, it is crucial to avoid acetone-based removers. While acetone works well for natural nails, it can dissolve the acrylic structure of artificial nails, leading to weakness, cracking, and potential nail damage.
Salons often use acetone for speed and convenience, but there are safer gel polish removal alternatives for acrylics. Stick to acetone-free gel removers or non-acetone nail polish removers to safely break down gel polish from acrylics.
File off gel top coat first
Filing off the gel polish top coat first allows removal to work faster and more effectively. Use a 100/180 grit nail file to gently roughen the entire gel surface, which removes the shine and smoothness.
This takes off the top layer of hardened gel and exposes the lower layers for the remover to penetrate. Be very careful not to file down too far into the acrylic itself – focus only on lightly scratching the gel polish. Filing before soaking nails speeds up removal time.
No need to remove acrylic nails
The good news is you do not have to fully remove or replace your acrylic nails just to change your gel polish color. As long as you use an acetone-free gel or non-acetone nail polish remover, you can safely remove the gel polish without damaging the acrylic underneath.
Take care not to pick, peel, or pry off the gel – this can weaken or lift the acrylic layer. Let the remover do the work to gently dissolve the gel bonds instead. Reapply new gel polish once finished.
Moisturize after removal
After removing gel polish from acrylic nails, it is important to moisturize both the natural and acrylic nail. Removing gel can lead to dryness, irritation, and increased brittleness. Apply a hydrating nail oil, glycerin-based moisturizer, or nail cream after taking off old gel polish. Massage it around the cuticles and over the nail surface.
Then apply cuticle cream to the nail folds and cuticles to condition. Moisturizing helps restore strength and flexibility.
Aftercare Tips for Acrylics with Gel Polish
Use Cuticle Oil Daily
Applying cuticle oil daily is one of the best ways to keep your acrylic nails looking fabulous in between salon visits (1). The acrylic and gel polish can leave the nail beds dry and dehydrated. Massaging in cuticle oil 1-2 times per day will moisturize the skin and help prevent lifting or cracking of the acrylic and polish (2).
Look for cuticle oils that contain nourishing ingredients like vitamin E, coconut oil, and jojoba oil. Keep a bottle on your desk or nightstand to help build the habit of regular moisturizing. Your nail tech will be amazed at how healthy your cuticles look!
Avoid Picking at Polish
This is one of the hardest habits to break – picking at your polish when it starts to lift or chip. Try your best to resist the urge! Picking can remove layers of acrylic and damage the natural nail underneath.
Instead, wait until your next fill appointment and have the lifted gel polish properly removed and reapplied by your nail tech. They have the right tools and techniques to avoid harming the nail bed. If you simply can’t stand the lifted polish, carefully file it away with a fine grit file or buffer.
Just be very gentle and don’t dig into the nail plate. A little patience goes a long way in maintaining the integrity of your nail enhancement!
Carefully File Away Lifting
If you do experience lifting or cracking of the acrylic or gel polish, don’t pick at it! Carefully filing away the lifted edges is a much safer option. Use a fine grit nail file and gently run it along the seam where the product has lifted, taking care not to dig into your natural nail.
The goal is to smooth and seal the edge to avoid snagging. Try rubbing a bit of cuticle oil into the exposed nail plate to rehydrate it. This should help tide you over until your next fill appointment. Let your nail tech know an area is lifting – they may need to change up the application technique or product for better adherence.
Touch Up Polish Between Fills
While gel polish can last 3-4 weeks on acrylic nails, occasionally it may show tip wear or small chips before it’s time for a fill. Don’t pick – just disguise! You can easily touch up the worn gel polish between salon visits.
Apply a thin layer of gel polish matching your set, cure it with an LED lamp, and finish by massaging in cuticle oil. Touch ups only take a few minutes and can keep your nails looking freshly-done. Some nail supply stores like Sally Beauty even offer mini LED lamps perfect for travel.
Keep your nails looking their best while avoiding damage from picking and peeling.
Conclusion
With the right products and techniques, you can easily apply gel polish over your acrylic nails for salon-quality results at home between fills. The long-lasting color, shine, and chip resistance make gels the perfect acrylic nail polish alternative.
Just be sure to properly prep, apply, cure and remove it to avoid any damage to your acrylics underneath. With our detailed guide, you’ll be a pro at mixing these two nail enhancements in no time!