Can You Put Acrylic Nails On Toes?
Have you ever looked at your toes and wished you could glam them up with a nice set of long, acrylic nails? Getting a pedicure is always nice, but acrylic nails take toe glam to a whole new level. If you’ve been wondering whether it’s possible to apply acrylics to your toes, you’re in luck.
If you’re short on time, here’s a quick answer: Yes, you can put acrylic nails on toes. It’s done the same way as on fingers by applying acrylic powder and liquid to nail tips or your natural nails to build out and extend them.
What are Acrylic Nails?
Acrylic nails have become an extremely popular nail enhancement over the past few decades. They are a lightweight, sculptable artificial nail that is applied on top of your natural nail for a stylish, durable manicure. Here’s a more in-depth look at what exactly acrylic nails are:
Made of a Liquid and Powder Acrylic Mix
Acrylic nails are composed of a powder and liquid mixture that contains acrylic polymer, monomer, and an assortment of pigments. The powder is a fine, white dust that provides structure, strength, and color.
It is combined with the acrylic liquid, a monomer like ethyl methacrylate, that acts as the bonding agent. Together, these components form a quick-drying paste that allows nail techs to sculpt and shape lengthy, gorgeous nail extensions.
Applied on Natural Nails
To apply acrylics, nail technicians first prep and file the natural nails to rough up the surface so the acrylic can adhere better. The natural nails are then primed before the acrylic mixture is applied and shaped on top to extend the nail’s length and cover the entire natural nail plate.
The acrylic hardens rapidly under UV or LED lamps into a protective, glossy artificial nail.
Long-Lasting Yet Lightweight
One of the biggest appeals of acrylics is their longevity and strength. The durable polymer structure allows acrylic nails to last 2-4 weeks on most people before needing to be filled. Yet despite their sturdiness, acrylics maintain a lightweight, natural-looking finish.
The extensions feel comfortable and flexible on the nails, avoiding the thick, heavy sensation of glue-on artificial nails.
Wide Range of Design Options
There are endless options when it comes to designing acrylic nails. You can create short, natural looks or long, dramatic claws. Acrylics can be sculpted into any shape imaginable – square, round, almond, coffin, ballerina, squoval and more.
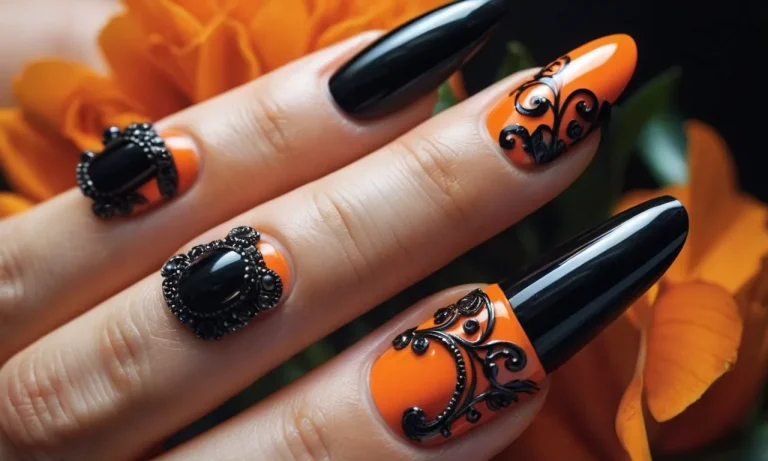
Endless colors and art can be added too with acrylic paints and nail polish. Glitters, rhinestones, foil, gems, 3D embellishments – nothing is off limits with acrylics. You can constantly change up your manicure and experiment with new styles at your nail salon visits.
Can You Put Acrylics on Toes?
Yes, you can definitely put acrylic nails on your toes! Acrylic nails are not just limited to your fingernails – with some modifications, they can be applied to toenails as well. Putting acrylics on your toes follows a similar process as on your fingers, but there are some important differences to keep in mind.
The Process of Applying Toe Acrylics
Here are the main steps for applying acrylic nails to your toes:
- Trim and file your toenails – Get rid of any old nail polish and trim your nails so they are short. Use a nail file to gently shape the nails and remove any rough edges.
- Clean toes and remove cuticles – Scrub your feet and toes gently with soap and water, then use a cuticle pusher to expose the full nail bed.
- Apply primer – Brush nail primer onto each toenail to help the acrylic adhere properly.
- Apply acrylic powder and liquid – The nail technician will use a brush to apply acrylic powder, then acrylic liquid, building your nail extension from the base outwards to create length and shape.
- Shape nails – Once applied, the acrylic will be filed and shaped to your desired length and look. Foot acrylics tend to be more squared or squoval.
- Add polish or decor (optional) – Toenail acrylics can then be polished, painted with nail art, or decorated with rhinestones or glitter.
Differences from Fingernail Acrylics
There are a few key differences when getting acrylic nails for your toes rather than fingers:
- Thicker acrylic: More acrylic powder is used on toes to account for high impact and pressure on the feet. The acrylic needs to be durable.
- Shorter shapes: Length is limited on toe acrylics for comfort and functionality in shoes. Styles tend to be short squared, squoval or oval.
- Less intricate designs: Intricate nail art can be tricky on toenails due to smaller surface area. Simple polish or French tips work best.
- Longer lasting:👍 Toenail acrylics tend to last approximately 4-6 weeks compared to 2-3 weeks for fingernails before needing fills.
Aftercare Tips for Toe Acrylics
Caring properly for your new toenail enhancements will help them last. Here are some key aftercare tips:
- Moisturize cuticles and toes daily to prevent lifting and cracking.
- Avoid picking at your nails as this can cause breakage.
- File down natural nail growth instead of pulling off acrylic.
- Get fill appointments every 3-4 weeks.
- Remove polish regularly and inspect for lifting or damage.
- Be gentle on your feet – avoid trauma and friction from tight shoes.
So feel free to glam up those toes with long-lasting, colorful acrylics! With proper application and care, toe acrylics can look fabulous for over a month. 😊👣
How to Apply Acrylic Nails on Toes
Prep the Nails
Preparing the natural nails is a crucial first step for successful acrylic application on toes. Start by trimming and filing the nails into the desired shape. Use a nail file to gently buff off the shine from the natural nail plate. This allows the acrylic product to adhere properly.
Next, use a dehydrator and pH prep to remove any oils from the nail plate and set the right pH balance for acrylic adhesion. Cleanse nails with soap and water, then dry thoroughly. Apply nail primer to help the acrylic bond to the natural nails.
Size and Shape the Tips
Once prepped, properly size and customize the acrylic nail tips for each toe. Use nail tip sizers to find the right fit for each nail. Cut the tips to adjust the width and length based on the natural nail bed size and shape. Shape and taper the free edge for a balanced look.
Lightly buff the inner surfaces of the tips with a nail file so they grip better. Test fit each tip on its assigned toe and make any adjustments for optimal adhesion.
Apply the Acrylic
With clean and prepped nail beds and customized tips, mix acrylic powder and liquid per the product directions. Work with small beads and layers to sculpt extensions on each nail. Use the brush to push the acrylic product underneath the tip and form the nail extension.
Let each layer dry between additions. Build the extension to your desired thickness and structure. Apply acrylic to the underside of the nail tip and place it on firmly. Hold for 30-60 seconds until set. Continue perfecting the acrylic nail shape with more layers and filing to get your ideal toe nails.
File and Shape
Once the full acrylic nail application is set on all toes, refine the shape with filing. Use coarse grit files to shape the nail edges and smooth the surface. Reduce thickness and length if needed. Use finer grits to refine the shape into a squoval, square, round or other preferred style.
Buff shine into the nails with a buffing block. Apply cuticle oil around each nail to hydrate the skin. Cleanse toes to remove dust and debris. Finish with a high shine topcoat or gel top coat cured with an LED lamp. Maintain the acrylic toe nails with regular infills every 2-3 weeks.
With proper application and care, acrylic nails can stylishly enhance bare toes.
Caring for Toe Acrylics
Moisturize Your Feet
Keeping your feet, especially the skin around and under your toenails, well-moisturized is key for healthy toe acrylics. Apply lotion or cuticle oil daily to prevent cracking and lifting of the acrylics.
An amazing tip is to apply lotion then socks before bed – the socks help lock in moisture overnight!
Avoid Picking or Biting
As tempting as it may be, try your best not to pick at or bite your toe acrylics. This can weaken or even break the enhancement, allowing moisture, dirt, and bacteria to get underneath. Not good! Instead, file down any rough edges gently with a glass file.
Use a Glass Nail File
Speaking of nail files, always use a high-quality glass file when shaping or smoothing your toe acrylics. The fine grit of glass files is gentle enough to buff without thinning the enhancement. In contrast, metal nail files can damage the acrylic or natural nails over time.
Invest in a durable glass file – your nails will thank you!
Get Fills Regularly
Natural nail growth means your toe acrylics will develop a gap between the cuticle area over time. Most salons recommend fills every 2-3 weeks to prevent lifting and breakage in that area. Getting timely fills isn’t just about looks – it also helps keep enhancements strong and healthy!
Risks and Things to Consider
Risk of Infection
Getting acrylic nails on your toes does come with some risks that are important to consider. One of the biggest risks is infection. The tools used to apply acrylic nails can cause small cuts or scrapes on the skin around your toenails, allowing bacteria to enter and cause an infection.
Infection risks are higher for pedicures because feet tend to harbor more bacteria than hands. To reduce infection risk, make sure to go to a reputable salon that properly sterilizes tools and foot baths. Look for signs that tools come out of sealed packages or autoclaves before each use.
An infection can become serious quickly, so see a doctor right away if you notice increasing pain, redness, swelling, warmth, or oozing around the nail.
Less Durability Than Fingers
Acrylic nails simply do not last as long on toes as they do on fingernails. Hands are less exposed to the elements and mechanical stress that toes endure on a daily basis. With toes constantly hitting the insides of shoes and rubbing against socks, the acrylic is much more likely to crack, break or lift off from the nail.
Reapplying or repairing lifted acrylic on toes is also more difficult for even the most skilled nail technician. For these reasons, a set of acrylics on your feet will likely need more frequent fills and maintenance.
On average, a pedicure with acrylic nails may last 3-4 weeks, in contrast to the typical 4-6 weeks for fingernails. Those with very active lifestyles may see their pedicure lifespan reduced to 2-3 weeks. Going into the process knowing that more upkeep will be required can set proper expectations.
Can’t Wear Closed-Toe Shoes
One significant drawback to getting acrylic nails on your toes is that you won’t be able to wear most closed-toe shoes comfortably. The long nails will constantly be hitting the shoe, making them very impractical for wearing sneakers, boots, flats, and other typical footwear choices.
You’ll be limited to open-toed shoes like flip-flops and sandals while you have the acrylics on.
This can present seasonal challenges in colder climates when warmer closed-toe shoes are a necessity. Trying to cram acrylic toenails into closed shoes will likely cause them to break or lift off prematurely.
If you live in a place with a true winter season, getting pedicure acrylics may realistically only be an option a few months out of the year.
Conclusion
While toes acrylics take some extra care and have some risks to consider, with proper application and maintenance you can successfully rock a glamorous set of long nails on your toes. If acrylics aren’t your thing, you can still decorate your toes with regular or gel polish, nail art, toe rings, anklets and more.
So go ahead and show off those feet – whether bare or embellished, toes have their own beauty worth flaunting!


