Can Isopropyl Alcohol Remove Acrylic Nails?
Acrylic nails have been a popular enhancement for natural nails for decades. They provide thickness, strength, and length that isn’t possible with natural nails alone. However, removing acrylic nails isn’t always easy or straightforward.
If you’re looking for a DIY acrylic nail removal method, you may be wondering: can isopropyl alcohol remove acrylic nails?
If you’re short on time, here’s a quick answer: soaking acrylic nails in pure isopropyl alcohol can help soften and break down the acrylic polymers. However, isopropyl alcohol alone often isn’t enough for full removal.
Combining it with other methods like filing is more effective for removing acrylics at home.
How Do Acrylic Nails Work?
Chemical Composition of Acrylic Powder and Liquid
Acrylic nails are created using a powder and liquid system that forms a plastic-like material when combined. The powder is made up of a polymer powder, most commonly polymethyl methacrylate (PMMA). PMMA is a lightweight and strong plastic material.
The liquid is an acrylic monomer, usually containing ethyl methacrylate. When the acrylic powder and liquid are mixed together, the acrylic monomer acts as a solvent that liquifies the PMMA particles. This causes a chemical reaction and the two ingredients combine to form the durable acrylic plastic material.
There are different chemical variations used to create acrylic powder. Manufacturers may tweak the chemical composition to produce powders with certain characteristics, like a clear or colored tint. But the basic components are generally PMMA polymer powder and an acrylic monomer liquid.
The chemical structure of acrylic makes it lightweight yet strong enough to build extensions of the natural nail.
Process for Applying and Curing Acrylic Nails
Getting a set of acrylics involves several steps and techniques. Here is an overview of the basic process:
- The natural nail is prepared by cleaning and lightly buffing the surface so the acrylic can adhere well.
- Tips or forms are applied to extend the free edge of the nail and create a foundation for building the acrylic.
- Acrylic powder is dippped into a dish of monomer liquid, forming a wet bead. This wet acrylic mixture is then applied to the nail and shaped into place.
- More acrylic is applied and shaped on the nail to build the desired extension length and structure.
- The acrylic is left to cure, usually under a UV or LED lamp. The curing process causes the monomer liquid to evaporate, leaving behind the hardened plastic acrylic.
- Once cured, the acrylic nails are refined by filing and buffing to smooth and shape the edge and surface.
This application process allows the liquid monomer and polymer powder to combine and cure into a durable acrylic plastic nail. The nail technician sculpts and builds the acrylic into the desired nail shape on the natural nail or nail tip.
Curing under the lamp triggers the chemical reaction that solidifies the acrylic material. Filing and shaping refines the final look of the acrylic nail extension.
Acrylic nails would not be possible without the chemical properties of the liquid and powder ingredients. When combined properly, they react to form the versatile acrylic plastic that is strong enough to shape into nail extensions.
The chemistry behind acrylic allows for sculpting, curing, and polishing durable synthetic nail enhancements.
Challenges of Removing Acrylic Nails
Acrylic Nails Are Durable by Design
Acrylic nails are designed to be quite durable and long-lasting. The acrylic material is hardened using a liquid monomer and polymer powder which chemically bond to the natural nail. This creates a plastic-like coating that is very difficult to remove compared to regular nail polish.
While the strength of acrylic nails is a plus for longevity, it poses some challenges when it’s time to take them off.
One of the biggest obstacles with removing acrylics is that the hardness of the material makes it extremely resistant to chipping or peeling. Attempting to simply peel off acrylics will not work and can cause damage as they are adhered very securely to the natural nail.
The material is intended to last 2-3 weeks between fills, so professionals use metal nail files and electric drills to gently thin out and shape the acrylic as it grows out.
For DIY removal, the key is to completely soak off and dissolve the acrylic coating instead of trying to rip it off. This requires acetone-based nail polish remover and patience. According to nail care experts, soaking nails in pure acetone for 15-30 minutes is ideal to slowly break down the acrylic polymers so they can be gently pushed off the natural nail.
Improper Removal Can Damage the Natural Nail
If acrylic nails are not removed properly, it can lead to damage of the natural nail underneath. This damage can include:
- Thinning and peeling of layers of the natural nail
- Splitting or cracking of the nail plate
- Lifting of the nail plate from the nail bed
These issues occur when the adhesion between the acrylic and natural nail is too strong. If the acrylic coating is forcibly ripped off, layers of the natural nail can get ripped off too. The nitrogen bonds that hold the nail cells together get disrupted.
Dermatologists warn that this kind of trauma can hamper nail growth and cause deformities. It may also be painful due to sensitive nerve endings being exposed when the nail plate is damaged. In worst cases, infections can occur if the nail bed is punctured and exposed to bacteria.
Using metal tools or abrasive buffers to scrape off acrylics can also lead to thinning and scratches on the natural nails. It is best to only use acetone and gentle, downward pressure with an orange wood stick to remove acrylics safely.
Doing it yourself requires diligence to prevent harming your nails.
Visiting a salon is highly recommended so professionals can properly remove acrylics using acetone soaks and electric drill bits. This avoids frustration and ensures the natural nails remain healthy and intact.
With careful removal, your nails can fully recover within a few weeks after removing acrylics.
Using Isopropyl Alcohol to Soften Acrylic
Isopropyl Alcohol Can Break Down Acrylic Polymers
Isopropyl alcohol (IPA) is an effective solvent for weakening the bonds in acrylic polymers. Acrylic nails are made from a liquid monomer and polymer powder which harden into a plastic-like material. The alcohol molecules can penetrate between the polymer chains and break the weak intermolecular forces holding them together.
This allows the rigid acrylic to become softened and easier to remove from natural nails.
Recommended Soaking Time and Concentration
To soak off acrylic nails, a 70% IPA solution is ideal. This allows for efficient polymer breakdown while minimizing drying out the natural nails. Soak each nail for 10-15 minutes to allow the IPA to penetrate fully. Longer soaking may damage the nail bed.
For better results, file and shape nails first before soaking to reduce thickness and exposure to IPA.
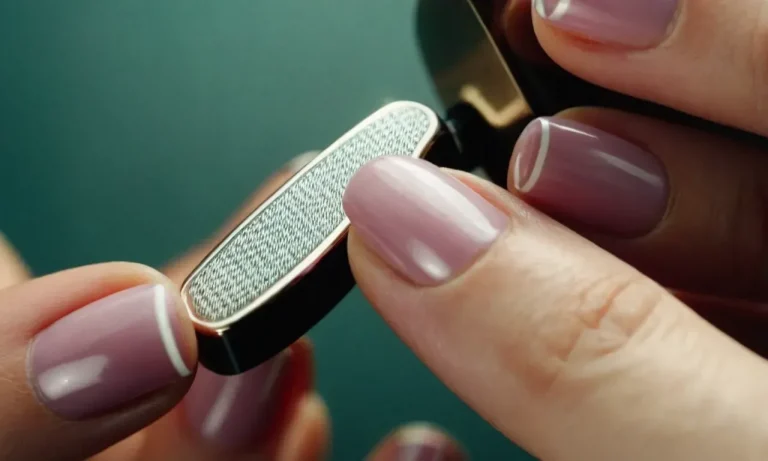
File and Shape Nails Before Soaking
Filing and shaping acrylic nails prior to soaking can significantly reduce removal time. Use a coarse nail file in a back and forth motion to thin down the acrylic. Pay close attention to the side walls and free edge of the enhancement. Avoid filing too aggressively near the cuticle area.
Nail clippers can also be used to shorten very long tips. The goal is to remove excess length and thickness before soaking so there is less acrylic for the alcohol to break down.
Some key points when using isopropyl alcohol to remove acrylic nails:
- 70% IPA concentration is optimal for polymer breakdown
- Soak each nail for 10-15 minutes maximum to avoid over-drying
- Shape and file nails first to reduce soak time
- Apply cuticle oil after to nourish nails
With proper technique, isopropyl alcohol can be an effective and affordable option for safely removing acrylic nails at home. Just be patient during the soaking process and take precautions to avoid over-exposure. Healthy and beautiful natural nails will soon be uncovered!
Let me know if you have any other questions😊
Combine With Other Removal Methods
File Nails After Soaking for Better Results
While soaking in isopropyl alcohol can help weaken the acrylic nail bonds, filing the nails after soaking can aid the removal process. Here are some filing tips:
- Use a coarse nail file or e-file to gently file off the top layer of acrylic from each nail. Don’t file too deeply to avoid damaging your natural nails.
- Focus on filing where the acrylic nail is attached at the cuticle area and free edge. This helps break the seal of the acrylic.
- Be patient and take your time filing. Rushing this step can cause you to file into your real nails.
- Only file in one direction to avoid weakening your natural nails. File from the outside of the nail towards the center.
Filing after soaking nails in isopropyl alcohol allows you to gently remove layers of the acrylic for an easier, damage-free removal. Just be cautious not to over-file your real nails underneath.
Use Acetone or Acrylic Nail Remover Afterward
While isopropyl alcohol alone may not completely remove acrylics for some, using acetone or acrylic nail remover after soaking can get the job done. Here’s how:
- After soaking nails in isopropyl alcohol, gently push back or file off any lifted acrylic.
- Apply 100% pure acetone or acrylic nail remover soaked into cotton balls onto each nail.
- Wrap each nail with foil to lock in the acetone and speed up the acrylic breaking down.
- Let the acetone sit for 10-15 minutes before removing the foil.
- Gently wipe away the softened acrylic remnants with an orangewood stick.
Using acetone or acrylic remover after an initial isopropyl alcohol soak helps dissolve any remaining acrylic stuck to the nails for easy removal. This combo allows for a quick and safe DIY acrylic removal.
See a Professional for Proper Removal
For those wanting the safest acrylic removal without risk of nail damage, seeing a professional manicurist is recommended. Here’s why:
- Professionals have specialized tools, like an electric nail file, to quickly and safely remove acrylics vs doing it manually at home.
- They can remove the acrylic fully from the nail plate without causing filing damage to your natural nails.
- Technicians can avoid overexposure to chemicals like acetone which can dry out your nail beds.
- Seeing a pro helps avoid picking off the acrylics yourself, which can rip off layers of your actual nail.
Salon professionals use products like acetone, cellulose wipes, nail clippers, cuticle pushers for a safe, effective removal. Getting acrylics removed properly by someone skilled in nail care helps avoid pain, damage and infection risk to the natural nails.
While DIY removal is possible, seeing a manicurist ensures proper, healthy nail bed prep for your next acrylic, gel or regular manicure.
Caring for Nails After Acrylic Removal
Moisturize and Nourish Nails and Cuticles
After removing acrylic nails, it’s crucial to moisturize and nourish your natural nails and cuticles. Acrylic removal can leave nails dry and brittle. Apply a nourishing nail oil like vitamin E or jojoba oil 1-2 times per day. Gently push back cuticles and apply a thick cuticle cream.
This helps rehydrate the nail bed and stimulates growth. A moisturizing hand cream applied throughout the day prevents dry, cracked skin around nails. Proper moisture prevents peeling and flaking as the nail plate grows out.
Avoid Using Damaging Chemicals Again Soon
It’s best to give nails a break after acrylic removal before getting them done again. Chemicals in acrylic monomer liquid can weaken natural nails over time. Let nails fully recover their moisture and strength before another acrylic or gel manicure application.
This may take a few weeks or longer depending on the condition of your nails. Avoid using acetone-based nail polish remover as it dehydrates nails. Stick to gentle, non-acetone polish removers. Also, limit use of detergents, bleach, and other household chemicals that can dry out nails.
Let Nails Recover Before Next Enhancement
Don’t rush back into enhancements too soon. Let nails fully regenerate to prevent damage. Here are some tips for letting nails recover:
- Wait at least 2 weeks before re-applying acrylics or gels
- Take a nail enhancement break for 1-2 months if nails are very damaged
- Avoid excessive filing and buffing of natural nails
- Use strengthening treatments like jojoba oil, vitamin E, and nail hardener
- Keep free edges short to prevent splits and breaks
- Eat a balanced diet and take supplements that support nail health
Letting nails rest between enhancements allows the nail plate to rebuild layers and restore strength. This prevents long-term damage from repeated chemical exposure. Be patient – healthy, strong nails are worth the wait!
Conclusion
While soaking in isopropyl alcohol can help break down acrylic nails, it’s most effective when combined with other DIY removal methods. Filing nails before and after softening them in alcohol allows more of the product to be removed.
Using acetone or professional acrylic remover after the isopropyl alcohol soak can take off any remaining enhancement.
Removing acrylics improperly at home can damage your natural nails. It’s always best to see a professional nail technician for safe, effective acrylic removal and avoid repeated exposure to damaging chemicals. Give your nails some time to recover before applying any new enhancements.