How To Achieve The Perfect Black To Clear Ombre Nails
Ombre nails are still going strong in nail art trends, allowing for an elegant fade between two colors. Black to clear ombre nails are especially striking, creating a faded gradient from dark to light.
If you want to try this trend at home, it is easy to achieve with the right techniques and products.
If you’re short on time, here’s a quick answer to your question: Start with a black base coat, then use makeup sponges to gradually dab on clear polish higher up on the nail for the fade effect. Thin clear coats and glossy top coat will perfect the ombre.
In this comprehensive guide, we will cover everything you need to know to get salon-worthy black to clear ombre nails.
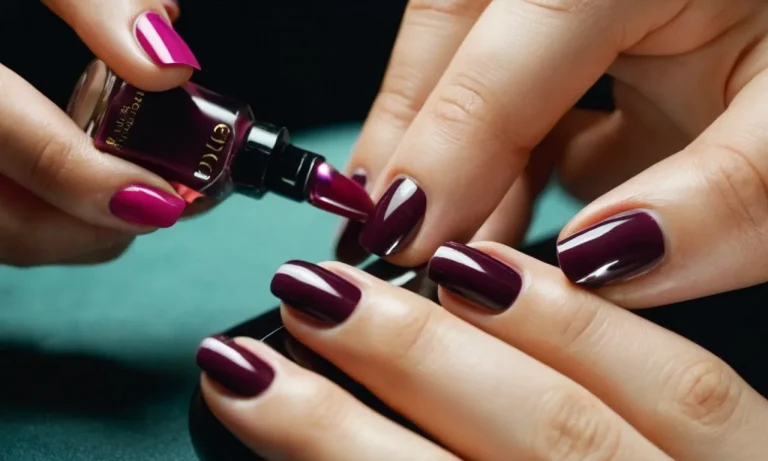
Choosing the Right Black and Clear Polishes
The black should be opaque and quick to dry
When choosing a black polish for an ombre manicure, it’s important to pick one that is opaque and dries quickly. An opaque black will provide full coverage in 1-2 coats, avoiding any streakiness that can ruin the gradient effect.
Quick-drying formulas are also key, as you don’t want to smudge the black as you apply the clear polish on top. Some great opaque, fast-drying black polishes to try are:
- OPI Black Onyx
- Essie Licorice
- Sally Hansen Xtreme Wear Black Out
Gel polishes are also a good option, as they dry quickly under an LED or UV lamp. Popular black gel polish choices include Gelish Black Onyx and Sensationail Gel Polish in Liquid Leather. The perfect ombre starts with the right black base!
Look for a glossy clear polish
Just as important as the black polish is choosing a clear polish that gives a bright, glossy finish. Matte and sheer clear polishes won’t showcase the ombre look properly. Aim for a clear polish that goes on smooth and dries to a shine. Here are some top-rated glossy top coats:
- Seche Vite Fast Dry Top Coat
- Essie Good To Go
- Sally Hansen Insta-Dri
These will help enhance the gradient effect from black to clear tips. For gel manicures, popular glossy top coats are Gelish Top It Off and CND Shellac Top Coat.
Consider gel polish for longer wear
While regular nail polish can work for an ombre manicure, gel polish is a great option if you want the look to last. With gel polish, the black and clear layers are “cured” under a UV or LED lamp, creating a hyper-glossy, chip-resistant finish that can last over 2 weeks with minimal touch-ups!
Some benefits of gel for ombre nails:
- Doesn’t chip or scratch easily
- Longer wear time
- Dries quickly under lamp
- Intense shine
If new to gel manicures, it’s best to have them done professionally in a salon the first few times. But with some practice, you can successfully achieve gel ombre nails at home too. Just be sure to prep nails properly and cure each layer fully.
Going gel will help you rock the black to clear ombre look for weeks on end!
Using Makeup Sponges for the Ombre
One of the best tools for creating a smooth, seamless ombre fade on nails is using wedge-shaped makeup sponges. Compared to brushes, sponges allow for more controlled blending and gradual buildup of the polish colors. Here’s how to use them for stunning black to clear ombre nails.
Cut Sponges into Small Wedges
Start with a new, clean makeup sponge. Using scissors, carefully cut the sponge into small wedge shapes about 1-2cm wide. The wedge shape is perfect for ombre nails because you can use the thin edge to apply polish just at the tips of nails, and the thicker end for the cuticle area.
Start with Black Polish at the Base
Paint 1-2 coats of black nail polish just on the bottom third of each nail, covering the cuticle area and avoiding the tips. Allow it to dry thoroughly before moving on. Black is a popular ombre starting color because it creates dramatic contrast against the clear tips.
Dab Clear Polish Higher Up Each Nail
Next, load a bit of clear, sheer polish onto the widest end of a makeup sponge wedge. Dab it onto the nail where you want the fade to start, just above the black polish. The clear polish should overlap the black slightly. The sponge applicator allows you to gradually build up the intensity of color.
Build Up Gradually for a Seamless Fade
Slowly move the sponge upwards, adding another dab of clear polish further up the nail and blending together the blacks and clears. The wedge shape helps create a super smooth fade. Continue working upwards until you reach the tips. Apply 1-2 quick topcoats to lock in the ombre design.
The makeup sponge technique helps you achieve salon-worthy ombre nails at home. It provides much more control compared to using brushes. You can create customize the fade exactly how you want, from subtle and soft, to high-contrast and dramatic.
It just takes some practice to perfect the seamless blend from dark to light.
For more ombre nail inspiration and tips, check out these amazing video tutorials and guides:
- Black to Clear Acrylic Nails Ombre
- Creative Color Fade Nail Art
- Complete Guide to DIY Ombre Manicure
Achieving an Ultra Glossy Finish
Apply Thin Coats of Clear Polish
Getting a super glossy finish for your ombre nails starts with applying thin, even coats of clear polish. Each layer should be smooth and not too thick. Going on too thick of a coat causes streaking and unevenness, taking away from that sought-after glassy look.
A good rule of thumb is to let each layer dry for 2-3 minutes before adding the next. This helps the polish self-level and creates a flawless foundation for maximum shine. Patience is key when building up thin coats of clear polish on ombre nails!
Finish With a Glossy Topcoat
The topcoat is the final step to amplify the gloss of your ombre nail design. Using a topcoat formulated specifically for shine and gloss is the best way to get that wet, luminous finish. Stay away from topcoats labeled “matte” or “satin”, as these will have the opposite effect.
When shopping for a great glossy topcoat, looks for ones that contain ingredients like silicone, acrylic polymers, and dimethicone to smooth and level the polish. Apply a thin layer as the last step and resist the urge to glob it on. You want an even coating for optimal shine.
Let it dry completely before touching anything!
Consider Using a Fast-Dry Top Coat
One way to cut down on drying time between layers is to use a fast-dry glossy top coat. Many brands now formulate quick-drying clear polishes and topcoats that provide the same stunning glossiness without the wait.
These are a lifesaver when you’re short on time but still determined to get glittering glass nails. Apply all the standard rules of thin, even coats with fast-dry products and you’ll have super shiny ombre nails in no time.
Just be aware that these types of polishes can be a bit thicker, so take extra care not to overload the brush.
Achieving show-stopping shine on your ombre nails is totally doable with a bit of patience and the right products. Thin, smooth layers are essential, along with choosing a topcoat formulated for maximum gloss. Consider a fast-dry option if you’re in a time crunch.
Following these tips will have your ombre nails looking slick and luminous in gorgeous glassy finish.
Caring for Your Black and Clear Nails
Avoid chipping with nail strengtheners
One of the biggest threats to a perfect black and clear ombre manicure is chipping and cracking. Using a nail strengthener or hardener can help protect your nails from damage.
Look for nail hardeners that contain ingredients like calcium, keratin, silk fibers, or horsetail extract. Apply a thin layer as the first step after your base coat and let it fully dry before painting on the black polish for your ombre tips.
Strengtheners help reinforce thin or brittle nails so they can better withstand daily wear without showing chips or cracks. This helps maintain that sharp line between the black tips and clear base of your ombre nails.
Use cuticle oil for hydration
Hydrated nails stay flexible and less prone to cracking or peeling. Massaging in cuticle oil around the base of your nails every day is key for nourishment.
Look for cuticle oils that contain moisturizing ingredients like vitamin E, aloe vera, jojoba oil or shea butter. Gently work the oil into your nail beds and cuticles, pushing back any overgrown bits for a neat look.
Daily cuticle oil application ensures your nails and surrounding skin stays supple. This prevents the lifted, snagged edges that can quickly ruin your perfect ombre tips.
Gently file away growth at base
As your natural nails grow out, you’ll start seeing a harsh line between the color and clear sections of your ombre manicure. Gently filing down the surface of the grown out part blends everything together.
Use a fine grit nail file and lightly smooth over the raised edge where your natural nails meet the colored tips. File just enough so the transition looks gradual, being careful not to scrape off your actual manicure.
Filling every few days ensures your regrowth stays blended with the black and clear ombre finish. It takes just a minute but makes a big difference in keeping that stylish gradient look perfect.
Troubleshooting Problems
Fixing uneven fades
Achieving the perfect ombre fade can be tricky, but don’t worry – any unevenness can be fixed! Here are some tips:
- Use a makeup sponge to softly blend the darker polish up into the lighter shades. This will help smooth out any harsh lines.
- Add another coat of the lighter polish over any spots that are still too dark. Let it dry completely before checking if the fade is smooth.
- Don’t be afraid to remove the polish and start over if needed. Use pure acetone to remove all residue before re-applying.
- Always apply polish in thin, even coats and allow proper drying time between layers. This prevents uneven build up.
Take your time perfecting the fade – it may require a few tries. But the results will be so worth it when you achieve that flawless ombre look! 😍
Dealing with bubbles in the polish
Bubbles in nail polish can really ruin that sleek ombre look. But no need to panic – here are some tips for preventing and fixing pesky bubbles:
- Make sure to wrap the tips of the nails with polish. Bubbles happen when polish pools at the cuticles instead of flowing down the nail.
- Apply thinner coats and allow more drying time between layers. Thick polish is more prone to bubbling.
- Store polish bottles upside down before using. This prevents air bubbles from developing inside.
- Run a toothpick gently over bubbles to pop them while polish is still wet, then smooth with a brush.
- Add a drop of nail polish thinner into the bottle and roll between palms to disperse trapped air.
Sometimes even with the best technique, bubbles still happen. Just stay calm and use these fixing tips for smooth, bubble-free ombre nails!
What to do if nails chip quickly
There’s nothing worse than spending time perfecting your ombre design only to have it chip after a day or two. But not to worry – here are some tips to help prevent chips and prolong your manicure:
- Always prep nails properly – cleanse, push back cuticles, buff for adhesion. Skipping this causes lifting and chips.
- Apply a base coat first to protect nails and help polish stick better.
- Ensure you seal the tips and edges to prevent chips from starting there.
- Don’t use your nails as tools! Opening soda cans, scraping things, etc causes breaks in the polish.
- Apply a good top coat like Seche Vite to seal and harden the manicure.
- Carry a mini nail file and polish for quick touch ups on any small chips.
Taking some extra time with the prep work and using a top coat is key for long lasting ombre nails! Then you can rock your design for 7-10 days chip free. 💅
Conclusion
With the right supplies and techniques, you can achieve stunning black to clear ombre nails at home. The gradient fade effect is simple to create with makeup sponges, and looks much more polished when finished with glossy topcoat.
Your ombre manicure will turn heads with its dramatic play of dark and light. Just take care to use quality polish and care for your nails properly so your black and clear nails last as long as possible.