Black Nails With Ring Finger Design: A Complete Guide
If you’re looking to spice up your manicure with a stylish black nail polish featuring a unique ring finger accent nail, you’ve come to the right place. This eye-catching look is perfect for making a bold fashion statement.
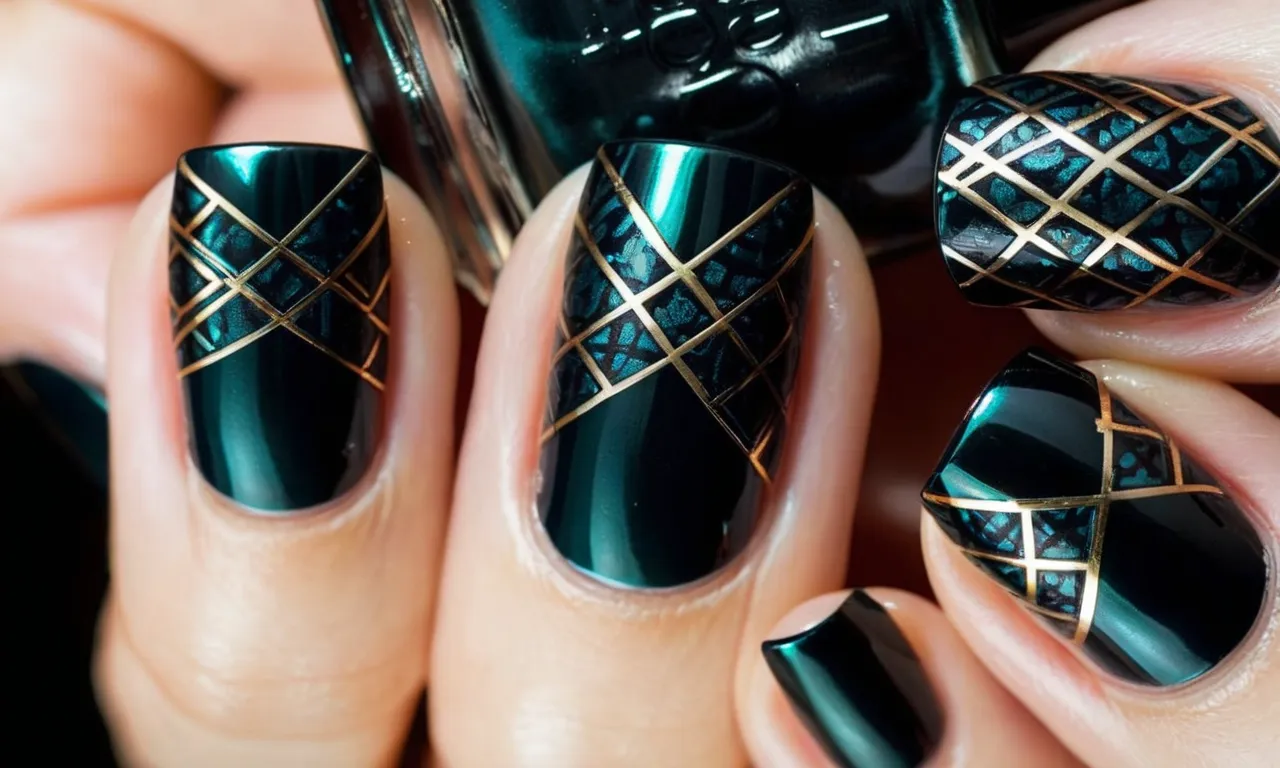
If you’re short on time, here’s a quick answer to your question: Painting your nails black with a decorative gold, silver, or jewel tone design on your ring finger nail is a fun way to glam up your manicure and show off your personal style.
In this comprehensive guide, we’ll cover everything you need to know about achieving the black nails with ring finger design look, from picking the right polish colors and nail art supplies to step-by-step application tips.
Read on for pro techniques that will have your nails looking fierce and fabulous in no time!
Choosing the Perfect Black Nail Polish
When considering black nail polish for an edgy yet chic manicure, the options extend far beyond basic black cremes. With creative textures and subtle sheens, today’s black nail lacquers make a bold and artistic statement. This guide explores popular categories to find your perfect black.
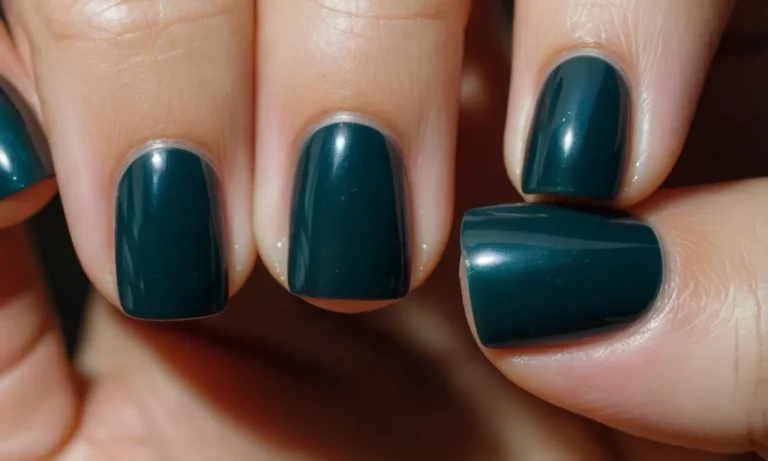
Deep, Jet Black Cremes
For a rich, classic look that flatters all skin tones, true black creme polishes can’t be beat. These deep, dense lacquers provide stunning opacity that makes nails appear longer and healthier. Leading brands like Orly and OPI offer beloved best-selling shades like Breathable Treatment + Color and Black Onyx.
While excellent coverage is key, quality black cremes also boast smooth and easy application. Essie’s top-rated Licorice, for example, glides onto nails flawlessly without streaking. For best results, use black cremes as a base color or striking French tip overlay.
Matte Black Finishes
For an ultra-modern, runway-inspired look, choose a matte black polish with a velvety finish. The muted effect spotlights nails’ natural shape and contours for an edgy yet minimalist style.
Sally Hansen leads the matte black market with popular Miracle Gel Top Coat, which transforms any shade into a modern matte. More brands now offer matte-specific black polishes, like LA Colors’ budget-friendly Matte Flat Finish beloved for its intense pigment.
Black Polishes with a Subtle Sheen
For evening glamour or added dimension, black nail lacquers with a subtle sheen range from cream to metallic. These shades make nails pop under light for a dramatic, camera-ready effect.
Deborah Lippman‘s Misty Morning offers a hint of shimmer, while KL Polish’s Susperia glitters with a purple shift. For show-stopping shine, China Glaze‘s Liquid Leather gleams like patent leather with flecks of silver.
To prevent sheening polishes from seeming overly flashy, layer with a demi-matte topcoat like Seche Vite‘s beloved Clear Demi-Matte Top Coat for balance.
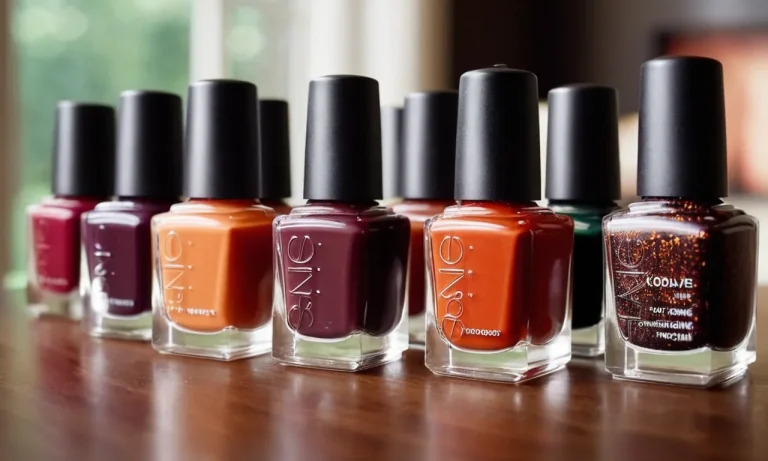
Selecting a Complementary Ring Finger Nail Polish
Metallic Golds and Silvers
When it comes to choosing a nail polish to complement your ring finger design, metallic golds and silvers are always a classic, elegant choice. Not only do these shimmery tones pair perfectly with jewelry, but they also give your manicure a luxurious, eye-catching pop.
Some great metallic options include:
- OPI’s Liquid Metals Collection in shades like “Worth a Pretty Penne” (rose gold) or “Push and Pur-pull” (cool silver)
- Essie’s “Good as Gold” or “Penny Talk” for a true golden metallic
- Sally Hansen Miracle Gel in “Rosey Outlook” or “Silver Sweep”
When applying your metallic polish, be sure to use a top coat to smooth out any brush strokes and really make that foil finish shine. Just one coat of a glittery gold or silver on your ring finger nail will complement any ring or jewelry while adding some glam to your mani!
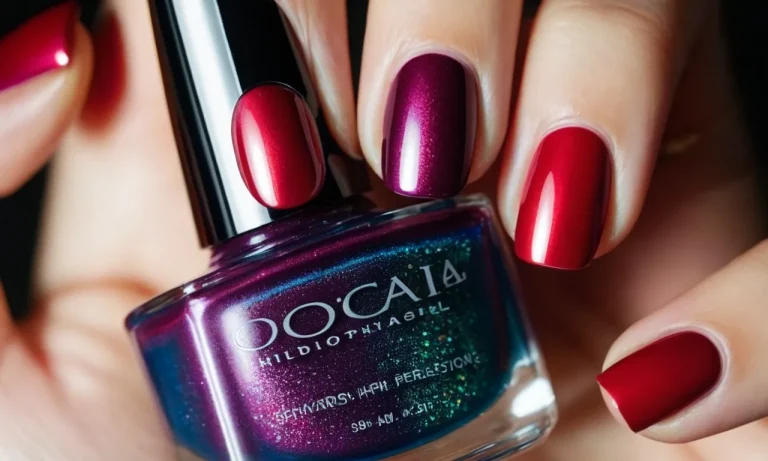
Jewel Tone Colors and Glitters
Another way to make your ring finger pop is by using a rich, jewel-toned nail polish or sparkly glitter. Deep gem tones like emerald, ruby red, sapphire blue, and amethyst purple pair gorgeously with rings and add a pop of color to your nail look. Some top picks include:
- Zoya Nail Polish in “Kimber” (sapphire blue) or “Layla” (emerald green)
- Essie Gel Setter in “Bachelorette Bash” (bright pink) or “Off Tropic” (vibrant coral)
- China Glaze in “Ruby Pumps” or “108 Degrees” (shimmery orange)
Not only do jewel tones complement gold, silver, and colored gem rings, but they also make your hand look instantly more elegant and sophisticated. For added bling, glitter polishes like OPI’s “Sparkle-is in the Air” add a festive, eye-catching touch.
Creative Accent Nail Art Designs
If you’re feeling creative, using unique nail art or designs on your ring finger nail is a fun way to make it stand out. There are endless possibilities when it comes to accent nail ideas! Some examples include:
- Metallic studs or rhinestones clustered around the base of your nail
- Geometric shapes like chevrons, lines, stripes, or dots in a contrasting polish color
- Flower or mandala designs using nail vinyls or tape
- Ombre fading from dark to light polish
- Marble or watercolor patterns
- Glitter tips or french manicure with a glitter band
The options are endless when you get creative with nail tapes, stamps, glitter, striping tools, and more. YouTube tutorials can give you plenty of ring finger nail art inspiration for your next manicure! Just be sure to use a top coat to seal in your design.
Gathering Your Nail Art Supplies
Base and Top Coats
Having a good base and top coat is crucial for any nail art design. The base coat helps the polish adhere to the nail and prevents staining. A top coat seals in the design and provides a smooth, glossy finish. Some great base and top coat options include:
- Essie Here to Stay Base Coat – Provides a ridge-filling base for even polish application.
- Seche Vite Dry Fast Top Coat – Dries polish super fast to prevent smudging.
- Sally Hansen Hard As Nails – Strengthens nails while providing protection.
- OPI Natural Nail Base Coat – Helps nourish and condition nails.
Dotting Tools
Dotting tools are essential for creating polka dots and other fine details. These tools have different sized metal or plastic heads for making perfect little circles. Get a dotting tool kit that has a range of tip sizes for different effects. Popular options include:
- Twinkled T Dotting Tools – Comes with 10 different double-ended dotters.
- Maniology Dotting Tools – Set includes 5 dotting heads plus handy case.
- Born Pretty Dotting Pens – An affordable option with multiple sizes.
Striping Brush
A striping brush has a very fine, pointed tip that allows you to create thin lines and details. This gives you great control when making intricate designs. Some top choices are:
- Twinkled T Striping Brush – Fine pointed brush for flawless lines.
- Maniology Striping Brush – Angled brush with durable synthetic bristles.
- Beauty Secrets Striping Brush – Budget-friendly option for precise lines.
Nail Decals and Rhinestones
Pre-made nail decals and rhinestones provide an easy way to accent your black and ring finger nail art. Decals come in various shapes and designs that you can quickly apply. Rhinestones add some sparkle and glam in an instant. Some popular picks include:
- Twinkled T Nail Decals – Large variety of chic decals and stickers.
- Born Pretty Rhinestones – Assorted crystal rhinestones in multiple sizes.
- Maniology M158 Clings – Trendy black and white decals to match the theme.
- Modelones Star Nail Decals – Cute star accents for accent nails.
With these essential nail art supplies on hand, you’ll be fully equipped to create trendy black nails with ring finger designs. Don’t forget extras like nail files, cuticle oil, nail glue, a cleanup brush and paper reinforcements too.
Now have fun mixing and matching products to put together beautiful nail looks!
Prepping Your Nails
Properly preparing your nails is a crucial first step before applying any nail polish, especially darker shades like black. Taking the time to correctly prep your nails helps the polish stick better, lasts longer, and gives you a smooth canvas to work with.
Cleaning Your Nails
Start by thoroughly cleaning underneath and on top of each nail using a soft brush and nail polish remover to get rid of any oil, dirt, or old polish residue. Make sure not to roughly scrub the nail surface to avoid weakening your nails.
After cleaning, rinse your nails with water and gently pat dry with a paper towel.
Cutting and Shaping Your Nails
Use a sharp nail clipper to trim each nail into the desired length and shape. Always cut or file your nails straight across to avoid cracks or splits. For the stylish black nail ring finger accent design, keep your ring fingernails slightly longer than the rest for maximum impact.
Next, use a fine-grit nail file to gently smooth out any rough edges on each nail. File in one direction starting from the outside corner down towards the center of the nail tip. Filing back and forth can weaken nails over time. Finish by gently buffing the surface of each nail to create a shine.
Applying a Base Coat
Before painting on any dark polish, it’s vital to use a nail hardener base coat underneath first. The base protects nails from becoming stained and helps polish better grip onto the nail.
Apply a thin, even layer of base coat onto each nail from cuticle to tip and let dry completely. This usually takes about 2 minutes. Going over each nail with a second layer of base coat helps safeguard against discoloration even further when using inky shades.
| Base Coat Benefits | Without Base Coat Risks |
|---|---|
|
|
Choosing a nourishing base coat infused with vitamins can also help condition bare nails in between polish applications. Most professional manicurists recommend applying Sally Hansen Hard As Nails as an affordable and trusted base coat brand.
Letting Each Layer Dry
It’s essential to give every layer of product enough drying time before adding another coat. Rushing through and layering polish before previous applications fully cure can cause bubbling, cracking, shrinking, or peeling.
If you don’t have patience, try using a nail dryer spray to speed up the process.
By thoroughly prepping your nails first, you’ll help create the perfect smooth canvas to show off your stylish black nail ring finger design beautifully!
Applying the Black Base Color
Applying a solid black base coat is the foundation for creating stunning black nails with ring finger designs. Here are some tips for getting that perfect, opaque black base:
1. Start with Clean Nails
Remove any old nail polish and use a nail dehydrator to get rid of oils on the nail plate. This helps the black polish adhere better and last longer without chipping.
2. Use a Base Coat
Apply a layer of base coat before painting on the black color. Base coats help prevent staining of the nails, enhance polish application, and make removal easier later on.
3. Apply Thin Layers
When working with a deep shade like black, it’s best to apply multiple thin layers rather than one thick coat. This prevents streaking and helps the polish dry thoroughly between layers. Build up to an opaque finish.
4. Let Polish Dry Fully
Make sure to let each layer of black nail polish dry completely before adding another coat. Rushing this step can cause bubbling and smudging.
5. Finish with a Top Coat
Once you’ve achieved that perfect black base, finish it off with a glossy top coat. This helps smooth out any ridges and protects the manicure underneath.
Following these simple techniques will give you a salon-quality black base that’s ready for creative ring finger nail art!
Painting Your Accent Ring Finger Nail
Painting a stylish accent nail on your ring finger can be a fun way to add some flair to your manicure. With the right prep and products, you can easily achieve a beautiful, eye-catching accent nail that complements the rest of your manicure.
Choose Your Ring Finger Nail Design
When painting an accent nail on your ring finger, you have lots of options for the design. Some popular choices include:
- A different color than the rest of the nails – This simple approach makes the ring finger pop. Opt for a complementing or contrasting shade.
- An ombré fade – Transition smoothly from one color to the next just on the ring fingernail.
- A pattern or graphic – Dots, stripes, florals and more make for an artistic accent nail. Use nail vinyls for perfect application.
- A glitter or shimmer – A sparkly accent nail catches the light beautifully. Try a glitter polish or shimmery topcoat just on your ring fingernail.
- French tip – A modern take on the French manicure with just the ring fingernail tipped.
- Jewels or rhinestones – For added bling, apply flat back gems or crystals just to the ring fingernail.
The design options are endless! Choose something that matches your personal style.
Prep Your Nails
Proper nail prep is key to achieving a long-lasting, flawless accent nail. Follow these tips:
- Trim and shape all your nails evenly. File the edges smooth.
- Use cuticle remover to clean up the nail bed. Gently push back cuticles, then trim any excess.
- Buff the surface of each nail lightly to remove shine and prepare for polish application.
- Wash hands thoroughly with soap and water. Rinse and dry completely.
- Apply a dehydrator prep product or wipe nails with rubbing alcohol to remove oils.
- Apply a pH-balanced nail primer or base coat to help polish adhere. Let dry.
Your nails are now prepped and ready for polish!
Paint the Accent Ring Nail
Now it’s time to paint your ring fingernail accent. Follow these tips for perfect application:
- Apply a base coat to the accent nail first. Let it dry completely.
- Paint the ring fingernail with your accent polish. Apply two to three thin, even coats for full coverage and intensity of color. Let dry between coats.
- Once the accent nail polish is fully dry, you can complete the manicure on the remaining nails.
- Finish by applying a fast-drying top coat to the accent nail and remaining nails. This helps seal in color and add shine.
- Let the top coat dry fully before using your hands to avoid smudging.
Your beautiful ring finger accent nail is complete! An accent nail is a great way to add a little extra style and personality to your manicure. With the right products, preparation, and polish techniques, you can easily nail this trend.
Sealing the Look with a Protective Top Coat
Applying a protective top coat is the final crucial step when doing black nails with ring finger designs. This seals the design and prevents chipping, smudging, and fading. Here’s a complete guide to picking and using a top coat for your stylish black nail art:
Choosing the Right Top Coat
There are a few factors to consider when selecting a top coat for black nail designs:
- Finish – A glossy top coat will make designs pop while a matte finish creates a more muted effect.
- Quick-drying – Look for quick-drying top coats that seal the design in 60 seconds or less.
- Long-lasting – An effective top coat should extend the life of your manicure by up to 10-14 days.
- Non-yellowing – Pick a top coat that won’t yellow over time and distort the design.
Some of the best top coat options for black nail art include: Sally Hansen Insta-Dri, Essie Gel Couture, and Seche Vite Dry Fast Top Coat.
Applying the Top Coat
Follow these tips for flawlessly applying top coat over your black and ring finger nail design:
- Work quickly and apply 1-2 thin layers of top coat over each nail before the polish dries.
- Use smooth, even strokes from the cuticle to the tip of the nail.
- Seal the free edges to prevent chipping and peeling.
- Avoid flooding the cuticles as this can cause the polish to peel.
- Apply top coat over nail art last to avoid smudging the design.
- Allow each layer to dry completely before adding another.
Properly curing UV or LED gel top coats is also crucial. Follow your lamp’s recommendations, curing each layer for 30-60 seconds. Using the top coat as intended will maximize shine and longevity.
Caring for Top Coated Nails
Once top coated, care for your black and accent nail design by:
- Avoiding chemical exposure from cleaning products.
- Using gloves for wet work to prevent water damage.
- Applying cuticle oil daily to hydrate nails.
- Filing away chips as soon as they appear.
- Reapplying top coat every 2-3 days.
With the right top coat and proper care, you can extend the life of your stylish black and ring finger nail design for up to 2 weeks of flawless wear.
Caring for Your Black Nails
Taking care of your black nails requires some special attention to keep them looking their best. Here are some tips for maintaining beautiful black nails:
Use a Base Coat
Applying a base coat before your black polish is crucial to prevent staining of the nail bed. Base coats create a protective barrier between your nail and the dark lacquer. This keeps the pigments from seeping into your nails and causing discoloration.
Apply Thin Layers
When painting your nails black, use thin, even layers of polish. Thick coats are more likely to get bumpy or develop bubbles as they dry. Multiple thin layers will help the polish go on smoothly and evenly.
Use a Quick-Dry Top Coat
A fast-drying top coat is essential for preventing smudges and chips. Apply it generously over your black polish after the last layer has dried. The top coat helps seal in the color and creates a protective shield over the manicure.
Reapply Top Coat Every Other Day
To keep the glossy finish of your black nails, reapply top coat every other day. This helps smooth out any small scratches or nicks. Regular top coats also help prevent chips and make the manicure last longer.
Moisturize Your Cuticles
Using cuticle oil daily is important when wearing dark polishes. The pigments can dry out the skin around your nails. Massaging in cuticle oil keeps this area hydrated and healthy.
Use a Nail Polish Thinner
If your black polish starts getting thick and gloopy, bring it back to life with a nail polish thinner. Add a few drops to restore it to the right consistency for flawless application.
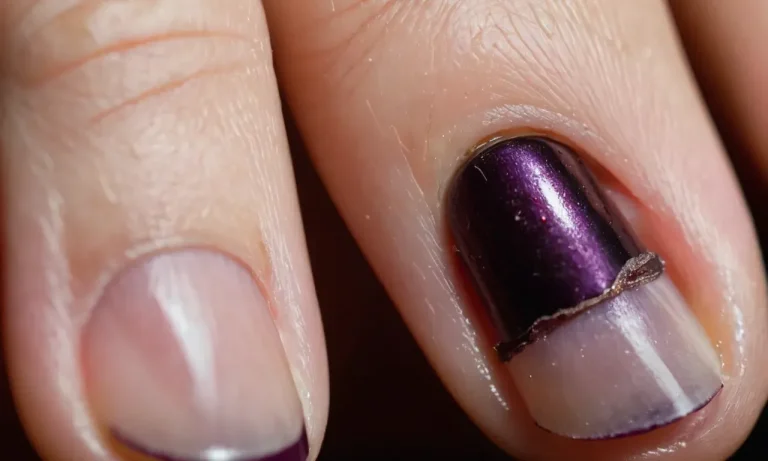
Remove Properly to Avoid Stains
Take your time when removing black nail polish. Soak cotton balls in pure acetone and hold them against your nails for 30-60 seconds before scrubbing. This prevents the dark pigment from staining your nails.
Exfoliate Your Nails
Use a nail buffer to gently exfoliate your bare nails once a week. This removes any product buildup and keeps nails smooth for the next manicure. Avoid over-buffing, which can cause damage.
Give Your Nails a Break
When you remove your black polish, give your nails a few days’ break before reapplying. This allows them time to recover and absorb nutrients properly. An occasional nail detox maintains healthy, strong nails.
With the right care techniques, you can keep your black polished nails looking fabulous. Consistent maintenance preserves the color and protects your nails from damage. Enjoy your dramatic manicure with these helpful tips!
Conclusion
With the right polish colors and a few simple techniques, you can easily achieve salon-worthy black nails with a fashionable ring finger accent. This eye-catching nail art design makes a vibrant style statement and shows off your creativity.
So grab your favorite dark lacquer and decoratively painted gold, silver or jewel tone ring nail and get ready to take your manicure to bold new heights!