Everything You Need To Know About Black And White Gel Nails
Black and white gel nails are a gorgeous and striking nail art look that you’ve likely seen pop up on Instagram and Pinterest lately. The high contrast color combo makes for an eye-catching manicure that’s equal parts edgy and chic.
If you’re short on time, here’s a quick answer to your nail art question: Black and white gel nails involve applying black gel polish to some nails and white gel polish to others for a graphic, monochromatic look. They’re achieved by using gel nail polish and curing under a gel lamp.
In this comprehensive guide, we’ll cover everything you need to know about achieving the black and white gel nail look, from the supplies you’ll need, the application process, design ideas, upkeep and removal.
Supplies Needed for Black and White Gel Nails
Gel nail polish in black and white colors
When creating a black and white gel manicure, you’ll need gel polishes in classic black and clean white shades. Most nail polish brands like OPI, Essie, and China Glaze make great black and white gel polish options.
Make sure to choose polishes labeled as “gel formula” that require curing under a gel lamp. Gel polishes create a super glossy, long-lasting manicure that can last over 2 weeks without chipping!
Gel nail lamp
No gel manicure is complete without a LED or UV nail lamp for curing the polish. These lamps vary in wattage, size, and features, but generally a 36 watt or higher LED lamp works great. Most lamps cost $30-60 on Amazon or at beauty supply stores.
The lamp should cure polish in 30 seconds to 2 minutes to get that hard, durable gel finish.
Nail prep supplies like dehydrator and primer
Properly prepping the nails is crucial for gel polish to adhere properly and avoid lifting or peeling. Start by gently buffing the nails to remove shine and oils. Then wipe nails clean with nail dehydrator/cleanser to remove residue and prep for polish.
Finish with a layer of gel primer or bond so polish sticks like glue! Supplies like Young Nails Protein Bond work wonderfully.
Top and base gel coat
No gel manicure is complete without a gel base and top coat to sandwich around the color polish. The gel base coat creates a smooth foundation for polish to adhere to. Then a glossy no-wipe gel top coat seals everything in place and creates a glassy finish.
Brands like Gelish and CND Shellac make excellent gel base and top coats.
Nail forms or tips if using extensions
For creating a fresh black and white manicure directly on your natural nails, no forms or tips are needed! But if you want lengthy nails or extensions for the mani design, have nail forms or prepasted tips on hand.
Clear polygel extensions also work great for extending your nail bed length before polishing.
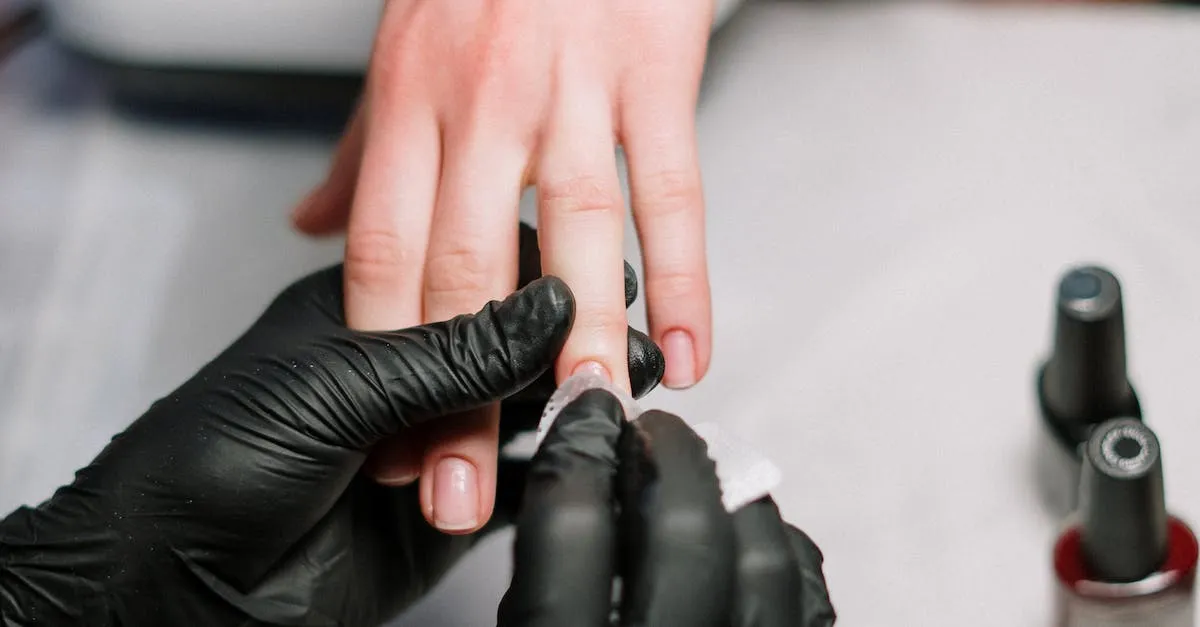
How to Apply Black and White Gel Nails
Achieving a stylish black and white gel manicure is easier than you think! With some basic supplies and step-by-step techniques, you can get salon-quality results right at home. Here’s everything you need to know about applying this chic nail design.
Prep Nails – Push Back Cuticles, File into Desired Shape
Start by grooming your natural nails – this lays the foundation for your gel manicure. Gently push back and trim any overgrown cuticles with a cuticle pusher and nipper. Then use a nail file to shape your nails into the length and shape you want – square, round, squoval or another style.
File in one direction starting from the outside edges to the center to prevent weakening your nails. Finish with a buffing block to smooth everything out.
Apply Nail Dehydrator and Primer
After filing, use a nail dehydrator or alcohol wipe to remove any oil and prep your nails. Let your nails dry completely, then brush on a thin layer of gel primer. This helps the gel polish adhere properly. Let the primer dry for 30-60 seconds before moving onto the next step.
Apply Base Gel Coat and Cure
Paint a layer of gel base coat onto each nail and use the edge of the brush to tidy up the tips. Make sure you don’t get any on your skin. Cure the base coat under an LED or UV nail lamp for 30-60 seconds, depending on your lamp’s instructions, to set it. This gives your design something to bond to.
Paint on Black and White Gel Polish in Desired Pattern
Now comes the fun part – use black and white gel polish to create your chic design! Work on one nail at a time. For example, paint on a black base then use a striping brush dipped in white to create a french tip or straight lines. Or paint on white then use black to make polka dots.
Get creative with chevrons, checkerboards or abstract art. The possibilities are endless.
Cure Each Layer Under Gel Lamp for 30-60 Seconds
After painting on each layer of color, cure the gel polish under the lamp. This sets and hardens the gel. Follow the lamp manufacturer’s recommended curing times, usually 30-60 seconds. Repeat this process until your nail design is complete.
Don’t forget to cap the free edge of the nail tip with each layer.
Apply Top Gel Coat over Design and Cure Again
Finish your manicure by applying a glossy top coat gel over the entire nail, sealing in your design. Cure one last time. This gives your nails a uniform smooth finish and long-lasting shine.
Clean up Around Cuticles with a Brush Dipped in Nail Polish Remover
Once cured, if there is any excess gel or polish on your skin, gently clean it up with an angled brush dipped in nail polish remover. Be careful not to disturb the polish on your nails. Finish with nail oil to hydrate your nails and cuticles.
With this technique, your trendy black and white gel mani can last 2-3 weeks with minimal chipping or wear. Be sure to prep your nails properly and follow all cure times. Have fun rocking this stylish nail art! Let your creativity run wild with dazzling designs.
Black and White Gel Nail Design Ideas
Black and white checkerboard or gingham print
Nothing says classic like a black and white checkerboard or gingham print. This timeless nail art design is easy to achieve with gel polish. Simply paint alternating nails black and white. For a checkerboard pattern, paint little squares of black and white gel polish on each nail.
Use striping tape to get clean lines if desired. This retro mani is versatile and pairs well with any outfit.
Color block – different nails painted black vs white
Another super simple but chic black and white look is to color block your nails. Paint half your nails with black gel polish and the other half with white. This high contrast manicure makes a bold fashion statement. It’s perfect for the artistic minimalist who wants an edgy look without too much fuss.
French manicure tip – black and white
For a modern twist on the classic French manicure, try using black gel polish on the tips instead of white. The stark contrast of the black tips against the bare natural nail bed looks incredibly clean and elegant. You can also do a reverse French with white tips on black gel polish.
Finish it off with a glossy topcoat for that salon perfect mani.
Geometric shapes like stripes, zigzags or chevron
If you want something more graphic, play around with geometric shapes using black and white gel polish. Paint alternating nails black and white, then use striping tape to create stripes, zigzags, or chevron patterns on each nail.
The combo of geometric shapes and high contrast color blocking is bold, edgy and straight off the runway.
Ombre fade from black to white
An ombre fade from black to white gel polish looks mesmerizing on the nails. There are a few easy techniques to achieve this blended gradient effect. You can paint the entire nail black, then use a makeup sponge to dab white polish at the tip and blend it upwards.
Or paint the tip white and use a brush to stroke black downwards blending into the white. This black and white ombre mani is subtler than stark color blocking but still very stylish.
Marble or shattered glass effect
For nail art that resembles marble or shattered glass, start with a base of black gel polish. Use a detail brush to flick white polish onto the nails in thin, irregular shapes. Drag a toothpick through the wet polish to stretch and swirl it, mimicking veins in marble.
Or leave the shapes angular like cracked glass. Top with a glossy top coat and you have an edgy black and white design that looks like a work of art.
Polka dots
A black and white polka dot manicure is a fresh and fun look. Paint your nails white first as the base color. Then use a dotting tool dipped in black gel polish to paint on different sized dots in a random pattern. You can also reverse it with black base and white dots.
This playful nail idea pairs perfectly with casual everyday outfits.
Animal print
Channel your inner wild side with black and white animal prints like zebra, leopard or tiger stripes. Paint alternating nails black and white. Then use striping tape or nail vinyls to create bold or delicate stripes on each nail.
An easy cheat is to paint on leopard spots or tiger stripes with a detail brush instead of using nail art tools. Finish with a top coat for a fierce and sassy manicure.
Caring for Black and White Gel Nails
Use cuticle oil daily to hydrate skin and nails
Applying cuticle oil daily is crucial for maintaining the health and moisture of your nail beds and cuticles when wearing black and white gel nails. The gel polish creates a hard, protective layer that can lead to dryness without proper hydration.
Massage a few drops of oil gently into the skin around each nail twice a day. Jojoba, vitamin E, and coconut oils work well. This simple routine keeps your cuticles looking healthy and avoids issues like peeling, cracking, or hangnails.
Avoid excessive water exposure
While gel manicures are generally more water-resistant than regular polish, it’s still best to avoid too much exposure to water when sporting black and white gel nails. The constant soaking from activities like swimming, washing dishes, or long showers can cause the gel polish to lift around the edges or bubble.
Wear rubber gloves when necessary and try to keep manicured hands away from direct water contact as much as possible to extend the life of your mani.
Wear gloves for cleaning and gardening
Household chores and gardening often expose hands to chemicals, dirt and moisture that can be rough on your black and white gel manicure. Protect those nails by slipping on rubber gloves before tackling any messy or abrasive tasks around the home.
Your gel polish will resist chipping and popping off longer if shielded from harsh cleaning solutions, garden soil, scrapes and daily wear and tear during chores.
File gently to reshape when needed
Filing and shaping gel nail extensions requires a light touch. Since the gel polish is bonded directly to your natural nails, overzealous buffing or filing can weaken the nail plate and damage your manicure.
When filing is needed to reshape or smooth rough edges, use a grit no coarser than 180 and limit short brisk strokes to avoid excessive stress on the nail plate. Don’t file off all the overlay gel or you’ll expose the natural nail underneath.
Get fills every 2-3 weeks to prevent lifting or cracks
To keep your black and white gel manicure looking freshly-done, get consistent nail fills every 2-3 weeks. This provides a “refresh” by removing any grown out gel and replacing it with a new coat of color. Getting timely touch-ups prevents the polish from growing out and lifting at the nail bed.
It also avoids cracks in the gel that allow moisture underneath. Frequent nail fills are the best way to maximize the longevity and flawless appearance of any gel mani.
How to Remove Black and White Gel Nails
Do not pick or peel off the gel polish
Though it may be tempting to try and pick or peel off your black and white gel polish, this can actually damage your natural nails. Picking at the gel can remove layers of your nail plate, leading to peeling, chipping, and breakage. It’s best to avoid this DIY removal method at all costs.
Use 100% acetone nail polish remover and cotton balls
To safely remove black and white gel nails, you’ll need a bottle of 100% pure acetone nail polish remover, which can be found at most drugstores or beauty supply retailers. It’s crucial to use acetone-based remover, as it’s the only solution that can break down the polymers in UV or LED gel polishes.
You’ll also need a bag of cotton balls to soak the gel off with.
Soak cotton in remover and place on each nail for 10-15 minutes
Start the removal process by saturating a cotton ball with acetone. Place it directly on top of your nail and hold it there for 10-15 minutes. The acetone will begin to break down the layers of gel polish. Perform this soaking method on each nail before attempting to scrape off the color.
Gently push back cuticles and scrape off gel with a wooden stick
After soaking, lightly push back your cuticles with a cuticle pusher tool. Then, take a wooden cuticle stick and gently scrape off the gel polish from the nail. Avoid using metal tools, as these can damage the nail bed. The gel should slide off after being sufficiently soaked in acetone.
Repeat the scrape-off process until all traces of color are gone.
File off remaining color and apply cuticle oil
If any gel residue remains, use a nail file to gently buff off the excess color. Don’t file too aggressively, as over-filing can thin your nails. Finish by massaging cuticle oil into the nails and skin. This hydrates the nail beds and cuticles after the drying effects of acetone.
Your nails will look refreshed and ready for a new black and white gel mani!
Conclusion
With the right supplies and technique, you can easily achieve the trendy black and white gel nail look at home. Just take your time painting on the graphic color block pattern and be diligent with aftercare to get it to last.
When done correctly, these bold high-contrast nails will earn you tons of compliments!
While regular polish chips after just a few days, gel polish can last up to three weeks with no chips or smudges. So you can enjoy stunning black and white nails for as long as you’d like when you DIY this manicure. If you have any other gel nail questions, don’t hesitate to ask!