Stunning Black And Orange Nail Designs For Bold Style
Nail art is an exciting way to express your personal style. If you love bold color combinations that make a statement, black and orange nails are a trendy choice. The striking contrast between these dark and bright shades creates an edgy look that’s perfect for pumpkin season or anytime you want to turn heads.
If you’re wondering how to do black and orange nails, this in-depth guide will provide tons of trendy design ideas, pro tips, and step-by-step instructions to recreate these hauntingly beautiful manicures at home.
In this article, we’ll cover:
Why Black and Orange Nails are So Popular
The Meaning Behind the Colors
Black nail polish has long been a staple in nail art for its striking look and ability to match any outfit. Black is associated with mystery, power, and elegance. Orange nail polish has surged in popularity more recently.
Known for being energetic and fun, the color orange symbolizes enthusiasm, creativity, and joy.
Together, these two vivid shades make a bold fashion statement. Black and orange have vastly different personalities that play off each other beautifully. This high-contrast complementary scheme is eye-catching and lively.
Complementary Color Scheme
Black and orange are direct complementary colors on the color wheel, meaning they are opposite each other. This creates a dynamic tension that is visually appealing. In color theory, complements balance each other out to create a harmonious combination.
When placed side-by-side, black and orange make each other stand out more. The warmth of orange enlivens the depth of black, while black enhances the vibrancy of orange. Using different proportions of each shade adds extra diversity and interest.
Works for Any Season
One reason why black and orange designs suit any time of year is their associations with perennial holidays like Halloween and Día de Muertos. These nail looks easily transition from autumn through winter.
During warmer months, sunshine-y orange pops against neutral black. For nighttime summer fun, black adds sophistication to bright citrus orange. This versatility makes black and orange an ideal nail choice 365 days a year.
As Helena Steele, nail artist behind Miss Betroot Salon, says: “You can never go wrong with black and orange nails. This color scheme has year-round appeal and works beautifully for all events, from casual Fridays to glam parties.”
Black and Orange Nail Design Ideas
Graphic Prints
Graphic prints like polka dots, stripes, and chevron patterns make a bold statement on black and orange nails. Go for big, bold polka dots in orange on a black base for a retro mod look. Or try chevron tips in orange on black nails – so chic! Thin orange pinstripes on a black mani are edgy and punky.
Graphic prints are a super fashionable choice.
Geometric Shapes
Geometric shapes like triangles, squares, rectangles, and diamonds look amazing in black and orange. An orange triangle accent nail balanced against a black background is such a strong graphic look. Or go for an intricate angular mosaic of black and orange shapes – so artistic!
Geometric shapes are a huge nail trend that pairs perfectly with black and orange.
Animal Prints
Unleash your inner wild side with animal prints in black and orange! A black leopard or zebra print mani with fierce orange claws is a sassy choice. Go for a modern abstract take on animal prints, with blurred orange and black spots or stripes.
Jaguar and tiger prints also look grrrreat in these bold shades. Express your unique personality with fierce black and orange animal prints.
Marbled Effects
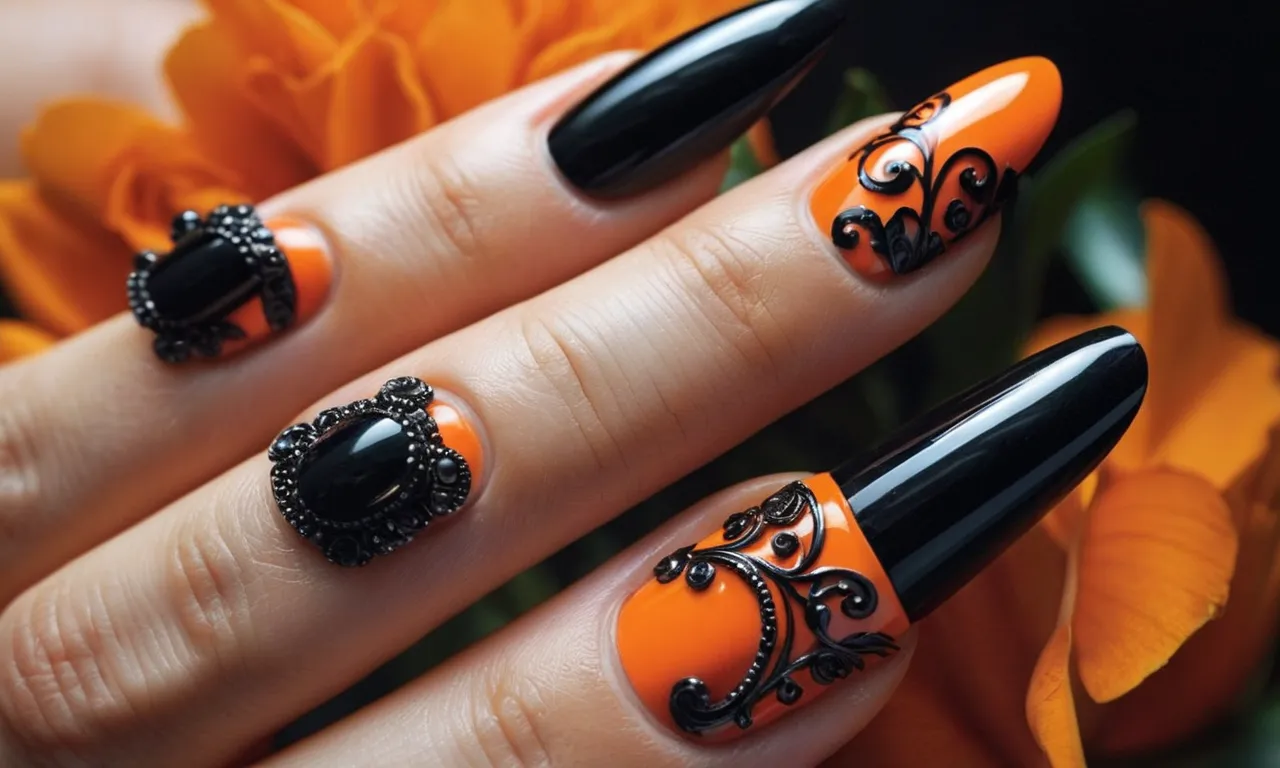
Marbled nails are so on trend, and the blend of black and orange creates a Halloween vibe. Swirl together black and orange polish for a mesmerizing, optical effect. Or go for a glossy black base with metallic orange marble swirls on top.
Add water droplets or black studs on top of marbled orange and black nails for extra embellishment. Marbled manis in these shades are hauntingly cool for the fall season.
Ombre
Ombre is a gorgeous look for black and orange nails. Go from black to orange in a striking color gradient. Or do black tips that ombre into orange bases for a bold contrast. Switch it up with matte black cuticle to tips that ombre into glossy orange.
Fade black nail art like stripes or chevrons into bright orange backgrounds. Ombre really makes the black and orange shades pop!
French Tip
A French manicure gets a Halloween makeover with black and orange nail tips! Black tips on orange bases make your nails pop. Or go for orange tips with black bases for an edgy take. Leave a gap between the tip and base colors for a modern look.
Glossy black French tips with matte orange bases are very on-trend. French manis are a classic design that’s so striking in black and orange.
Halloween Themes
Of course, black and orange are instantly associated with Halloween! Get your nails in the spirit with jack-o-lanterns, ghosts, bats, or spooky lettering against a black background. Go for a fun pumpkin orange base with silhouettes of black cats and witches.
Spiders, webs, and candies like chocolate bars and lollipops also look cute. It’s easy to get your nail game on theme for Halloween with these two colors!
How to Do Black and Orange Nails
Prepping Your Nails
Before painting your nails, start by trimming and filing them into your desired shape. Use a nail file to smooth the edges and get rid of any rough areas or hangnails. Push back your cuticles gently with an orange stick. Then, wash your hands with soap and water and dry them thoroughly.
Apply a small amount of cuticle oil around each nail to condition the skin and nails. Now they are prepped and ready for polish!
Choosing Your Colors
When pairing black and orange nail polish, go for an edgy and bold contrast. Traditionally, black symbolizes darkness while orange represents warmth, making these complementary shades visually striking. For Halloween vibes, opt for a rich black and vibrant orange red.
Or try a deep black and burnt orange for an elegant, fall-inspired look. Get creative with different orange hues like peach, coral, pumpkin, or copper.
Brushing on Base Coats
No manicure is complete without a base! After choosing your polish colors, apply a layer of clear base coat to all nails first. This “primes” the nails by allowing polish to glide on smoothly. It also prevents staining of the nails. Let the base coat dry for 2 minutes before moving on.
If you have extra dry or brittle nails, use a hydrating base containing jojoba oil or vitamin E.
Painting Tips for Clean Lines
A steady hand is key for painting neat, straight lines along the edges of your nails. If you’re a nail art novice, use a product like the Maniology Straight Up Brush to guide you. This thin masking tool lets you paint against it for perfect lines.
You can also use a toothpick to tidy the edges after polish is applied. When doing alternating colors on different nails, work in small sections to avoid smudging. Don’t forget those finishing details – paint diagonal lines at the tips for a trendy accent.
Top Coat for Shine and Protection
High-shine top coats amplify and seal in your black and orange design. Apply over fully dried polish, using long, even strokes. Allow to dry for 5 minutes. Top coats contain acrylic polymers that smooth and harden the manicure underneath.
This prevents chips and wears for extra longevity of your artsy look. For best results, reapply a fresh top coat every 2-3 days.
Drying Between Coats
To avoid bubbling or smudging nail polish layers, be patient and take breaks in between coats. Make sure each layer dries completely before adding another. Follow the drying times listed on your polish bottles, usually 1-2 minutes between thin coats. Wave your hands to speed up drying time.
You can gently blow on nails as well. If possible, take 5-10 to let them fully cure before resuming activity.
Using Nail Decals and Embellishments
Add personality with pre-designed nail decals featuring Halloween motifs like spiders, bats, or pumpkins. Metallic foil decals also pair nicely with the black and orange color scheme. Place decals using tweezers, adhering them where desired.
You can also glue on tiny embellishments like rhinestones or charms with a polish like Gelish Embelish. Let all attachments dry fully before applying your top coat to lock them in.
Caring for Your Nail Polish
Keep your stunning black and orange mani looking freshly-painted by avoiding nail polish remover as long as possible. Use the wrap tip method when washing hands: Wrap a finger over the opposite end of the nail to avoid water exposure and wear at the polish edges.
Reapply top coat as needed to smooth over minor chips. When removing polish after 5-7 days, use an acetone-free nail polish remover to limit drying of the nails and cuticles.
FAQs About Black and Orange Nails
How do I choose flattering shades?
When pairing black and orange nails, it’s important to find shades that complement your skin tone. Warm complexions look great with burnt orange hues while cool tones shine against black. For a bold look, go for a vivid orange like neon or coral.
More muted tones like terracotta can provide an elegant edge. To play it safe, opt for a black base with orange accents. Focus orange on one or two nails or just the tips. No matter what you choose, you’ll turn heads with this dramatic color combo!
What nail shapes work best?
The black and orange trend allows for lots of creativity when it comes to nail shapes! For a fierce look, sculpt your tips into sharp stilettos or bold squovals. Play up the contrast with a black and orange color block effect.
If you prefer a more understated style, opt for rounded edges in a classic oval or almond shape. Short nails and medium lengths both work well, letting the graphic colors take center stage. You can even mix and match shapes, like pairing pointy black nails with wider orange ones.
The options are endless!
Are these colors hard to apply?
Applying both black and orange polish can seem daunting, but have no fear! Start by painting your base coat – either black or orange – over the entire nail. Let it dry fully before moving on. Then use striping tape to create straight lines separating the colors.
Paint the second shade over the sticky tape. Once dry, slowly peel it off to reveal super crisp edges. The tape tricks prevent messy overlaps. You can also opt for nail stickers with black and orange designs instead of painting freehand.
As long as you use a quality polish and top coat, the mani can last over a week without chipping or fading!
How long will it last?
With the right prep and products, black and orange nail art can last over two weeks without needing a touch up! Always start with a base coat to protect nails and prevent staining. Apply two thin layers of each color for full coverage.
Finish with a fast-drying top coat like Seche Vite to lock in the look. Reapply the top coat every 2-3 days to refresh shine and smudge-proof the design. Store polishes upside down when not in use to keep them from thickening. Avoid moisturizers right after polishing.
Most importantly, resist the urge to pick at your nails as they grow out. This allows the color to gradually fade instead of chip. With proper aftercare, you can rock black and orange nails for weeks!
Conclusion
With endless options for combining black and orange in unique ways, you can create nail art that suits your personal taste. Following the application tips will help you end up with an eye-catching manicure that lasts. So go bold and make a statement with these darkly beautiful nail colors!
We hope this guide has inspired you with loads of ideas and advice for achieving stunning black and orange nails. Show off your creative flair and your one-of-a-kind style with this dramatic color pairing.