How To Apply Acrylic Overlays On Short Natural Nails
Having beautiful nails can make you feel polished and put together, but some of us are cursed with short, weak nails that make it hard to grow them out. If you want long, strong nails but nature didn’t give you much to work with, acrylic overlays may be the solution you’re looking for.
Here’s the quick answer: Acrylic overlays involve applying a liquid and powder acrylic mixture over your natural nail and shaping it into the length and shape you want. They are durable, natural looking, and can last 2-3 weeks on short nails with proper application and care.
In this comprehensive guide, we’ll discuss everything you need to know about getting acrylic overlays on short natural nails. We’ll cover tips for preparing your nails, step-by-step application instructions, how to care for acrylics, plus pros and cons so you can decide if it’s the right option for you.
Benefits of Acrylic Overlays on Short Nails
Add Length and Structure
One of the best benefits of acrylic overlays on short natural nails is that they allow you to add length easily. Having short nails can feel limiting when it comes to nail art and creativity. With overlays, your nail technician applies a liquid and powder mixture over your natural nail to extend its length.
This not only gives you more room to work with for designs, but also adds structure and strength to fragile, brittle nails. Having a protective acrylic overlay is great for people who struggle with thin, peeling nails. The overlay adds reinforcement to prevent splits and breaks.
Protect Your Nails
A major advantage of acrylic overlays is how much protection they provide for your natural nails underneath. The acrylic material creates a hard, protective shield that prevents your real nails from chipping and becoming damaged.
This helps your actual nails grow out healthy, avoiding pesky snags and breaks. The acrylic also protects from impacts and trauma, like if you accidentally whack your hand into something. With the acrylic overlay absorbing the shock, your natural nail avoids cracking or bruising.
This protection allows your real nails to grow out long and strong. No more worrying about destroying your nails with day-to-day activities and chores!
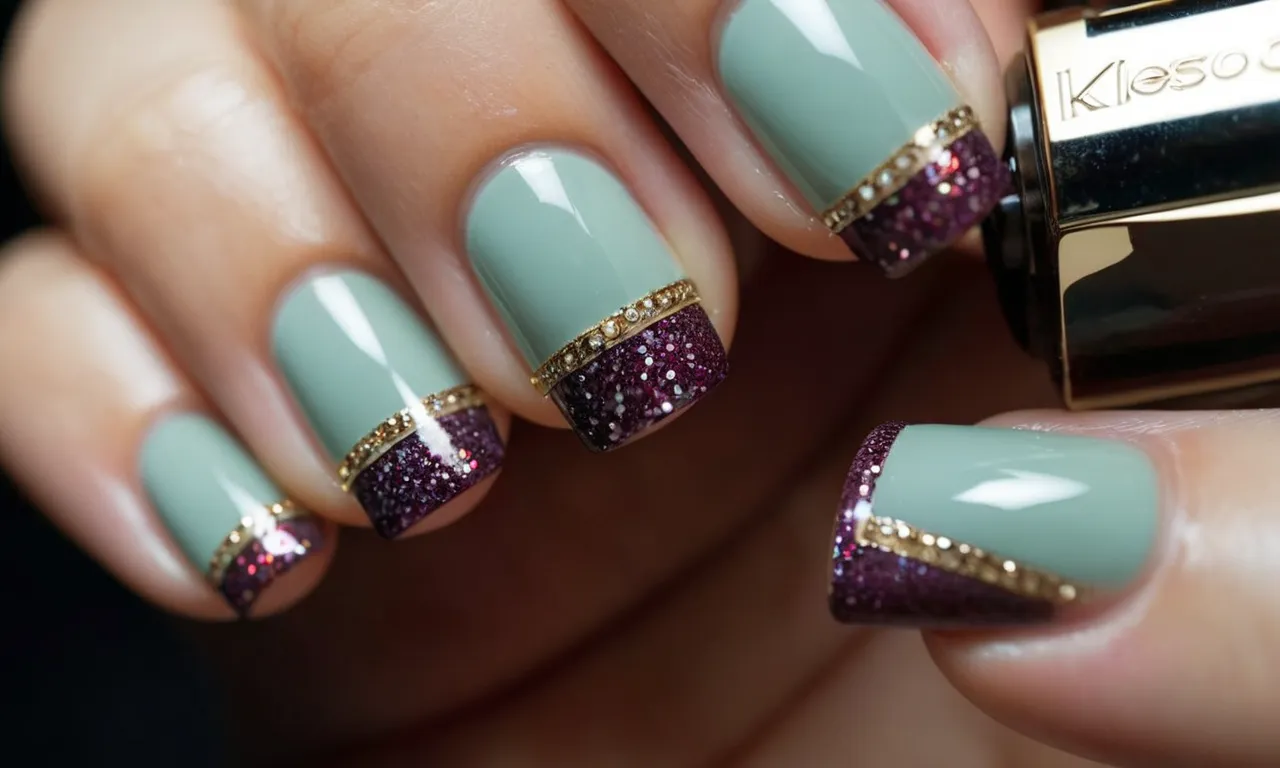
Customizable Shape and Length
One of the best things about acrylic overlays is that they are fully customizable. You can choose exactly how long you want your nails to be, from a subtle length boost to dramatic stiletto tips. Your nail tech can shape the acrylic into whatever style you desire – oval, square, round, or coffin nails.
You also get to decide how thick you want the overlay to be, from a light layer for a natural look to an extreme long nail. This versatility allows you to experiment with different nail shapes and sizes at your whim. With just one salon visit, you can go from short nubs to lengthy claws!
Unlike fake press-on nails, acrylics are molded specifically to fit your nails for a flawless application. This customization means you can change up your manicure and enjoy stylish nails.
Drawbacks to Consider
Can Damage Nails if Done Improperly
Acrylic overlays can definitely damage your natural nails if not applied correctly. The application process requires bonding the artificial material to your real nail using glues and primers. This can weaken the nail over time if the products are too harsh or if the overlay is removed improperly.
Filing and buffing too aggressively when prepping the nails can also thin out the natural nail plate, causing peeling and breakage. However, a skilled technician should know how to prep and apply overlays without causing damage.
They’ll use gentle handing techniques and quality products meant for natural nails. As long as you go to a reputable salon and care for the overlays properly, your natural nails should remain healthy underneath.
Require Filling Every 2-3 Weeks
One of the biggest drawbacks of acrylic overlays is that they require relatively frequent maintenance. As your natural nails grow out, the acrylic will lift at the cuticle area and may start to separate from the free edge.
This leaves unsightly gaps that allow dirt, debris and water to get underneath. To maintain a flawless, seamless look, most people need fill-ins every 2-3 weeks. This involves filing off the lifted edges and reapplying acrylic to fill in the new growth area.
While some may enjoy biweekly or triweekly salon visits, others find it time-consuming and expensive to keep up with the filling schedule. This downside can be remedied by choosing a slightly longer overlay length, which allows more time between appointments.
Can Be Expensive
The ongoing maintenance required by acrylic overlays contributes to the overall cost. A full set may run $50-$85, while fill-ins are $30-$50 every few weeks. Some additional factors that influence the price include:
- Salon location – Urban areas typically charge more
- Technician’s experience level – Master technicians charge higher rates
- Overlay length and embellishments – Longer and more detailed nails cost more
- Quality of products used – Salon-grade acrylics are pricier
While a basic overlay set may seem affordable at first glance, the long-term investment for upkeep is certainly higher than a traditional manicure or other natural nail services. Individuals on a tight budget may want to weigh the pros and cons versus other options.
However, many still find the longevity and appearance of acrylics well worth the price when compared to nail polish.
Preparing Your Nails
When applying acrylic overlays on short natural nails, proper preparation is key to achieving a long-lasting and natural look. Here are the steps you should take before applying the acrylic overlay:
Trim and File Nails
Start by trimming and filing each nail to your desired length and shape using a nail clipper and file. Make sure to file in one direction and buff the surface of the nails lightly to remove any shine or oils. This helps the acrylic overlay adhere properly.
Remove Any Old Polish
Use an acetone-based nail polish remover to remove any lingering traces of old nail polish or gel polish from the nails. Removing any polish will allow the primer and acrylic to bond directly to your natural nail.
Push Back and Clean Cuticles
Gently push back the cuticles around each nail using a cuticle pusher or orange wood stick. Do not cut or damage the cuticles. Then use a cuticle remover solution to dissolve and wipe away any excess cuticle tissue.
This helps neaten the nail and allows the acrylic overlay to sit flush against the natural nail.
Use Primer or Dehydrator
Apply a nail dehydrator or primer designed for use with acrylics. These products prep the nails by removing traces of moisture and oils from the nail plate. This improves adhesion so the acrylic overlay will stick. Let the primer dry completely before applying acrylic.
By properly trimming, shaping, removing shine, and priming the natural nails first, you create the ideal surface for the acrylic overlay to adhere to. Taking these simple preparatory steps helps ensure your DIY acrylic manicure lasts for weeks without lifting or damage to the natural nail underneath.
With the right prep work and technique, you can have long-lasting, natural-looking nails in no time!
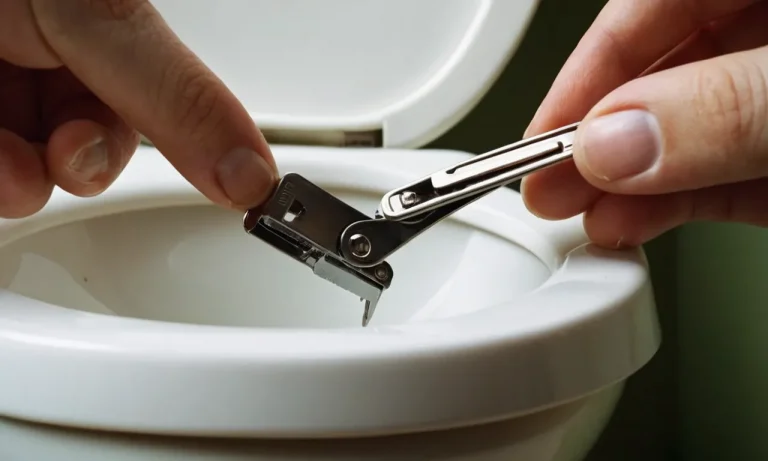
Step-by-Step Application
Apply Nail Tips
Applying nail tips is the first step when doing acrylic overlays on short natural nails. Here’s how to do it:
- Start by trimming and shaping your natural nails – make sure they are filed into the desired shape.
- Then, select the correct sized nail tips and apply a small drop of nail glue to the well of the tip.
- Firmly press the nail tip onto the free edge of the natural nail. Hold for 30 seconds until bonded.
- Use tip clippers to trim the nail tip flush with your natural nail edge. Blend by gently filing the seam between your natural nail and the tip.
Properly applied nail tips create the perfect foundation for building out the acrylic overlay extension. Take your time applying them straight for the best results.
Apply Primer
Once the nail tips are secured, the next step is to prep the nails for acrylic application by cleaning and priming:
- Use a nail dehydrator or alcohol wipe to remove any oils from the natural nail plate.
- Apply nail primer to all of the natural nails and tip extensions. This helps the acrylic adhere properly.
- Let the primer dry for about 60 seconds until tacky.
Priming is a crucial step that ensures proper adhesion of the acrylic overlay. Don’t skip this step!
Apply Acrylic Powder and Liquid
Now it’s time for the fun part – building the acrylic overlay on the nails:
- Apply a nail form securely under the free edge of the nail to support the extension.
- Dip a small acrylic brush into the liquid monomer and use the bead method to pick up a small ball of acrylic powder.
- Place the wet bead of acrylic at the cuticle area and use the belly of the brush to gently push it towards the free edge.
- Repeat to build and extend the acrylic overlay little by little until you achieve your desired length.
- Make sure to work quickly and avoid over-wetting as this can cause lifting or cracking.
Take your time applying the acrylic overlay to get it just right. Remember that you can always go back and add more if needed. The key is gradual, thorough application while the product is still wet.
Shape and File
Once the acrylic overlays are fully applied, it’s time to perfect the shape:
- Use an acrylic nail file to shape the overlay extension edge flush with the free edge of the natural nail.
- Shape and taper the sides at a gradual angle to create your desired look – coffin, square, or rounded.
- Refine by gently filing and buffing to remove any lumps and imperfections in the overlay.
- Avoid over-filing as this can cause thinning and cracking over time.
Take your time filing and shaping to get a seamless, professional look. Filing at the right angles will also help prevent lifting or cracking of the acrylic overlay down the road.
Buff Shine
The final step is buffing and shining the nails to perfection:
- Use a three-way buffer block to smooth and debulk the entire nail.
- Finish with a high-shine buffing block or drill attachment to create a salon-perfect shine.
- Wipe nails clean with a lint-free wipe or nail cleanser to remove any dust.
- Apply cuticle oil around the nail and hydrate the skin to complete the service.
Buffing and shining is the icing on the cake that makes acrylic overlays look freshly done and gorgeous! This seals in the color and creates a flawless finish.
Caring for Acrylic Overlays
Moisturize Cuticles and Nails
Keeping your natural nails and cuticles moisturized underneath the acrylic overlay is crucial to prevent cracking or lifting. Massage cuticle oil or creamy moisturizers into the nail beds and cuticles daily to condition the nails and promote healthy growth (source).
Products with jojoba oil, vitamin E, and shea butter are great options. This helps the natural nails stay flexible and avoids gaps between the overlay and nail, which can lead to fungus or infection.
Avoid Picking or Peeling
It can be tempting to pick at or peel lifting edges of the acrylic overlay, but this can damage the natural nail underneath. Use a wooden cuticle pusher to gently nudge the lifting edge down and apply more glue if needed.
For minimal damage, it’s best to go to your nail salon and have a professional reapply the overlay if lifting occurs.
Use Cuticle Oil Daily
Applying cuticle oil around the nail beds every day keeps the skin around the nails conditioned, which helps prevent cracking and infection risk (source). Use a dropper or brush to gently massage it into the cuticles and sides of nails once or twice per day.
Cuticle oil containing vitamin E or aloe vera works well. This promotes healthy growth of the natural nail and keeps the overlay secured tightly to the nail.
Fill in Gaps Every 2-3 Weeks
Get fills done every 2-3 weeks to prevent gaps between the natural nail and the overlay, which can trap bacteria and dirt (source). As your natural nails grow out, gaps start forming which not only look unsightly but can lead to green nails or infections.
Frequent touch-ups and refilling the overlay maintains a flawless protective layer that follows your natural nail shape.
Removal Process
Do Not Pick Off Yourself
Attempting to pick off acrylic overlays by yourself can severely damage the natural nail underneath. The acrylic adhesive bonds tightly to the nail plate, so prying it off can pull layers of your real nail off too. This can lead to infections getting trapped under the peeled area.
It’s crucial to avoid picking or pulling off acrylics yourself and go to a professional instead.
Use Acetone or Acrylic Remover
The safest and most effective way to remove overlays is with pure acetone or an acrylic nail remover product. Apply a generous amount of remover to cotton balls and hold them against each nail for 10-15 minutes. The acetone breaks down the acrylic resin so the product can be gently filed off.
Don’t wipe or scrape roughly, as this could damage the exposed nail bed.
Gently File Surface
After soaking off the majority of the acrylic with remover, use a fine nail file to gently buff off any remaining overlay bits on your nail’s surface. Apply the file in one direction – don’t saw back and forth. Pay extra attention around your nail’s edges and cuticle.
Don’t file too rigorously or you could weaken your nail. Press lightly and focus on smoothing down the uneven spots.
Moisturize Afterwards
An acrylic removal process can leave nails feeling dry and brittle. Apply a rich nail oil or moisturizing cuticle cream immediately after taking off overlays and filing down the surface. The vitamins and nutrients will nourish the nail beds.
Continue massaging oil into the bare nails and cuticles daily while they recover. Proper moisturizing prevents cracks, peeling or breakage after removing enhancements.
Conclusion
While acrylic overlays require more maintenance than natural nails, they allow you to have the long, strong, beautiful nails you want. With proper application and care, acrylics are a great option for those with short, weak nails to gain length and strength.
Just be sure to keep up with fill appointments, moisturize often, and avoid damage to get the best results. Happy growing!