Acrylic Nail Designs For Beginners
If you’re looking to learn how to do acrylic nail designs as a beginner, you’ve come to the right place. Acrylic nails allow you to get creative with colors, shapes, and designs in a way regular nail polish just can’t.
While the process does involve some learning and practice, acrylic nail art is achievable even for total nail art newbies with the right tips and techniques. If you’re short on time, here’s a quick answer to your question: Start with short, basic designs in solid colors.
Use nail forms to help get the right shape. Go for coffin, square, or almond shapes first before trying stiletto. Use a basic three-step process: apply powder, shape with file, seal with top coat.
In this comprehensive guide, we’ll cover everything you need to know as a beginner to start creating stunning acrylic nail designs of your own, from picking the right supplies and prepping your nails to step-by-step application techniques and finishing touches.
Read on for tips from expert nail techs for beginner-friendly acrylic nail shapes, colors, art techniques, and designs that are sure to help you get salon-worthy results at home.
Choosing the Right Acrylic Nail Supplies
Getting started with acrylic nail application requires having the proper supplies on hand. As a beginner, it’s important to understand the purpose and function of each item to create stunning acrylic nail designs safely.
Acrylic Powder and Liquid
The acrylic powder and liquid are the core ingredients that allow you to build, extend, and shape artificial nails. The powder is a fine polymer that comes in various colors and textures. When mixed with the liquid monomer, they chemically bond to form hardened acrylic.
Liquid acts as a polymerization initiator to begin the hardening process. For novices, choose a standard acrylic powder and medium-consistency liquid until you refine your technique.
Primers, Dehydrators, and pH Balancers
Using primers and dehydrators prepares the natural nail plate to bond properly with acrylics. Primers create a tacky surface for acrylics to adhere better. Dehydrators remove moisture and oils from the nails that can weaken acrylic bonding.
pH balancers neutralize nail pH levels to prolong the manicure. Applying these crucial products prevents lifting, cracking, and other common nail enhancement issues.
Nail Forms
Nail forms serve as a foundation for sculpting acrylic nails from scratch. They come in various sizes to custom fit each nail and prevent breakage or damage to the natural nails underneath. Better quality forms adapt to the nail shapes with fewer bumps or ripples in the final product.
Nail Tips
Nail tips are pre-shaped artificial nails made of ABS plastic that attach to the free edge of natural nails. They act as an extension for acrylic application rather than sculpting directly on the natural nail.
Tips help reinforce thin, weak nails and allow more acrylic product near the stress area at the free edge. For beginners, clear tips are easiest to blend with acrylic.
Acrylic Nail Brushes
The right nail brushes make application easier by effectively transferring products from bottles to nails. Stiffer, angular brushes provide good control for beginners. Softer, pointed brushes create a flawless finish on the surface of enhanced nails.
Quality brushes won’t spread or clump the acrylic mix unevenly, reducing filing later on. Clean brushes thoroughly after each use with professional brush cleaner fluid and conditioner.
Nail Files and Buffers
Using professional-grade nail files and buffers is vital for shaping, smoothing, and perfecting the structure of acrylic and natural nails.
Files come in varying grits – higher numbers are less abrasive, lower grits quickly refine shape. Buffers polish and shine the nails to a pretty sheen.
Gently filing and buffing prevents over-thinning acrylics or damaging the natural nails hidden beneath.
Preparing Nails for Acrylic Application
Cleaning nails
Properly cleaning and preparing the natural nails is a crucial first step before applying acrylics. Here are some tips for cleaning nails before acrylic application:
- Remove any old nail polish with acetone-free nail polish remover. Acetone can dry out the nails.
- Wash hands thoroughly with soap and water to remove oils, lotions or creams from the nail surface.
- Use a nail brush and scrub around each nail to remove debris and buildup.
- Rinse nails and dry thoroughly. Make sure there is no moisture on or around the nails.
- Use a nail dehydrator or alcohol wipe to remove any remaining moisture and oils.
Taking the time to properly clean the natural nails helps acrylics adhere better and last longer. Skipping this step could lead to lifting, cracking or premature loss of extensions. Let those tips help you get off to a good start!
Lightly buffing surface
Once nails are squeaky clean, lightly buffing the surface of the natural nail can help acrylics grip better. Here’s how:
- Use a fine grit nail file or buffer to gently rub surface of each nail. Do not over-file.
- Focus on lightly buffing the center area of the nail, avoiding the edges and cuticles.
- Buff just until the shine is removed and there is a slightly rough texture.
- Wipe away buffing dust with a towel.
- Apply nail dehydrator or alcohol again to remove any oils.
Light buffing removes the shine and opens up microscopic ridges for the acrylic product to seep into. This helps create a strong bond between the natural and acrylic nail. However, over-filing can thin and weaken nails, so a delicate touch is best.
Applying dehydrator and primer
Acrylic products adhere best to a clean, dry and slightly textured surface. Using a nail dehydrator and primer prepares the nails for acrylic application by:
- Removing moisture and oils from the nail plate.
- Creating a tacky surface for acrylics to grab onto.
- Preventing lifting and allowing product to last longer.
Follow these tips when applying dehydrator and primer:
- Use a lint-free wipe soaked in dehydrator or alcohol to cleanse nails again.
- Allow 1 minute for nails to fully dry.
- Apply a thin, even coat of primer to each nail.
- Let the primer become slightly tacky before applying acrylic.
- Avoid flooding cuticles with primer as this can cause lifting.
Using the right dehydrator and primer is essential preparation before acrylic application. Doing so helps nails look amazing longer! Now those tips will help you get the most flawless acrylic manicure.
Applying Acrylic Nails
Picking an acrylic nail shape
Choosing the right acrylic nail shape for your hands is an important first step. The most popular options are coffin, square, almond, and round shapes. Consider the length and width of your natural nails when deciding on a shape.
Shorter nail beds tend to look best with round or squoval shapes, while longer nails can pull off coffin or almond shapes. You’ll also want to pick a shape that complements your hands and lifestyle. For example, shorter square shapes are great for those who type a lot or use their hands frequently.
Sizing and placing forms or tips
Once you’ve picked the acrylic nail shape, proper sizing and placement of forms or nail tips is crucial. Forms are small, curved pieces of plastic that are placed under the free edge of the natural nail to build the acrylic on top.
Tips are pre-shaped artificial nails that are glued onto the natural nail free edge and then acrylic is applied over them. Taking the time to correctly size and place these will determine the final shape and structure of the acrylics.
Most professionals recommend placing them just a tiny bit away from the cuticles to prevent lifting or damage. It may take some practice to get the sizing and placement right!
Applying acrylic powder and liquid
Now comes the fun part – applying the acrylic! Acrylic powder and liquid are mixed together on a palette to create a wet paste that hardens quickly. Using a brush, apply the acrylic paste to the nail, starting at the cuticle area and working toward the free edge.
The key is to apply thin, even layers, allowing each layer to partially dry between applications. Experts recommend applying 3-5 layers total. Make sure to brush the product underneath the free edge as well to create a strong apex.
Applying too thick of layers can lead to cracking or lifting off the natural nail, so take your time with this step!
Shaping with nail file
Once the acrylic has fully hardened, the next step is shaping the extensions with a nail file. Filing gives precision to the shape and smooths the surface. Use a coarse file first to get the overall shape, then switch to a fine grit file to refine it further.
Most technicians recommend filing the nails into a squared-off or slightly rounded shape before polishing for longevity. Be careful not to file too thin or too close to the cuticles. Take your time perfecting the shape for a professional looking result.
Finishing nails
The finishing touches involve buffing the surface for a glassy shine and applying nail polish if desired. Buffing helps smooth out any small bumps or ridges left from filing. Use a buffing block in a back and forth motion to seal the keratin layers.
Wipe nails with a lint-free pad and cleanse with nail prep solution. You can then apply a base coat, colored polish, and top coat for a perfect manicure. Regular polish or long-lasting gel polish both work well over acrylics. Finish with cuticle oil around the nails to moisturize the skin.
Voila, you have beautiful, flawless acrylic nails! Proper at-home care is required to make them last 3-4 weeks.
Acrylic Nail Designs for Beginners
Solid colors
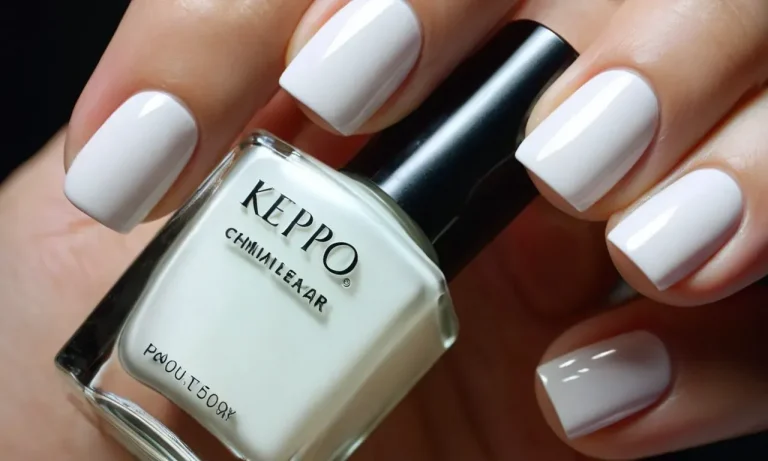
Going with a solid color is a foolproof option for acrylic nail beginners. Whether you prefer neutrals like beige, white, and nude, or want to make a statement with a bright hue like red or blue, solid colors are classic and easy to pull off.
Ask your nail tech to buff and shape your nails before applying the acrylic for a clean look.
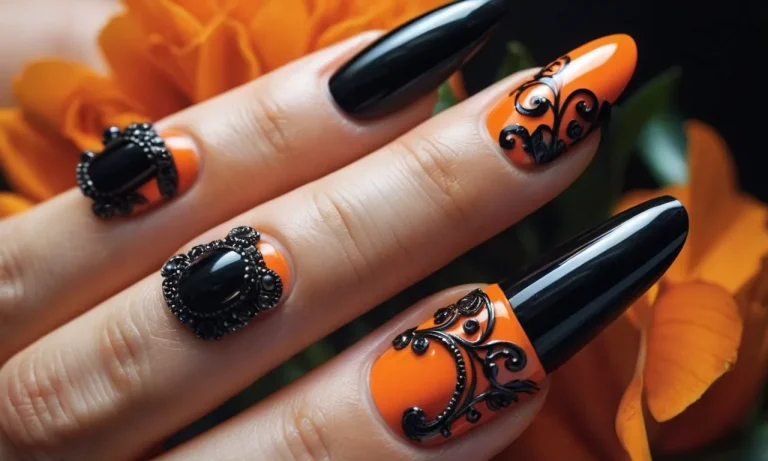
Color blocking
Color blocking with acrylics is super trendy and doesn’t require advanced skills. You can do different colors on alternating nails or color block on each nail with geometric shapes or ombre fading. This style allows you to experiment with fun color combos.
Neon shades like orange and green are eye-catching together, or go for an edgier vibe with black and red.
Ombre
Ombre acrylic nails produce a seamless faded effect from dark to light and look amazing on short square or oval designs. This gradient style is beginner-friendly because the application is blended, so imperfections are less noticeable.
Plus, your nail tech can combine any colors you want for a custom ombre mani.
Nude and neutrals
You can never go wrong with neutral acrylics. From pale pink and beige to white and cream shades, nude nails are classic and complement any outfit. They also elongate the fingers for a slimming effect. For understated glam, ask for subtle shine or glitter in the acrylic powder.
White tips
A french manicure with white acrylic nail tips dresses up your hands for any occasion. This forever-chic look frames the nails beautifully. Keep the base nude or light pink to really make the tips pop. You can opt for thick bold white tips or skinny defined ones based on your preference.
Glitter acrylic
Incorporate sparkle into your manicure with glitter acrylic powder. You can do a full glitter acrylic nail or mix glitter with solid colors. Silver and gold glitter look glamorous for holiday parties. Or try colorful glitter on one feature nail as an accent.
Glitter acrylics add eye-catching shine and dimension.
Chrome
Chrome is a high-impact acrylic powder that creates a mirror-like reflective surface on the nails. It has an edgy, futuristic vibe. You can do chrome on all nails or limit it to an accent nail with silver, blue, purple or rainbow colors.
Make sure to use a quality top coat sealant to prevent chipping and add gloss.
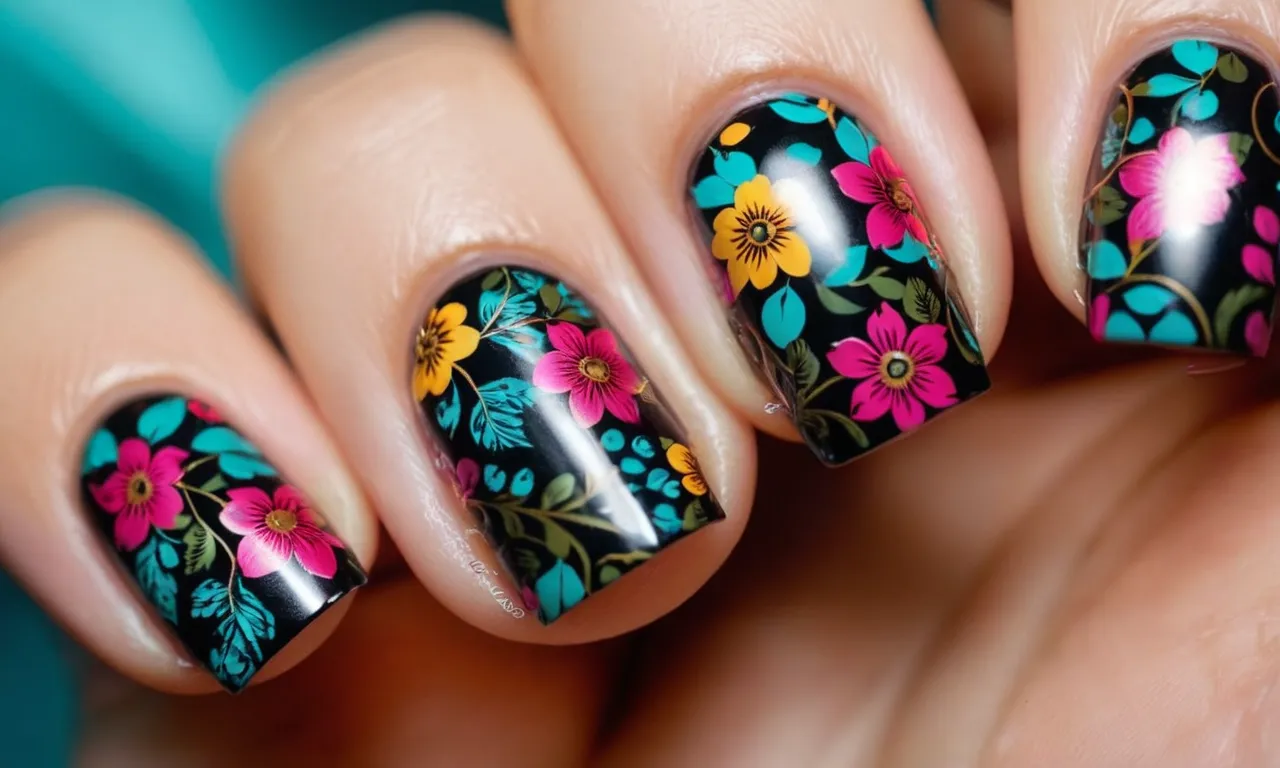
Flowers
What’s better than flowers on your nails? 3D flower acrylic nail art takes skill but is manageable for beginners if you start with something simple. A few small flowers on one or two nails can make a statement. Go for springtime vibes with pastels like pink, purple and yellow.
Ask your nail artist to use high-quality acrylic for detailed blossoms.
Polka dots
Cute and playful polka dots are a fun acrylic nail idea for beginners. They’re most striking on a neutral background like nude or white. Go for black or colored dots and keep them small and consistent in size. Ask your nail tech to use a dotting tool for perfect circles.
Polka dots are a whimsical addition to your manicure.
Caring for Acrylic Nails
Keep nails dry
Keeping acrylic nails dry is crucial to preventing lifting and cracks. When washing dishes or showering, wear rubber gloves to protect the nails from excess moisture. Gently pat nails dry after washing hands to remove trapped water.
Letting the nails air dry helps prevent water from seeping under the acrylic and weakening the bond.
Use cuticle oil daily
Apply cuticle oil around the nail beds daily to hydrate the skin and nails. Jojoba, vitamin E, and coconut oils work wonders. Massage the oil into the skin to stimulate healthy nail growth and cuticle health. Properly hydrated cuticles prevent lifting and help the acrylic adhere properly.
File gently
Filing acrylic nails requires a gentle touch. Use a fine-grit emery board and avoid sawing back and forth. Gently file in one direction at a time to smooth edges and shape the tips. Rough filing can thin and weaken nails, making them prone to cracks and breaking.
Go slowly and check often to prevent over-filing.
Avoid picking at nails
Resist the urge to pick at lifting edges or imperfections. Picking at the acrylic can further lift the product and introduce bacteria under the nail. Instead, fill any gaps with acrylic powder and sealing glue to re-adhere it. Any rough edges can be gently filed smooth.
Leaving lifting areas alone prevents making the problem worse.
Go easy on hands
Acrylic nails require gentle care. Avoid using hands and nails as tools to pry things open. Opening soda cans, picking at stickers, and digging in purses can cause cracks and breaks. Also, wear gloves when cleaning with harsh chemicals. Acrylics make nails more brittle than natural nails.
Treating hands with care helps acrylics last longer.
Removing Acrylic Nails Safely
Soaking cotton in acetone
The first step in safely removing acrylic nails is to soak cotton balls or pads in pure acetone. Acetone is the primary ingredient that breaks down the acrylic polymers in the nail extensions. For best results, choose a high-quality acetone formulated specifically for removing artificial nails, as these tend to work faster than regular nail polish remover.
Place the cotton over each fingernail and let it sit for 10-15 minutes. The acetone will start dissolving the bonds between the artificial nail and your natural nail. Reapply fresh acetone-soaked cotton as needed until the acrylics become loose.
Scrape off acrylic gently
After soaking in acetone, the acrylic nails should lift off easily using an orangewood stick or cuticle pusher tool. Gently scrape under the acrylic starting at the cuticle area and work downward toward the free edge.
Take care not to pry too hard or scrape back and forth, as this can damage the natural nail underneath. Work slowly and patiently to remove the entire acrylic extension from each nail. For tips that are still firmly adhered, reapply acetone and let sit longer until you can gently lift them off.
Buff away remaining residue
Once the acrylic extensions have been removed, there will likely be a small amount of residue still clinging to the natural nails. Use a fine grit nail file or buffer block to gently buff away the remaining product. Work from the side edges of the nail toward the center, using light pressure.
Be very careful not to over-file, as thinning the nail plate too much can weaken nails and increase the risk of breaking. Filing too aggressively can also cause heat buildup and irritation of the surrounding skin. The goal is simply to remove the last traces of acrylic for a clean slate.
Moisturize after removal
After removing acrylic nails, it’s very important to moisturize the nails and cuticles. Prolonged acrylic wear and repeated exposure to acetone can cause dryness, peeling, and brittle nails. Apply a thick, nourishing hand cream right after taking off extensions and massage it into the nails beds and surrounding skin.
Reapply daily while nails recover. You can also do a hydrating hot oil treatment once a week. Consider taking a break between sets of acrylics to allow nails to completely regenerate and strengthen. With proper removal and aftercare, you can safely wear gorgeous acrylic nail designs as a fun fashion statement!
Conclusion
If you’re a nail art beginner looking to try your hand at acrylic designs, take it from the pros and start simple. Focus on perfecting basic application techniques and experiment with simple embellishments like glitter or ombre.
Nail your acrylic fundamentals first before attempting advanced nail art. With some patience and practice, you’ll be giving yourself salon-worthy acrylic manicures in no time. Remember to prep nails properly, work cleanly with products, and care for your acrylics after application.
Follow the tips outlined here and you’ll gain the skills and confidence to show off gorgeous, head-turning acrylic nail designs as a beginner nail artist.