How To Draw A Hand With Nails Step By Step
Drawing hands can be tricky, but with some practice and patience, anyone can learn how to draw a realistic hand complete with nails. In this comprehensive guide, we will walk you through the steps and techniques for drawing a hand with nails from start to finish.
If you’re short on time, here’s a quick overview of the process: start by sketching the basic shape of the hand, refine the proportions, add guidelines for the fingers, sketch each finger and the palm, erase guidelines, and finally add details like creases, nails, and shading.
Gather References and Materials
Study hand anatomy and structure
Understanding the anatomy and structure of the human hand is essential for drawing realistic and proportional hands. When studying hand anatomy, pay attention to the skeletal structure and muscles that create the shape and form of the hand.
The human hand has 27 bones, including the carpals, metacarpals, and phalanges. The palm consists of 5 metacarpal bones that connect to each of the fingers. Each finger has 3 phalange bones, except for the thumb, which only has 2.
Studying the joints and how the bones connect is important for rendering natural hand poses.
In addition to the bone structure, familiarize yourself with the muscles, tendons, and ligaments in the hand and fingers. These elements add shape and allow the hands to move and grip objects. The tendons on the back of the hand become more pronounced when the hand stretches or grasps something.
Find photo references
Using photo references is a great way to understand the complex anatomy and proportions of human hands. Look for images of hands in different positions, gestures, and from various angles. Some helpful references include:
- Hands holding or interacting with objects
- Hands performing everyday tasks like writing, typing, etc.
- Palm facing up, palm facing down
- Fingers bent, stretched, spread apart
- Hands making gestures like peace sign, ok sign, etc.
Pay attention to the shapes created by the bones and muscles and how light hits the form. Collected a diverse range of hand references will give you a visual library to refer back to when drawing.
Prepare drawing materials
Having the right drawing tools and materials will make the drawing process easier. Recommended supplies include:
- Drawing paper – Smooth paper is ideal for detailed hand drawings. Bristol paper or mixed media paper work well.
- Drawing pencils – An assortment of pencils, such as HB, 2B, 4B, 6B, allows you to create different strokes and shading.
- Kneaded eraser – Kneadable erasers can be shaped into points to erase fine details.
- Tortillon – Blending stumps help smooth pencil strokes for graduations of tone.
- Drawing board – This keeps the paper steady while working on details.
Setting up good lighting is also important. Position a lamp to cast light across the hand model to see the forms and shadows clearly. Having your materials prepared ahead of time helps you stay focused on the drawing process.
Sketch the Basic Shape
Start with a light guideline
When starting a hand drawing, it’s best to first lightly sketch a guide for the basic hand shape. Use a light, smooth line to indicate the overall flow of the hand. Many artists suggest beginning with the middle finger, drawing a light line to represent its length and gently curving shape.
From there, roughly indicate where the other fingers and thumb will go. Refrain from drawing heavily at this stage – light guidelines are easily adjustable as the draft takes shape. Once the basic positioning is roughed out, you can begin refining.
Indicate the palm shape
After the initial finger guideline, start sketching the shape of the palm area. Draw a rounded form to serve as the underside of the fingers and thumb. Lightly sketch the contours of the palm – the curve of the thenar eminence at thumb base and the bulge of fleshy palm directly below the little finger. Many beginning artists ignore the palm shape at first and later struggle to attach the fingers to hand in a natural way.
Take care to draft the foundation of the entire hand structure early on.
Note changes in planes across the palm – draws lines to indicate shifts from the flat, central palm to the sides of the hand. Use an anatomical hand reference if needed. Once you map out the overall form, it will be easier to build details.
Sketch the thumb shape
The thumb plays an pivotal role in shaping the look of a hand. After marking the guidelines for the fingers and palm, lightly draw an oval form to represent the thumb mass. Angle this towards the index finger at about 45 degrees. Indicate the basic joints by shortening the length of subsequent thumb segments.
Do not press hard or draw the thumb details yet. The foundational sketch is still adjustable. Take care that the thumb overlaps the palm edge slightly – later details like nails and knuckles will increase the realism.
For more tips, refer to this guide on sketching challenging hand positions. With an initial framework roughed out, you can begin refining the anatomical accuracy of each area. Pay special attention to the complex web of tendons on the back of the hand to convincingly finish your drawing.
Refine the Proportions
Palm width and length
When drawing a hand, getting the proportions of the palm right is key to making it look realistic. The palm area is typically as wide as it is long. To check the proportions, draw a box around the palm area from the base of the fingers to the wrist.
The width and length of this box should be nearly equal.
As a general rule, the palm length is around 4-5 finger lengths. So if you’ve drawn the fingers, count how many finger lengths fit into the palm vertically to ensure you have the right palm size. Don’t make the mistake of drawing the palm too short or too narrow.
Finger length and width
The lengths and widths of the fingers also need to be anatomically accurate. Going in order from index to pinky finger, the fingers gradually get shorter. The index is usually as long as the middle finger or just slightly shorter.
The ring finger is slightly shorter than the middle, and the pinky is the shortest.
In terms of width, the index and middle fingers are the widest. The ring finger is slightly more slender, and the pinky is the most narrow. Pay attention to these relationships as you refine the shapes of each digit.
Thumb placement
The position of the thumb is also important for creating a natural looking hand. When drawing a relaxed hand, the thumb is usually separate from the rest of the fingers, creating an open space rather than tightly gripping them. The thumb should align with the knuckles of the index and middle finger.
Be careful not to place the thumb too far over or draw it too small. Use the length of the thumb relative to the palm and other fingers as a gauge. The tip of the thumb should end around the middle of the index finger or slightly lower.
Add Guidelines for Each Finger
Mark knuckle lines
When drawing a hand, it’s important to indicate where the knuckles are located on each finger. Here are some tips for marking knuckle lines accurately:
- Start by lightly sketching a box shape for each finger section – this will help you visualize the length and joints.
- Look at your own hand as a reference. Note where the first main knuckle crease is on each finger and lightly draw a line to indicate it.
- On the index, middle, and ring fingers, there is a second knuckle about halfway down the length of the finger. Add another light line for this.
- The knuckles on the thumb are positioned a bit differently. Make sure to carefully observe this and sketch them appropriately.
Properly marking the knuckles will create a great foundation for each digit and make the fingers look more realistic.
Indicate intermediate joints
Between the knuckles, it’s important to show the intermediate joints on each finger. Here are some techniques for doing this effectively:
- Look closely at your own hand – see how the fingers gently curve and bend at the intermediate joints. Lightly sketch this curvature.
- Draw short lines bisecting the middle of each finger section to indicate the joint placement.
- Consider the type of pose – if the fingers are bent, make sure to accentuate the joint areas appropriately.
- Lightly erase and refine the joint lines as needed – they should be visible but not stark.
Well-defined intermediate joints will add realism and help convey the natural creases and contours of the fingers.
Extend to fingernail tips
The fingertips help complete the structure of each digit. Use these methods for drawing defined fingernail tips:
- Observe where the end tip of each finger should go – slightly round off the end of each finger line.
- Consider the perspective – fingertips viewed straight on will appear blunt, while those seen at an angle will taper to a point.
- Draw a curved line at the end of each finger for the fingernail shape. Leave a small gap between the knuckle and nail.
- Refine the shape of the nails – they can be round, oval, or gently squared off at the edges.
Taking time on the fingernails will really make hands look polished and professional. Don’t forget to add details like the lunula (little white half-moon at the base) for extra realism.
With careful attention to detail on the knuckles, joints, and nails, you can achieve wonderfully lifelike hands that will elevate your art. Patience and practice are key – use photo references of hands in varied poses to hone your observation skills.
Over time, you’ll be able to draw hands from imagination with ease. Keep at it!
Sketch the Fingers and Palm
Detail each finger segment
When sketching the fingers, it’s important to break them down into segments. Each finger has three segments – the distal, middle, and proximal phalanges. Carefully sketch each segment, making sure to capture the relative lengths and tapering widths.
For example, the distal segments are the longest and skinniest while the proximal segments are the shortest and widest. Lightly indicate the knuckles between each segment as this will help place the fingers properly on the hand.
Refine palm shape
After roughing out the basic shape of the palm, take some time to refine its form. Pay attention to the thenar eminence at the base of the thumb and the hypothenar eminence on the little finger side. These mounds of tissue help cup the palm and give it a more organic appearance.
You can also lightly sketch some crease lines across the palm to show how the skin folds with the closing of the hand.
Connect fingers to palm
Carefully attach the finger segments to the palm, using your initial guide lines as reference. The proximal phalanges should seamlessly connect to the hand below the knuckles. Take care that the fingers visually line up with their corresponding metacarpals in the palm structure.
For example, the index finger should connect to the hand slightly towards the thumb side. Pay attention to spaces between the fingers as well – they should not overlap or have odd gaps unless intentionally exaggerating gesture.
Erase Guidelines and Add Details
Soften guidelines
Once you have a basic outline of the hand structure, the next step is to soften the guidelines. Using a kneaded eraser, gently erase some of the darker guideline lines. Don’t erase them completely, as you still want them there for reference, but lightening the lines will make the hand look less rigid and more natural.
Add creases and wrinkles
Now it’s time to add some realism to the hand by drawing in creases, wrinkles and folds. Study your own hand for reference. Use sketched lines to indicate the natural creases that form when the fingers bend, the wrinkles at each knuckle, and the folds and contours on the palm and around the thumb.
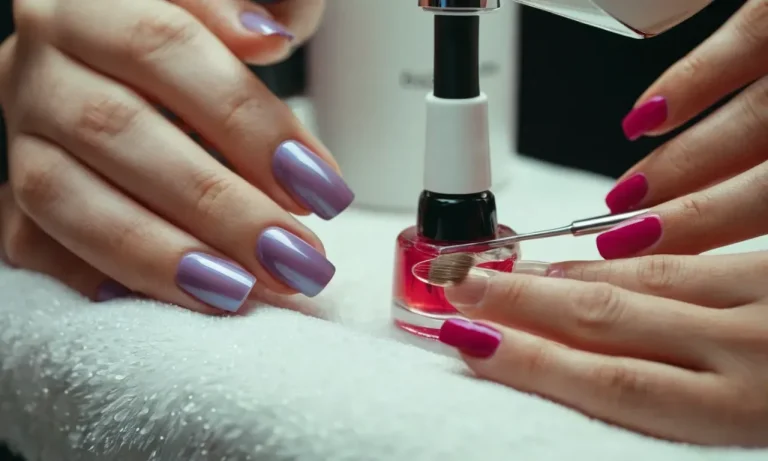
Draw fingernails
To draw realistic fingernails, start with a basic crescent moon shape along the end of each finger, using smooth lines. Then add the nail bed inside the nails using curved lines. You can add white highlights along the top ridge of each nail to hint at their thickness and give them some sheen.
Some other detailing you can add that gives nails more realism:
- Indent the skin around the nails
- Add nail ridges using delicate lines
- Show the half moon shape of the nail base
Indicate knuckles
Lastly, since the hand model is clenched, we need to draw the protruding knuckles to give it that clenched look. Lightly indicate the raised knuckles with subtle shadow, keeping the light source in mind.
You can also use some hatching lines to emphasize the ridges and valleys of the knuckles and tendons on the back of the hand.
Add Shading
Consider light source
When adding shading to a hand drawing, it’s important to first consider the direction of the light source. Is the light coming from above, below, or the side? This will determine where the shadows fall. Here are some tips for considering light source:
- For top-down lighting, shadows will be cast underneath the hand and fingers, becoming darker as they move further from the light.
- Side lighting will create shadows on the opposite side of ridges and protrusions, like knuckles and nails.
- Backlighting from behind the hand will outline the edges of the fingers and palm in shadow.
Decide on the light direction before shading so the values are consistent. You can emphasize different contours and shapes by adjusting the light source. Side lighting brings out the dimensionality, while top-down lighting can flatten and simplify the form.
Add basic value shades
Once you know your light source, start adding basic shading using different values. Values refer to the lightness or darkness of tones. Here are some tips for effective hand shading:
- Use very dark values near the core shadows where light is blocked. Lighten the values as you move away from these areas.
- Add reflected light along the edges facing the light source to show the form turning away.
- Use medium values for the halftone areas between the highlights and core shadows.
- Leave the lightest values for the main planes facing the light source.
Build up the values gradually using soft edges and smooth blending. Areas like the creases and joints between fingers can stay darker to show depth. Vary the values across the different planes to make the hand appear three-dimensional.
Refine shadows and highlights
Once the basic values are mapped out, refine the shading by pushing the contrasts. Here are some tips for adding polish:
- Reinforce the core shadows with slightly darker tones using crisp edges.
- Add small catch shadows where the hand overlaps or intersects with itself.
- Brighten highlights along ridges and raised areas facing the light.
- Use reflective highlights along oily or moist areas like fingernails.
- Soften edges between values to reduce noise.
You can also show the texture of skin by varying the grain of the shading. Use small circular motions for a rough texture or gentle gradients for smoothness. Pay extra attention to delicate areas like the fingernails and knuckles.
Refining these crisp shadows and bright highlights will make your shading really stand out.
Proper shading adds crucial realism and depth to hand drawings. Whether using simple light sources or complex compositions, the right shading can bring out all the intricate shapes and textures. With the core shadows, halftones and highlighted edges in place, you can make your hand drawings pop off the page.
Conclusion
With persistence and practice using the steps outlined here, you can learn to draw a realistic hand with nails. Focus on developing an accurate foundation, refining proportions, and adding expressive details. Hands can be challenging, but you can improve with time and observation.
Soon you’ll be able to sketch hands confidently in any pose or gesture.