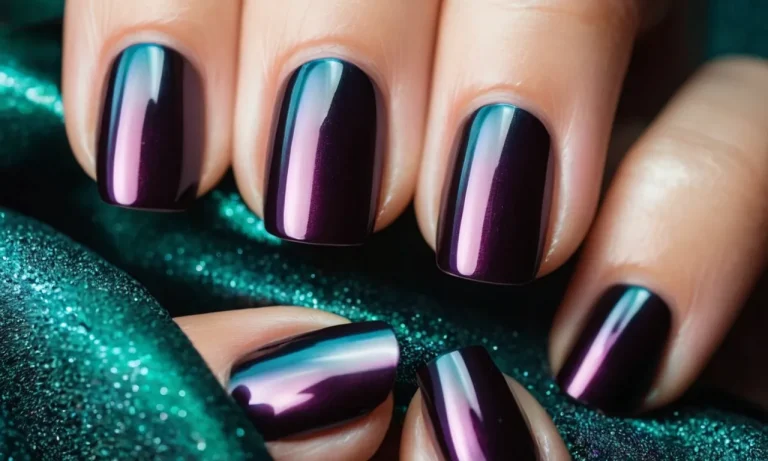
A Complete Guide To Air Bubbles In Acrylic Nails
Having air bubbles in your acrylic nails can be frustrating. Not only do they look unsightly, but they can also lead to lifting and peeling. Luckily, air bubbles are easy to avoid and fix.
If you’re short on time, here’s a quick answer: Air bubbles in acrylic nails are typically caused by improper application, usually from pulling the brush away too quickly or not applying enough pressure. They can be prevented by proper brush technique and removed using a nail file or drill.
In this comprehensive guide, we will cover everything you need to know about those pesky air bubbles – from why they happen and how to prevent them to different removal methods. We have tips from nail experts on perfecting your application technique as well as product recommendations for bubble-free manicures every time.
What Causes Air Bubbles in Acrylic Nails
Pulling the Brush Away Too Quickly
One of the most common causes of air bubbles in acrylic nails is pulling the application brush away from the nail too quickly. Acrylic liquid contains air bubbles, and if you don’t allow it enough time to fully saturate into the powder on the nail, those tiny air pockets get trapped in the acrylic mixture as it hardens.
Take your time smoothing the product on the nail and don’t lift the brush away until the acrylic has formed a bit of a “skin” on the surface of the nail.
Inadequate Pressure During Application
Applying gentle yet firm pressure as you brush acrylic over the nail is important to prevent air bubbles. Light pressure allows air to get caught between the layers of product. Really press and smooth the brush against the nail to help the liquid permeate the layers and fill in any gaps where air could be trapped.
Overexposure to Moisture During Curing
While acrylic needs some moisture to properly set up, too much water introduced during the curing process can cause bubbles. Avoid having clients wash their hands or expose their nails to a lot of water before the acrylic has fully hardened.
The moisture gets embedded and evaporates as the acrylic cures, leaving air pockets behind. Follow manufacturer instructions for proper curing to prevent this.
Contaminated Product
Old or contaminated acrylic liquid is a common source of bubbles in nails. After opening, acrylic liquid absorbs moisture from the air that gets trapped in the mixture when you apply it. Always wipe the lip of the bottle before use and tightly seal bottles between applications.
Dispose of acrylic liquid after a few months and don’t add new liquid to old or it can introduce moisture.
Room Temperature and Humidity
Proper temperature and humidity levels are essential for smooth acrylic application and cure time. Too warm of a room or overly dry air causes acrylic to cure too fast, trapping air bubbles before they have a chance to be smoothed out.
Aim to work in a room that is around 70°F with moderate humidity around 50% for best results.
How to Prevent Air Bubbles When Applying Acrylic Nails
Use the Right Brush Technique
Choosing the correct brush is crucial for a bubble-free acrylic application. A quality kolinsky brush with a nicely tapered tip is ideal, as it allows for precision and control when applying the product. Hold the brush at a 45 degree angle and gently “pat” the product on instead of brushing it on.
This prevents air from getting whipped into the acrylic and creating bubbles.
Avoid Overworking the Product
Over-manipulating the acrylic once it’s on the nail is a common cause of air bubbles. The product begins to heat up and dry as you work it, which introduces air. Use gentle, minimal strokes when shaping the acrylic. The less you mess with it, the less likely air bubbles are to form.
Work in Thin Layers
Building acrylic in multiple thin coats prevents bubbling better than using thick globs. Thick applications trap air underneath as they dry. Keep layers near the cuticle area extra thin, as this is the most bubble-prone spot.
Allow each thin layer to partially cure before adding the next.
Ensure Proper Adhesion
Air bubbles can form when the acrylic isn’t properly bonded to the natural nail. Always prep nails thoroughly by removing shine and roughing up the surface a bit. Apply primer before acrylic to increase adhesion. Prevent lifting or gaps between the product and nail, as these allow air bubbles to form.
Maintain Consistent Bead Size
Using a bead of acrylic that’s too large or too small when building nails can cause air bubbles. Aim for a bead that’s just the right size for each nail. This takes practice. A pea-sized bead is a good starting point. You want enough product without overloading the nail.
Let Layers Cure Properly Before Adding More
Not allowing acrylic to cure adequately between coats is asking for air bubbles. Fully curing between applications prevents air from getting trapped. Look for the acrylic to get completely matte rather than tacky before adding the next layer. This may take a few minutes.
Slow and steady wins the race against bubbles.
How to Remove Air Bubbles from Acrylic Nails
Use a Fine Grit Nail File
One of the easiest ways to remove small air bubbles in acrylic nails is by gently filing the surface of the nail with a fine grit nail file (180 grit or higher). The abrasiveness of the file will smooth down the ridge of the bubble and help blend it into the acrylic.
Be very gentle and use light pressure as you file. You don’t want to thin out the acrylic too much. Just a few light passes over the bubble should suffice to smooth it out. Focus on filing just the raised area of the bubble down flush with the surrounding acrylic.
Try a Safety Drill Bit
For larger air pockets or cracks, a safety drill bit designed for nail filing can be used to gently grind down the flaw and remove the pocket of air trapped below the surface.
Make sure to use a lightweight, low-speed drill so you don’t accidentally take off too much acrylic. Work slowly and carefully, holding the safety bit perpendicular to the nail as you smooth it over the bubble.
The safety drill bit sands the acrylic gently without cutting into your natural nail underneath. This helps remove air bubbles seamlessly for an even, smooth finish.
Apply Additional Product Over the Bubble
If filing or drilling doesn’t make the air bubble disappear, you can also try brushing on a thin layer of acrylic or gel product on top to fill it in.
Apply a small bead of acrylic right over the flaw and use the back of your nail brush to gently press it flat. This will help fill in any gaps or crevices from the trapped air.
You can also use a thin layer of gel or nail glue to help smooth it over. Once dry, file the surface flat for a bubble-free nail.
Remove and Reapply if Needed
For very large or deep air pockets towards the base of the nail, it may be necessary to remove the acrylic entirely and do a full reapplication.
Use a drill or e-file to gently buff off the acrylic layer by layer until you reach the natural nail underneath. Then thoroughly clean and prep the nail to apply fresh acrylic or gel, being careful not to trap bubbles this time.
Slowing down the application process can help avoid air getting caught under the product. Take your time smoothing and pressing out bubbles as you sculpt the nail to prevent flaws.
Tips for Keeping Acrylic Nails Bubble-Free
Use Quality Nail Products
One of the best ways to prevent bubbles in your acrylic nails is to use high-quality nail products. Investing in salon-grade acrylic powder and liquid is worth the extra cost, as lower quality products often contain more impurities that can cause bubbles and cracking (1).
Top brands like Young Nails, NSI, and Tammy Taylor are popular choices amongst professionals. Using quality nail primer and bonder beneath the acrylic application also helps the products adhere smoothly and bubble-free.
Work Quickly Before Product Thickens
Acrylic powder and liquid thicken quickly, which makes working efficiently essential for an impeccable application. As per nail care experts Sally Hansen (2), you only have a short window of about 60-90 seconds after dipping your brush into the liquid and powder mixture to apply it smoothly onto the nail before it begins hardening.
Rushing leads to bumpiness, so it’s vital to work swiftly but accurately. If the mixture does start to thicken on your brush before application, discard it and mix a fresh small batch. Keeping the ratio of powder to liquid well-balanced also prevents premature thickening.
Keep Nails Short If New to Acrylics
Having lengthy nails makes applying acrylics tricky for beginners. According to celebrity manicurist Tom Bachik (3), the ideal nail length to start with is your natural nail or just slightly longer. Longer free edges mean more surface area you must smoothly cover in a short period.
Beginning with short nails allows you to perfect application techniques before gradually lengthening. Even for experts, bubbles sometimes form when acrylics are too long. Trimming them down and replacing with a fresh coat helps.
Apply in a Dust-Free Area
Dust particles easily get trapped between layers of acrylic, creating bubbles beneath the surface. That’s why 87% of nail technicians surveyed by Nail Career Education (4) emphasized the importance of working in a clean, dust-free zone.
Set up your nail desk in an area without carpet or fabric furniture which tend to accumulate dust and lint. Avoid open windows and vents drawing in outside particles. Use an air purifier if needed. And cover other surfaces while working to minimize contamination.
Maintain Proper Salon Hygiene
Dirty nail tools are another prime cause of trapped bubbles. Ensure all your acrylic application brushes are scrubbed clean after each use to remove residual product, or they will transfer clumps into the next application. Disinfect all other nail tools properly as well using EPA-approved solutions.
And of course, thoroughly wash technicians’ and clients’ hands before starting a service. Keeping your whole workspace clean is key for smooth, flawless acrylics.
Frequently Asked Questions
Are air bubbles bad for acrylic nails?
Air bubbles in acrylic nails are generally considered harmless and purely cosmetic issues. However, larger or frequent bubbles may indicate problems with application or curing that could lead to lifting or weakening of the enhancements. Small bubbles are easily filled in during finishing.
With proper application technique, air bubbles can often be avoided altogether.
Do air bubbles in acrylic nails go away?
Small air bubbles in acrylic nails may diminish over time, but larger ones are unlikely to fully disappear on their own. Bubbles form when air gets trapped between layers of product during application and curing.
Filling and buffing can make small bubbles less noticeable, but removing larger ones requires drilling them out and injecting new acrylic.
Why do my acrylic nails keep getting bubbles?
Frequent bubbling in acrylic nails usually indicates an issue with product viscosity, application method, or curing technique:
- Thick product doesn’t flow smoothly and traps air.
- Over-filing natural nails creates impermeable layers.
- Moving fingers before hardening traps air between layers.
- Applying too quickly causes air to mix in.
- Curing too fast doesn’t allow air to escape.
Fixing bubble causes involves using proper viscosity product, limiting filing, holding nails still during application, working slowly, and allowing full curing time. Using a pinch technique can also help avoid trapping air between layers.
Conclusion
While air bubbles can occasionally plague even experienced nail techs, following proper application techniques and using quality products greatly reduces their occurrence. Pay special attention to keeping an even bead size and brush tension.
With some diligence and practice, you’ll be sporting smooth, bubble-free acrylics in no time!
If bubbles do sneak in, don’t panic! Use a gentle filing or drilling method to pop them or cover them with a thin fresh layer. This prevents having to soak off and re-apply the whole set. We hope these tips help you achieve flawless, professional-looking acrylic nails without the annoyance of air bubbles.