A Comprehensive Guide To Nail Art Design
Nail art design allows you to unleash your creativity and make a bold fashion statement with your fingernails. From basic polish techniques to advanced 3D designs, the possibilities are endless when it comes to decorating your nails.
If you’re short on time, here’s a quick answer: Nail art encompasses any kind of decorative design or embellishment that is applied to natural or artificial fingernails. It can involve using nail polish, glitter, rhinestones, 3D elements, airbrushing, nail stickers, stamping, painting designs by hand, and more.
In this comprehensive guide, we will cover everything you need to know about getting started with nail art. We explore the most popular nail art techniques, indispensable tools and supplies, how to do basic nail art designs like polka dots and stripes, as well as more advanced floral, geometric, abstract nail art ideas.
We also provide tips for making your manicure last longer.
Nail Art Basics
Types of Nail Extensions Used for Nail Art
Nail technicians have various options when it comes to the types of artificial nail extensions that can be used as a base for creative nail art, including acrylics, hard gels, and plastic tips. According to statistics from respected industry sites like Nailsmag.com, acrylic extensions remain the most popular choice as they are lightweight, durable, and easy to customize with endless nail art possibilities.
Essential Nail Art Tools and Supplies
Aspiring nail artists will need to invest in quality nail art brushes, dotting tools, striping tape, rhinestones, charms, 3D accessories, an art palette and plenty of nail polish colors to unleash their creativity.
Top products and kits from reputable brands like ASP (here) provide everything needed to beautifully decorate natural or artificial nails.
Choosing Nail Polish Colors and Finishes
The sheer variety of nail polish available today enables nail artists to create diverse designs, textures and color palettes. Most experts suggest stocking up on core colors like nudes, pinks, reds, neutrals and metallics as they enable hundreds of combinations.
Polish finishes like creams, shimmers, glitters, crackles and chromes expand the options for creative self-expression via nail art.
Nail Art Techniques for Beginners
Easy nail art designs for beginners include basic polish techniques like ombre, color blocking with tape, stamping simple patterns or shapes with purchased plates or homemade cardboard cutouts, embellishing with stickers and rhinestones, simple freehand stripes, polka dots or flowers.
Easy Nail Art Design Ideas
| French Manicure Variations | Colorful Geometric Shapes |
| Polka Dots | Ombre Color Gradients |
| Glitter Accents | Seasonal Themes |
Intermediate Nail Art Techniques
Gradient Nails
Gradient nails are a fun and stylish intermediate nail art technique. To create a gradient effect, you’ll need 2-3 nail polishes in complementary colors. Using makeup sponges, apply the darker shade at the tip of the nail and blend upwards towards the cuticle with lighter shades.
This ombré effect is very on-trend and looks amazing on long, oval nails. Add some glitter or nail art like dots or stripes over the gradient for extra pizzazz.
Ombre Nails
Similar to gradients, ombre nails blend two colors from dark to light. But instead of a subtle fade, ombres feature a more stark transition between shades. To get this look, paint on your base color first. Once dry, use tape to mask off the area where you want the second color to begin.
Then paint the nail tip with the darker tone and remove the tape. Ta-da – stylish ombre nails in minutes! Neutrals, pinks, blues and greens make pretty ombre color combos.
Nail Stamping
Nail stamping kits allow you to easily transfer intricate designs like florals, geometrics and animal prints onto your nails. First, apply a clear base coat to clean nails. Paint the image plate with a thin layer of the special stamping polish.
Firmly press the stamper onto the design to pick it up, then transfer it onto your nail. Top with a clear top coat to seal in the design. Nail stamping opens up a world of possibilities for creative and artistic nail art.
Sponge Nail Art Techniques
Crumpled up cosmetic wedges can help create cool nail art effects. Try dabbing on different colors in a random or geometric pattern. Or alternate light and dark shades to get an ombré look. Cut wedge tips into points or strips for more design options.
Sponging works great over an accent nail or french manicure tips. Seal in the sponge designs with a glossy top coat for long-lasting nail art.
Striping Tape Nail Art
Striping tape, available at beauty shops, lets you paint straight, precise lines in different widths and colors. Stick it firmly onto dry painted nails where you want the stripes to go. Then paint over the tape and surrounding nail with another polish shade.
Carefully remove the tape after the polish dries to reveal perfect stripes every time. Striping tape takes the hassle out of freehand lines and checks for graphic, modern nail art.
Popular Intermediate Nail Art Designs
Some intermediate nail ideas to try once you’ve mastered the techniques:
- Checkerboard nails
- Argyle or plaid prints
- Polka dots
- Geometric shapes
- Animal prints like leopard, zebra or snake skin
- Marble
- Ombré French tips
These intermediate designs take your nail art up a notch while still being achievable at home. Have fun being creative and don’t be afraid to experiment with colors, shapes and patterns!
Advanced Nail Art
Airbrushing
Airbrushing is an advanced nail art technique that uses an airbrush machine to create intricate designs and gradients on the nails. The airbrush sprays a fine mist of nail polish, allowing for seamless blending and more precise control over the design.
With airbrushing, nail artists can create stunning ombre fades, realistic images, and subtle shading effects. It requires practice and skill to master airbrush techniques, but the results are well worth it. Airbrushing allows for beautifully soft, blurred edges and an unlimited range of color shades.
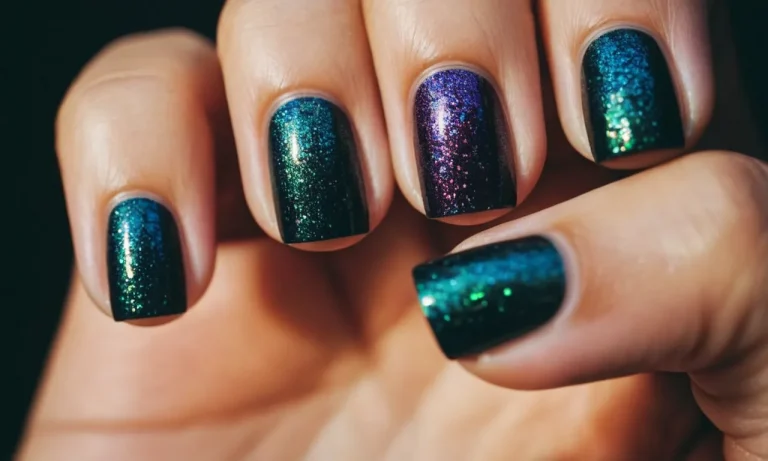
3D Nail Art
3D nail art takes designs to the next level with actual dimension and texture. There are many ways to create 3D effects on nails. Some options include using acrylics, gels, nail foils, rhinestones, charms, lace, beads, and more.
Nail artists can sculpt nails into unique shapes before painting intricate 3D designs. Popular 3D nail art themes include food, animals, flowers, candies, bows, and anything that has texture. The possibilities are endless!
These playful designs really make the nails pop off the fingers for an eye-catching manicure.
Hand-Painted Nail Art
Hand-painting designs on nails is an old school technique that is still treasured for its artistic merit. Using small, intricately shaped nail art brushes, nail artists can freehand paintings or illustrations directly on each nail.
There are no limits on what can be created with a steady hand and some creativity. Botanical elements, abstract patterns, mini portraits, and unique characters are just some ideas. It takes a skilled and patient nail artist to do quality hand-painted work, but the impressive results are worth the effort.
Custom hand-painted nail art is the ultimate personalization!
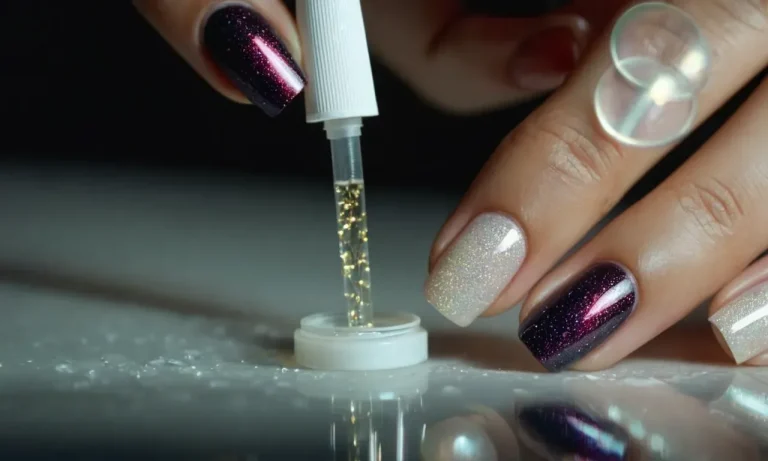
Encapsulation
Encapsulation is an innovative 3D technique where small objects and trinkets are suspended in acrylic or gel polish on the nails. Things like beads, charms, studs, glitter, and even photos can be encapsulated.
The items are placed on the nail first before applying a clear gel coating over top to seal them in place. It creates a fun, texturized encapsulation effect. Tiny spaceships, flowers, or butterflies seem to float inside each nail!
Encapsulation nail art allows you to customize each nail and make designs really stand out.
Popular Advanced Nail Art Design Themes
Some popular advanced nail art themes include:
- Mermaid or ocean themes using ombre colors, shells, pearls, and glitters.
- Outer space designs with airbrushed galaxies, holographic foils, and 3D charms like spaceships or planets.
- Florals and botanicals with hand-painted flowers or gardens encapsulated on the nails.
- Geometric abstracts using sharp lines, shapes, optical illusions, and cool textures.
- Mini cities and architecture with tiny hand-painted skyscrapers and street scenes.
The beauty of advanced techniques is that they allow nail artists to create tiny masterpieces on each fingernail. Clients can really showcase their interests, hobbies, and personal style through these custom, salon-quality manicures. The intricate designs are like wearable art for your hands!
Caring for Your Nail Art Manicure
Applying a Top Coat
Applying a quality top coat is crucial for protecting your nail art and making it last. The top coat creates a protective barrier over the polish and art, helping prevent chips, scratches and fading. Apply a fast-drying top coat like Seche Vite or Essie Gel Setter after your design is complete and let it dry fully.
Reapply every 2-3 days to maintain the protective shield. Using top coat helps lock in your nail art so you can flaunt it for 7-10 days or more.
Drying Your Nails Properly
Letting each layer of polish and art dry fully before moving on is key for long-lasting results. After base coat, color and embellishments, give your nails at least 10 minutes to air dry before applying top coat. If possible, take a hair dryer on the cool setting to speed up drying time.
Fanning your hands can also help. Slow down and take the proper drying time to help your mani withstand daily activities without smudging.
Preventing Chips and Dents
There are little habits you can adopt to prevent your nail art from getting dinged up quickly. Try to use the sides of your fingers for everyday tasks instead of the tips, which hit surfaces most often. Wear gloves when cleaning, gardening or washing dishes.
Avoid picking at your polish and don’t use your nails as tools. Keep nails short or medium length, as longer tips are prone to breaking. And watch how you open cans, bags and bottles to avoid chipping.
Removing Nail Art Safely
When it’s time to take off your nail art, never peel or pick off the polish, as this can damage the nail bed. Use an acetone-free nail polish remover and cotton balls to gently dissolve the polish, taking care around embellishments.
For heavy glitter, foil and other 3D art, you may want to go to the salon for removal to prevent damage. Soak a cotton ball in remover and hold it on each nail for 30 seconds before gently sliding off polish. Take your time removing art to avoid harming nails.
Caring for 3D/Acrylic Nail Art
Nail art with acrylic, gems, charms or sculpted designs requires some additional TLC. Avoid catching these elements on clothing, tools, surfaces, etc. When washing hands, carefully lather beneath embellishments to keep the area clean and dry them thoroughly after.
Use a very gentle touch when applying lotion or cuticle oil around 3D art. And protect the nails by wearing gloves for cleaning, gardening and other messy tasks. With proper care, embellished manicures can last over 2 weeks.
Conclusion
With this guide, you should now feel equipped to start embellishing your nails with beautiful, unique designs. Remember to start simple, arm yourself with the right tools and supplies, and don’t be afraid to experiment!
Nail art allows endless opportunities for self-expression and fun fashion statements. Whether you love playing with color or want to show off your artistic flair, nail decoration is a wonderful creative outlet.
So grab your polish and accessories and enjoy the process of designing your own fabulous nail art!